North States Industries Feeders (a.k.a., Ace Hardware Bird Feeders) BACKGROUND: Jo Anne DeKeles' LSOL article of February 8, 2006 brought to light a group of inexpensive bird feeders that may add additional variety to a layout's buildings. The bird feeders by North States Industries could be placed on a layout with little if any modification. 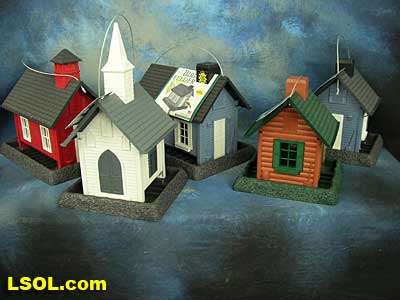
Once I read Jo Anne's article and reviewed the video it seemed that these buildings might be good choices for possible bashing and modification. I contacted North States Industries placing an order for the Red Barn and the Blue Cottage.
Within a few days the bird feeders arrived. A quick inspection confirmed that these are tough little buildings that have potential to hold up well on a outdoor layout. I understand these feeders are also available at Tractor Supply Company and Pet Smart, to name a couple of additional sources. Having worked with two of the feeders I can say this is the toughest plastic ever encountered. To accomplish any type of major bash or modification will take developing new techniques that deal with this plastic.
For most folks a major bash would entail more work and innovation than the effort may be worth. Final thought is that these bird feeders may best be utilized on a layout close to their original state with just some minor enhancements plus addition of external detail items.
LET'S GO THROUGH A BASH
The term Bash may be too strong. Slight modifications, after working on two of the buildings would better describe what I was able to accomplish.
TOOLS, BONDING AGENTS, PAINT TOOLS: Given the nature of the building's plastic I was hard pressed to find tools that would cut the plastic. For modifying the two buildings the following tools were used.
Coping Saw Dremel Tool Pin Vise Razor Saw X-ACTO knife Dremel Table Saw (not recommended) BONDING AGENTS: The following plastic weld solvents and cements were used.
GOOP Lawn and Garden contact adhesive Maxi-Cure CA Ambroid Proweld plastic welder There was no plastic weld solvent of those I had that would phase the bird feeder plastic. Even MEK would not attack the material. Any attachments made to the building's plastic was accomplished with GOOP. How GOOP will hold up out in the weather only time will tell.
PAINT: Paint is also an issue with these buildings. It soon became apparent that the paints I had would not work. Since I wanted to change the color of the little cottage the only paint that seemed practical was Krylon Fusion. Fusion is sold for painting outdoor plastic furniture. I've been told that Urethane based paints may also adhere to the bird feeder plastic.
Note that only Fusion was used on the feeders. The other paint was used on Plastruct. Where detail on the building was highlighted the building was first painted with Fusion. My hope is that the Testors enamel will bond with the Fusion that in turn has bonded with the building plastic. We'll see.
Krylon Fusion Testors Enamel
THE SMALL COTTAGE My intent was to use the cottage as a yard office for the railroad. There were some minor changes to be made to change the building from a cottage to a structure that might have been used for a yard office.
First, disassembly of the building had to be accomplished in order to paint the major components.
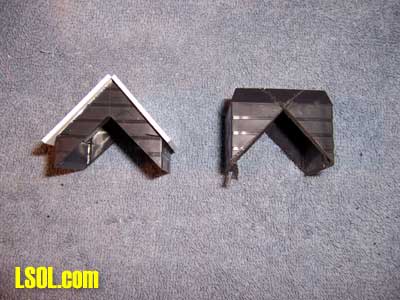
This picture sequence shows how the building comes apart. First the base was removed as depicted in the LSOL video by removing two Phillips head screws from the base. The end and side walls fit together and then are snapped into place with the roof.
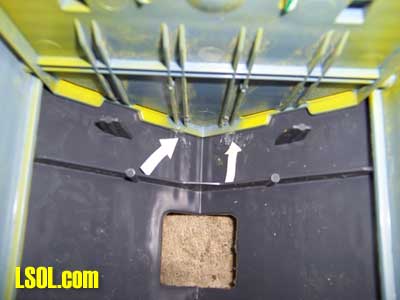
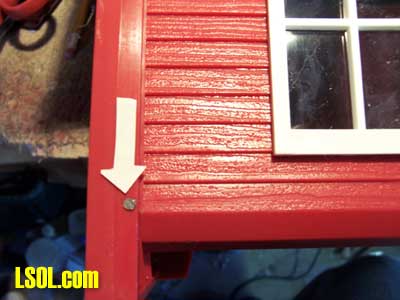
The first picture shows the location of small tabs cast into the roof. The tab locations are denoted by the white arrows. Since the plastic is so tough it is difficult to flex the ends enough to get them released by these small tabs. It was necessary to use a Dremel with a cut off wheel to remove the roof tabs.

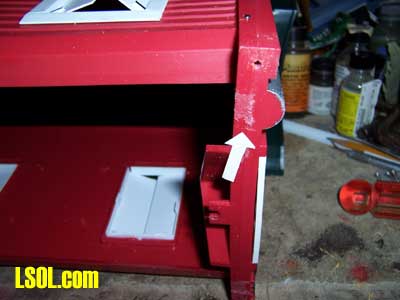
Once the tabs are removed the gable end of the wall can be pushed slightly back to disengage four tongues from slots in the end wall. The second picture shows the end wall pushed back. The tongues are highlighted with white paint. Once both building end walls are disengaged the roof will lift off.

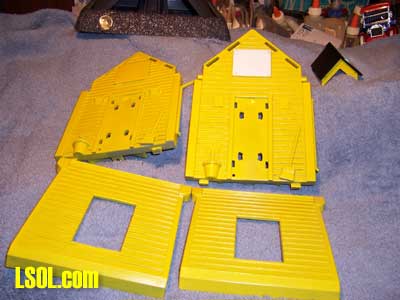
The last picture shows the end walls pushed in and the side walls freed from the slots that they fit into on the end walls. The side walls pivot up and are disengaged from the end walls. I got a little ahead of myself and didn't take these pictures when the building was first taken apart. That's the reason the building walls are yellow. These pictures were taken as the building was being reassembled.
In most cases it would not be necessary to take the building apart in this manner.
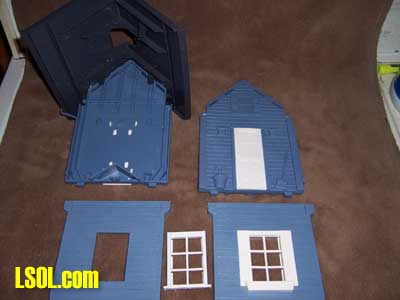
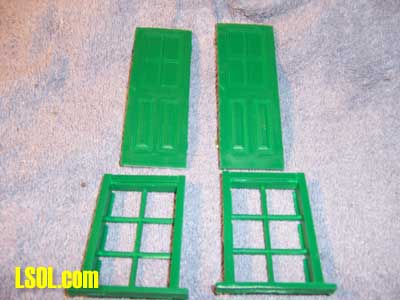
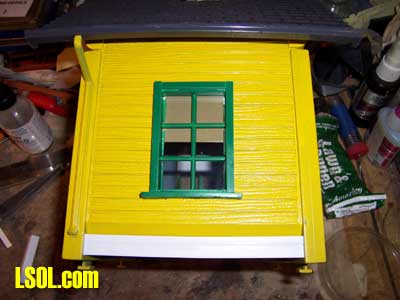
Here the four walls and windows are shown. Note that one of the window frames has already been modified. As produced the windows have flower boxes molded to the sills. I removed the flower boxes since most likely the yard crews would not want to water any flowers. Also, the molded on shutters were removed. The flower box and shutters were cut off using the Coping Saw and the edges cleaned up with the X-ACTO knife.
Window frames were refaced with Plastruct. Goop was used to attach the new facing to the window frames. This facing hides the remainder of the shutters and edge of the window frame.

Windows on these buildings are held in place by the glazing. The above pictures show how the glazing holds the window in place and slides up to release the window from the building.
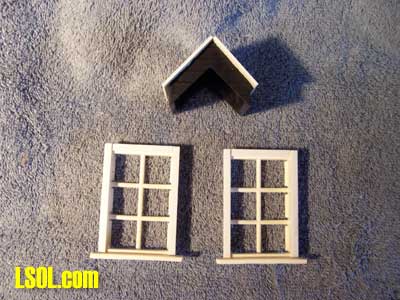
The windows and chimney were modified.
The chimney was cut down to represent a roof peak ventilator. The chimney on these feeders is the fill opening for seed. As such the chimney looks big enough to drop a cow down it. Roof panels made out of Plastruct were attached to the cut down chimney sides. A piece of brass tubing was used to represent a smoke stack.
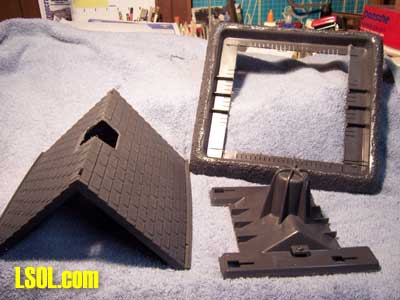
Shown above is the modified roof with the seed fill cut away and the base with the seed tray edges removed. That portion of the base that fits under the house was retained. The base retains the slots that slide on to the end wall lugs. In this case the base will hold the walls in place similar to an unmodified feeder.
Prior to painting with yellow Fusion several details were removed or covered. On the front wall of the building the molded in lights on both sides of the door were removed. The openings in the walls where the lights had been were covered with pieces of Plastruct sheet held with GOOP. Above the door on each end there is a molded in window with shutters.
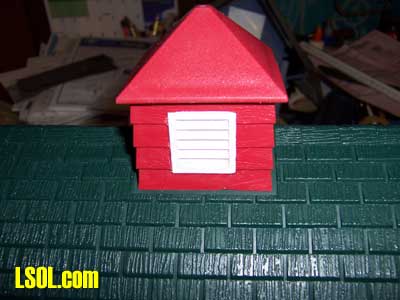
Given the nature of the plastic I could find no good way to remove this feature. Solution was to cover these windows with Plastruct sheet cemented in place with GOOP. On the front of the building this flat area was then covered with a "Yard Office" sign.
The windows frames and doors were first painted with Fusion. Once that paint had dried they were then painted their final color with Testors enamel. Portions of the door that represented glass were painted with black enamel. By painting over Fusion I'm hoping that the enamel will adhere to the Fusion that in turn will stay adhered to the building plastic.
It took five coats of Fusion yellow to cover the blue plastic. The final coat was allowed to dry for twenty- four hours and then the building was reassembled. The cut down base was put back in place.
When assembled the side walls have a void at the bottom. The void is there to allow bird seed to flow out into the tray when the building is used as a feeder. These openings at the bottom of each side wall had to be filled. In the first picture white Plastruct is shown. The Plastruct was used to fill these opening by extending the side walls down to match up with the end walls.
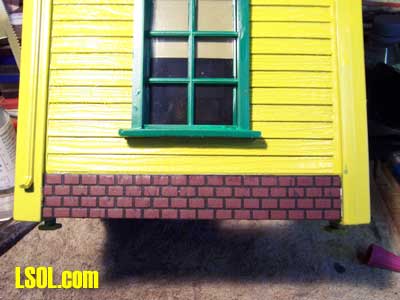
The second picture shows the filler covered with a brick facing used to represent a foundation. The brick facing is a textured, pre-painted rubber type material. I've used this brick on a number of buildings to represent a foundation. From past experience I know the material will stand up outside. Well, it has for at least four years on several other buildings.
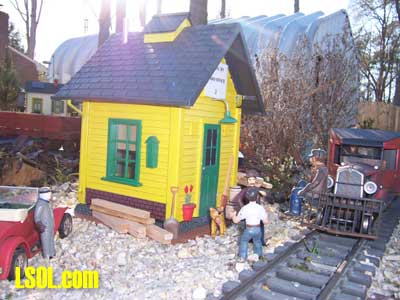
In the above pictures the building is on the layout in its position as a yard office. A square of ceramic floor tile was set in place at ground level. The tile is just slightly bigger than the foot print of the building. The building seems heavy enough that all but the very strongest wind will not move it. Should the building move it could be held in place using GOOP.
MODIFICATIONS TO THE COTTAGE RECAP Feeder tray base cut to eliminate edges. Chimney modified to represent roof ridge vent. Flower boxes and shutters removed from side windows. Tan window shades added to side windows. Upper windows and shutters covered with plastic sheet. Outside lights either side of front door removed. Smoke pipe added to roof. Foundation added to side walls. Building color changed to yellow with green trim.
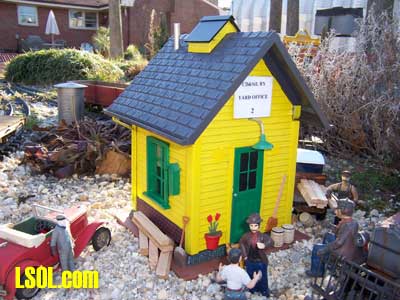
While the modifications are not extensive the little cottage now looks more like it could be a yard office. For the low cost of the building and time involved the CD&StL has a structure that will serve its purpose for years to come.
THE RED BARN
For my purpose the Red Barn did not need to be taken apart. After looking the barn over I decided to remove the base and replace the windows plus add a foundation under each side wall.
First step was to remove the base by removing the two Phillips head screws that keep the base from sliding off the end wall lugs.
Once the base was removed I drilled a small hole at each lower corner of the building. The picture shows a small wire nail inserted in the side of the building to hold the side wall tight against the end wall. Drill a hole just slightly smaller in diameter than the wire nail. By drilling a smaller hole the nail will stay in place by an interference fit. Each corner received this treatment.
Next the lugs on the end walls that attach the walls to the base were removed with the Coping Saw. Removing these lugs allows the base to be mounted flat against the end walls.
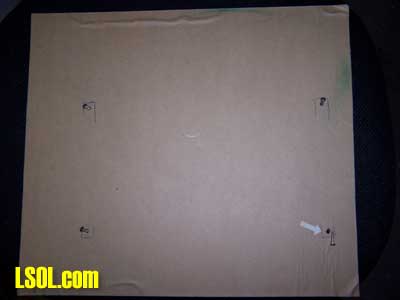
For the barn I used a piece of Plexiglas. I've found that Plexiglas makes a good base for buildings. It's for sure the bugs won't attack it! I cut the Plexiglas slightly longer than the barn and considerably wider. The barn was mounted off center so that more Plexiglas extended to one side. As seen in the above picture four holes were drilled in the Plexiglas with one hole at each corner were the barn would be placed. These holes were drilled up into the corners of the barn and screws were then put through the holes to secure the barn.
The biggest change to the barn was to eliminate the large side windows. Barns had windows but I doubt that many had windows the size of those in this barn.
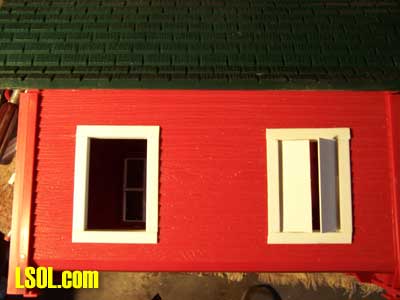
Since the plastic is so difficult to work, I decided on another solution. The easiest solution was to replace the windows with ventilation doors. Pictured is one side of the barn with a completed ventilation door set in one window and the other window framed. Frames where constructed using 5/16 inch Plastruct angle. Frames were cut, fitted, and joined with Ambroid Proweld. Ventilation doors were made using sheet Plastruct.
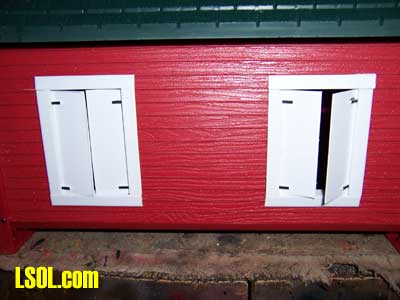
The ventilation doors are cemented in place with Proweld. The doors were set slightly opened, some more than others to give a little different look to each. Small pieces of square Plastruct were painted black and attached to simulate hinges. Ventilation doors and frames assemblies are secured to the barn with GOOP.
Ventilation slats and frames on the cupola where painted white for accent. Prior to painting white the area was painted with Fusion. Once the Fusion dried white Testors enamel was applied.
Windows above the barn doors on each end of the barn are molded in. To give these windows some definition they were first painted with Fusion and then white enamel was applied. Window glass was painted black.
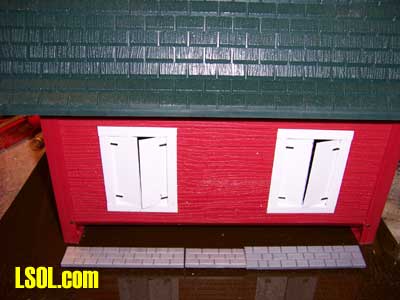
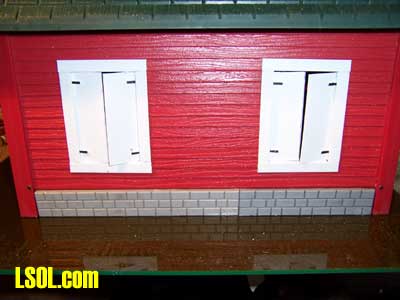
The side walls on the barn, just like the cottage, do not extend down to meet the base. It's that bird seed thing again. We had some left over plastic pieces that look like cement blocks. It turned out that these pieces were just the right height to fill the void and look like a foundation.
In the first picture above the three pieces needed to complete one side are positioned to check their fit. The second picture shows the foundation pieces cemented in place. Since the base is Plexiglas and the foundation pieces are either Pola or Piko the Ambroid Proweld worked to attach the pieces to the base. A very strong joint was achieve so there should be no problem with these pieces coming loose.
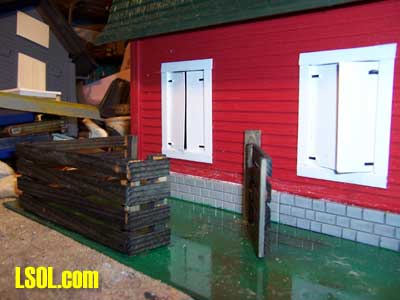
To add a bit of detail to the side of the barn a small fenced in area was constructed using cedar. The cedar fence posts where cemented to the base using CA. A small hole was drilled up through the Plexiglas centered on each post. A small wire nail was inserted to help secure the fence to the base.
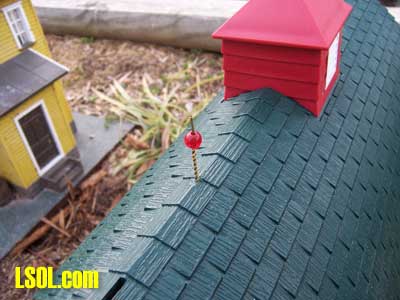
To add some detail to the cupola and roof lightning rods were made by twisting together 3/64" brass rod. A small red bead was added to simulate the glass or ceramic balls that are found on lightning rods. These rods are quick and easy to make. Plus they'll help reduce fire insurance rates on the barn!
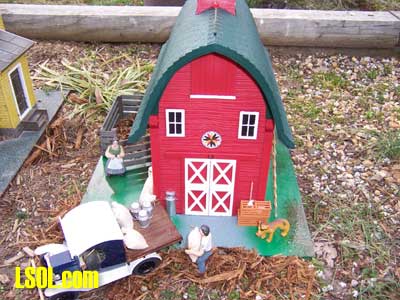
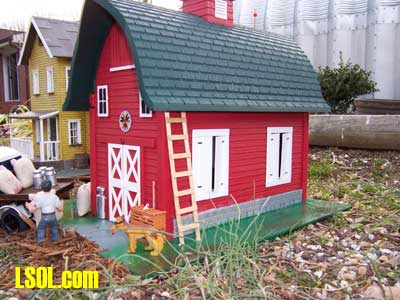
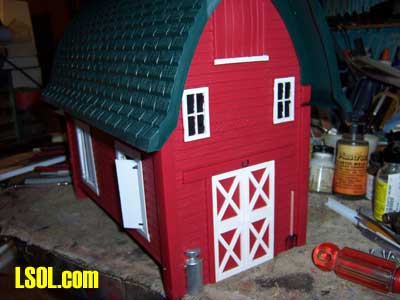
Here are two pictures of the completed barn in place next to the farm house on the layout. For a little added detail interest a hex sign was down loaded from an internet site, printed out, laminated and attached over the barn door on each end of the building. BUCK the Wonder Dog had stopped by just after the barn was put in place. BUCK was there to inspect the new building and to see if he could secure a chicken for lunch when nobody was looking.
MODIFICATIONS TO THE BARN RECAP Base removed and replaced with Plexiglas. Windows removed with new frames and ventilation doors added. Foundation added to both side walls. Cupola and upper windows detailed with white paint. Fenced in area with gate constructed using cedar. Three lightning rods added to roof. Hex sign added over main barn doors.
IN SUMMARY
For just slightly over $55.00 the CD&StL gained two interesting buildings. The type plastic used in these buildings should hold up well in the weather. I would think since these are bird feeders the plastic is UV stabilized thus giving years of service.
How well the Krylon Fusion paint will adhere to this plastic only time will tell. If the Fusion's performance on our lawn furniture is any test then it should do well on these buildings.
The biggest "knock" on these buildings is also their strong point. The plastic used is very difficult to work with making any major bashing a real challenge. I would not recommend these buildings should a major bash be planned.
It will take some real work bench engineering to figure out a way to make major changes or additions to these buildings. As a quick, easy, and somewhat inexpensive way to add structures to the layout these buildings should do just that.
My recommendation would be to remove the bird feeder base replacing it with a base material such as Plexiglas or some other type heavy plastic sheet. Fill in the voids along each side wall to represent foundations and put the building on the layout.
Added external details set around the buildings will also give visual interest to any of the models available.
Should anyone come up with a viable method to work this plastic as well as other paint that is known to bond with the surface please pass that information along.
Top of Page