Scratch & Bash
:
Buildings
Build an Oil Platform for your Railroad
Mar 25, 2009


By Noel Widdifield
LSOL.com Managing Editor |
Author
Bio
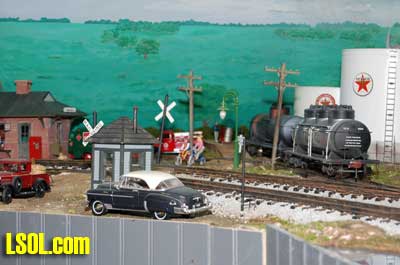
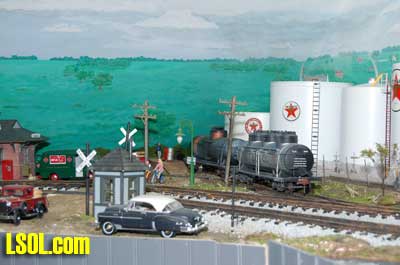
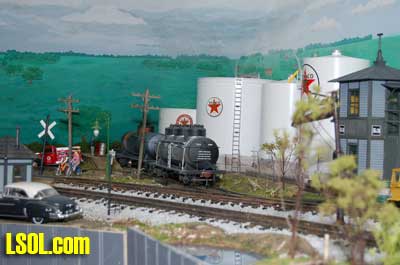
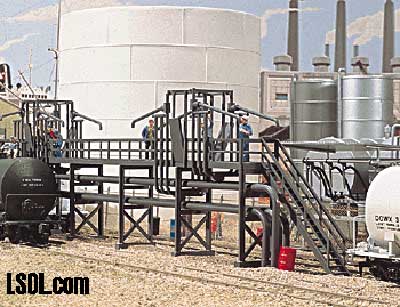
I sprayed the two large and two small cans with white paint and added Texaco signs and some piping and ladders to make them look more authentic. The fence clearly added to the authenticity of the tank farm, but something still was needed. I realized there needed to be a way to load or unload the tank cars at the tank farm.
|
While working on the scenery on the first section of my indoor New York Central Big Four railroad, I added a chain link fence in front of the Texaco tank farm in Anderson, Indiana. I had made the tank farm from several large tins that contained popcorn. I sprayed the two large and two small cans with white paint and added Texaco signs and some piping and ladders to make them look more authentic. The fence clearly added to the authenticity of the tank farm, but something still was needed. I realized there needed to be a way to load or unload the tank cars at the tank farm.
Material List (PDF)
 At the time, I didn't want to stop working on the scenery to build the loading platform. So I continued with the scenery over the next few months, completing most of it in October. As I prepared to leave for Florida for the winter, I kept the idea of the loading platform in mind as one of my winter projects. I like to have a few projects to work on down there since I don't have my trains to run. The loading platform would be my third project for the winter. In February I built the Warren Truss Bridge and in March I completed the interior for the Bellefontaine, Ohio power plant and finally it was time to start on the loading platform. Whenever I am going to build something, I search for pictures of the structure on the Internet and in the reference books I own. I use the pictures to develop the plans for the project. Read: You Can Build a Warrren Truss Bridge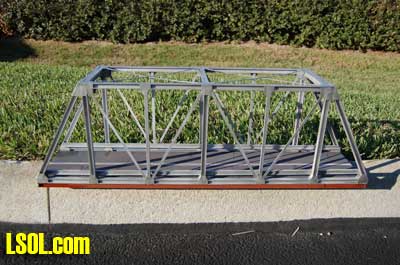
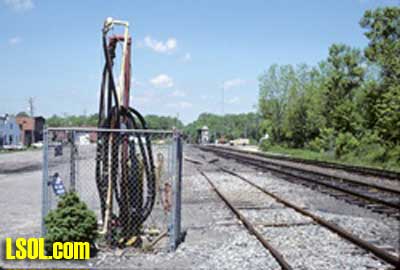
After looking through all of my reference books and searching the Internet for hours, I was unable to find a good photo of such a platform. Finally, I found two pictures of models of a platform. Neither provided much detail, but I used the Walthers kit picture as the basis for my platform.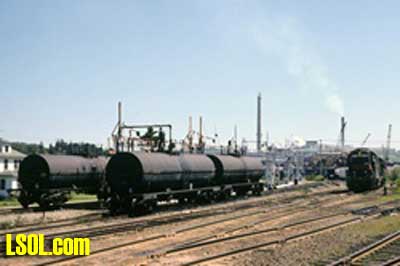
 I drew a simple plan for the platform but didn't include any detail of the superstructure. I used the plan for sizing the structure and for ordering the parts from Plastruct. http://www.plastruct.com/ (See materials list) I drew a simple plan for the platform but didn't include any detail of the superstructure. I used the plan for sizing the structure and for ordering the parts from Plastruct. http://www.plastruct.com/ (See materials list)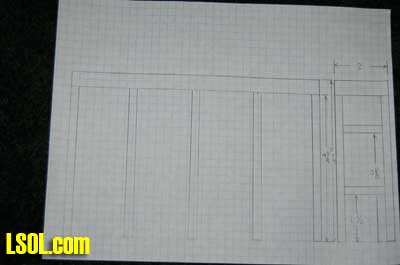
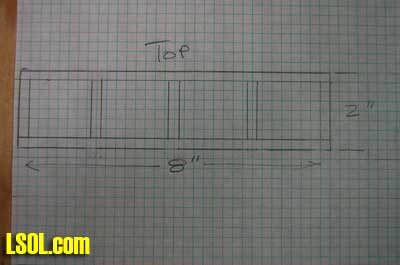
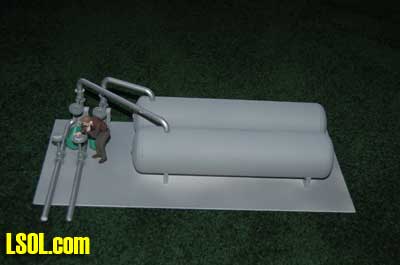
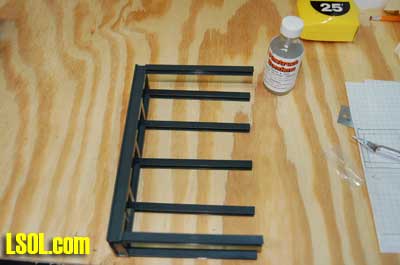
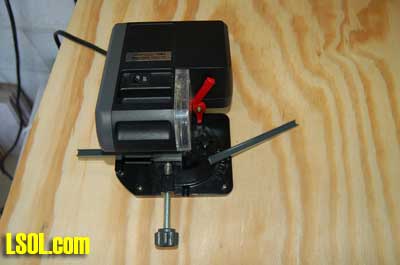
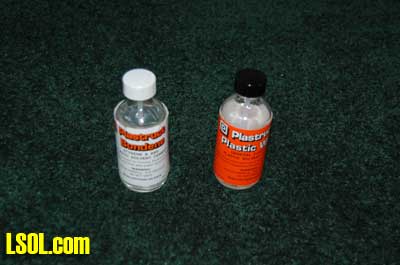
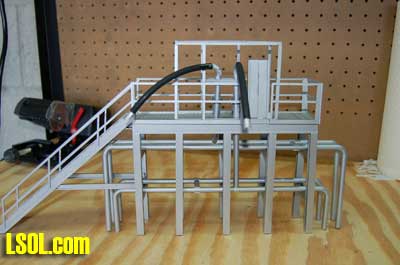
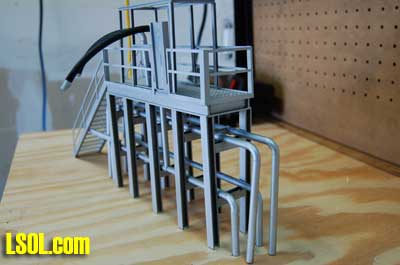
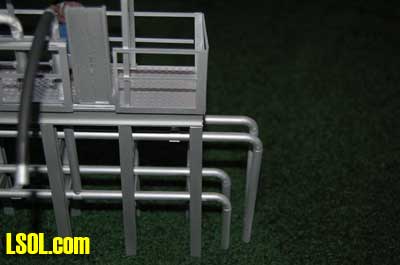
To begin the construction I used the Plastruct ABS structural beams and cut the upper frame from 1/2 inch ABS I-beams (B-16L) and glued them with Plastruct Bondene Solvent Cement. The upper frame is 8 inches long and 2 inches wide. I cut the legs from 5/16-inch ABS H Column (H-10) and fastened them to the upper frame. The legs are 4 3/4 inch long. I used my Micro Mark chop saw to cut all of these. 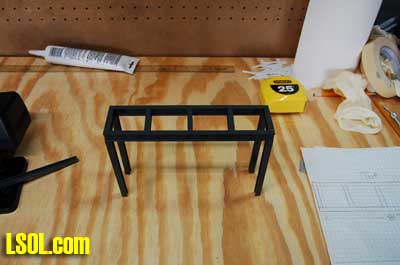
  ] ]
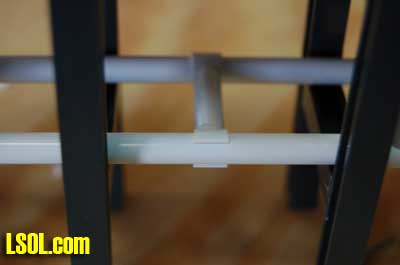
Cutting some more of the 5/16-inch ABS H Column (H-10) to fit as bracing between the legs, I glued them in place using a square to make sure they were properly aligned. These were measured and cut to fit between the legs. I used two braces on each of the legs. 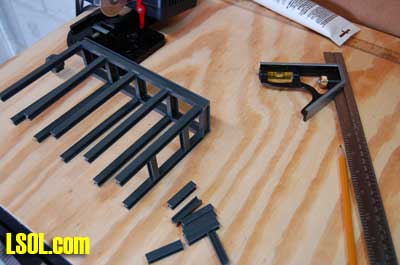
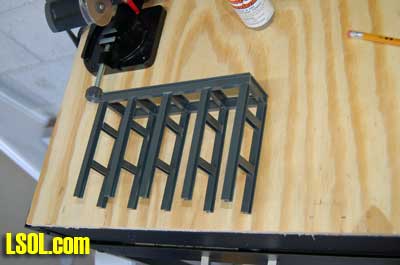
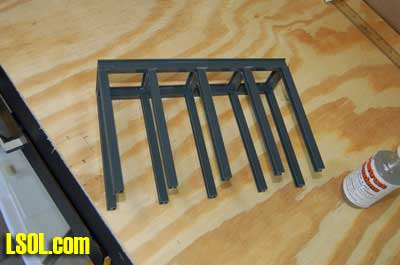
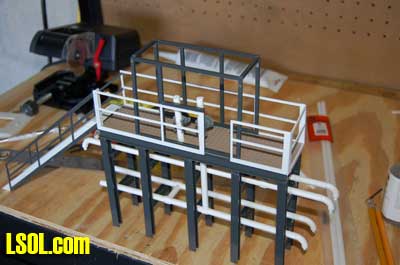
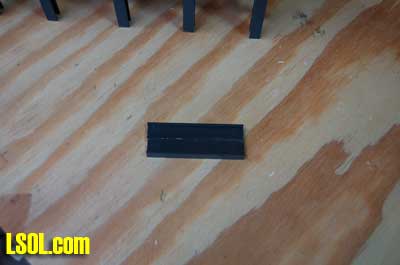
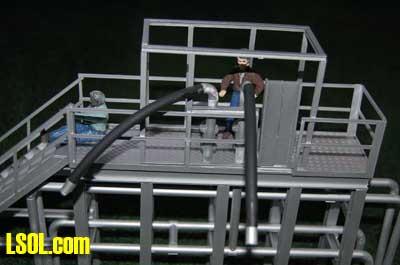
I cut some Double Diamond Plate sheet (PS-150) to fit the upper frame and glued it in place. Using 1/4 inch Butyrate round tubing (TB-8), I cut the fuel pipes to fit and used Butyrate 90 Degree elbows (E-8) to connect the vertical and horizontal pipes. I used Butyrate snap on tees (TPO-8) to connect some of the pipes to each other. I used the 45 Degree elbow (EL-8) to connect one of the pipes to one of the two vertical pipes and the 90 Degree elbow to connect the other. All of the pipes were glued to the legs of the frame using the Plastruct cement.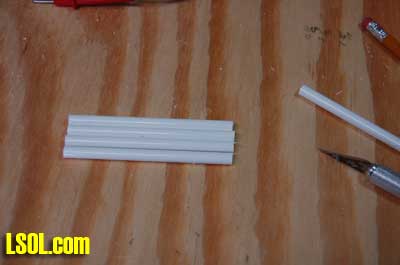
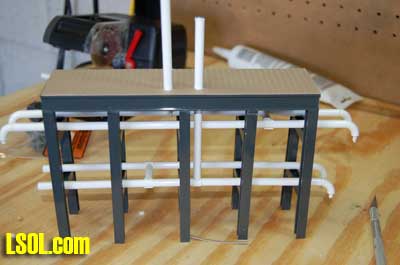

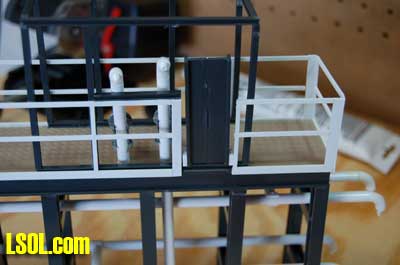
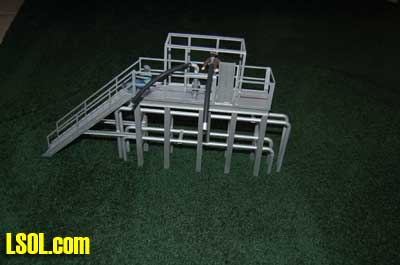
 I added several valves (SV-8) and built the superstructure using 1/8 inch ABS H Column (H-4) to construct the safety cage. The cage is 4 3/8 inches long and 3 3/16 inches high. I used Plastruct Handrail (HRS 16) to build the hand railing around the platform. 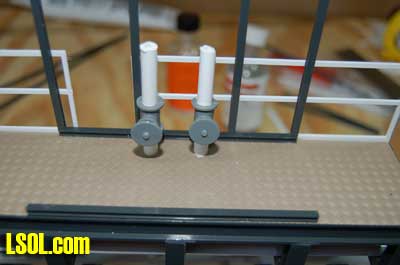
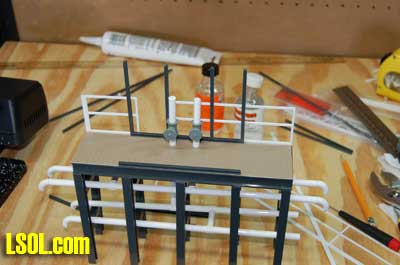
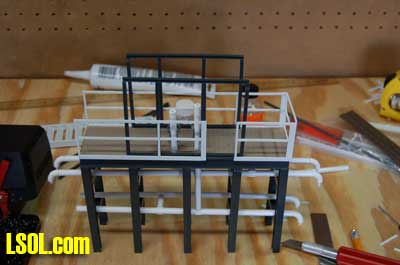
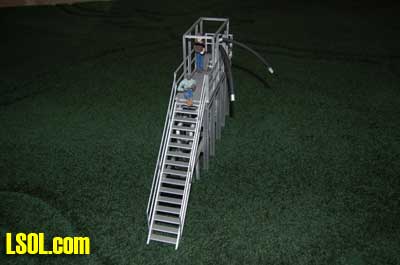
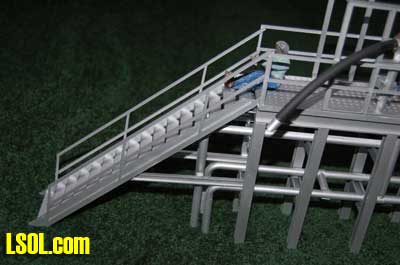
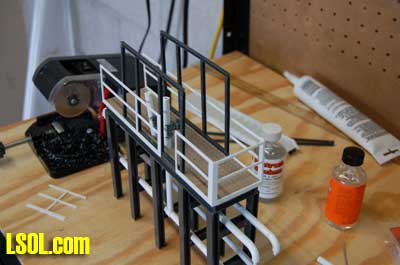 I used a Plastruct stairway (STAS -16) and stairway handrail (STRS-16) to construct the stairs for the platform. They were cut to fit between the ground level and the platform. 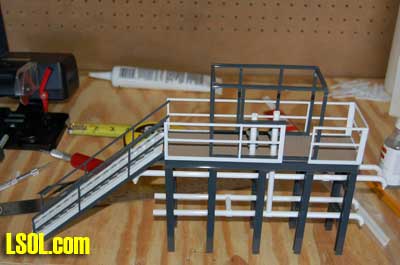
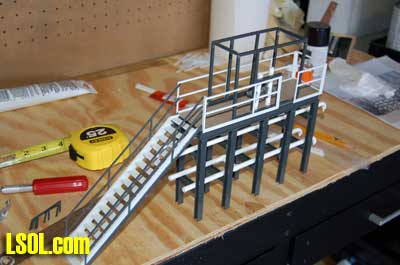
The platform needed a drop down ramp for the workers to be able to reach the top of the tank cars. I used some of the 1/2 inch I-beam material (B-16L) for this. I cut off one edge of the I beam and glued two pieces together to form the ramp. I used my Micro Mark electric sander to even the edge of the two pieces and then glued the ramp in place on the structure. 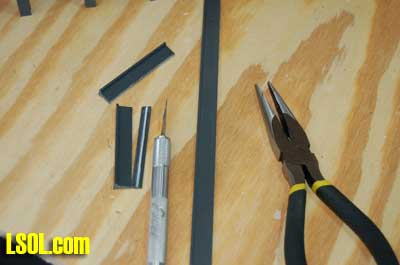

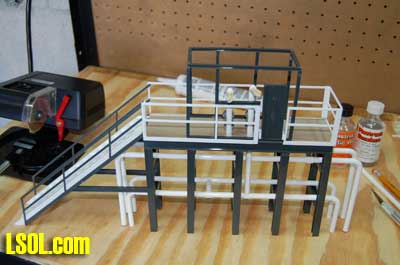
Next I placed the structure in my "paint booth" and sprayed it with Krylon Metallics Silver. 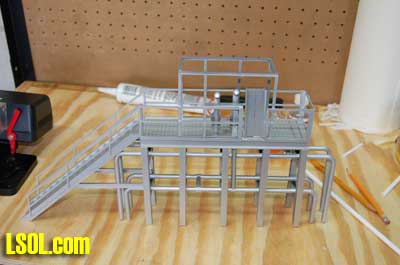
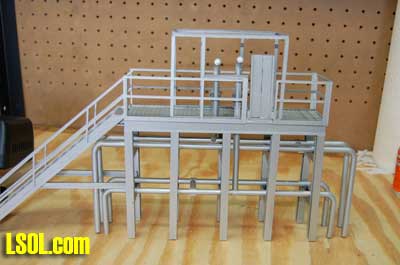
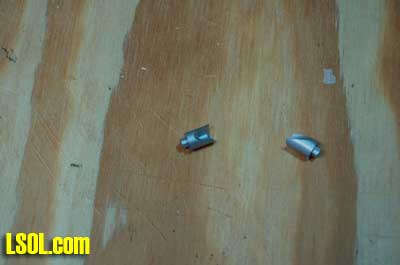
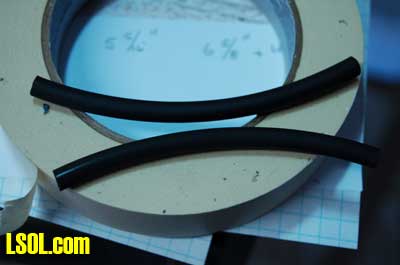
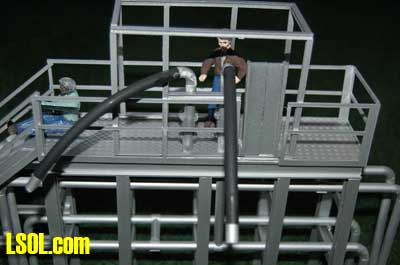
I was now ready to finish the model by gluing some black 1/4 inch tubing to the end of the pipe projecting up onto the deck of the structure. I cut it to be long enough to reach the top of the hatch on a tank car. I spray painted the hose with flat black and let it dry. I fastened a 45 Degree Stub In Tee (TPA-8) to the end of each hose to form a nozzle. I connected the tubing to the vertical pipes using 90 Degree elbows. 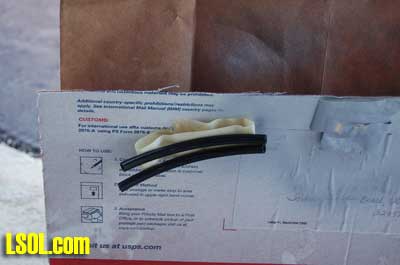
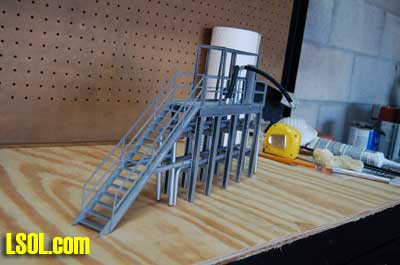
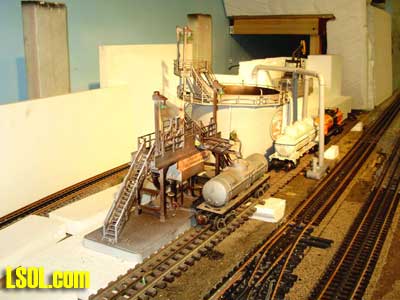
The finished structure is now ready to put in place on my railroad when I return to Maryland. It will service all of my tank cars and create an industry that requires considerable switching since the service track will only hold a couple of cars at a time and this particular refueling structure will only service one car at a time. The workers are from Scale Equipment Ltd. They come in white plastic and I paint them using the techniques I described in my LSOL.com series on painting figures. How to Paint Figures - Part 1How to Paint Figures - Part 2This is another of those quick and simple projects that only takes a couple of days to complete. The structure is for my indoor railroad, but the Plastruct materials will hold up outdoors too. The cement used fuses the plastic material together forming a permanent bond that is waterproof. The finished product is easily expandable to allow servicing multiple tank cars by simply extending the length of the platform and adding additional fueling receptacles. If you need a way to fill your tank cars on your railroad, you might consider this easy project while you still have a few bad weather days ahead. 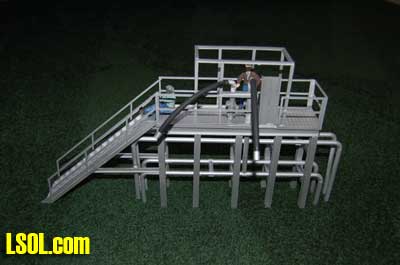
| Building an Oil Platform for your rr |
| Kudos to Noel Widdifield on this great article. I have been wanting to build a platform like this for my version of Chama NM Gramps oil platform. I could never figure out how to go about it until now. Keep up the good work and thank you for sharing your skills with us. |
| John Mayo - 03/25/2009 - 04:59 |
| Loading Dock |
| Reminds me of loading docks that were used by Sohio in Lima and Marathon in Findlay. Yours looks good and captures the feel of these docks. |
| JD Miller - 03/25/2009 - 05:04 |
| oil platform - plastic cement |
| Great looking addition Noel. Love short projects! I've never used Plastruct, but have just added their website to favorites and hope to make use of it. Was happy to see you using Testor's plastic tube cement on figures. It still remains a favorite indoor glue for me. Just went to a nicely revamped hobby shop who said that cement was old fashioned and didn't carry it! |
| Phill Lowe - 03/25/2009 - 05:47 |
| Excellent Addition |
| Besides showing how to make a very interesting industrial structure, the article shows that you can do so in a very limited space, adding a lot of railroad character to the layout. |
| Rick Henderson - 03/25/2009 - 07:32 |
| building an oil platform |
| I like the Oil Platform , It will go good with my new tank train.Excellent Work on a small project. |
| Lynn (Orlyn)Glover - 03/25/2009 - 08:44 |
| Oil Platform |
| Great job Neol. This is a super addition to your oil storage facility. |
| Jim O'Connor - 03/25/2009 - 09:13 |
| Oil Platform |
| Nice looking platform Noel. I will try one of these when I get my yard established on my pike. I see one of these every time I drive up the eastern shore of Virginia on my way to Philly. Yours is exactly as that prototype appears. |
| Roland "Doc" Smith - 03/25/2009 - 16:44 |
| Oil Platform |
| Nice job Noel. My railroad is still in the planning stages and is a desert theme. I might try to adapt your design to a water station as that would be a shortage in a frontier town. Also, my wife enjoyed the included articles on painting figures, both Part 1 and 2. Keep up the good work. |
| Carl Angdahl - 03/25/2009 - 21:48 |
| oil platforms |
| Incredible!!!! LSOL is just Incredible. Someone once said "Ask and you shall receive" |
| JIm Sweeney - 03/26/2009 - 12:52 |
| oil platforms |
| Incredible!!!! LSOL is just incdedible. Someone once said" Ask and you shall receive" JD and I bought 4 tank cars on the lsol special last month. As we were emailing back and forth about the couplers I happened to wish for someone to step up and either make or show where we could get scale piping to build a facility to off load our new tank cars. Voila!!!! Thank you, Noel Jim Sweeney |
| Jim Sweeney - 03/26/2009 - 12:58 |
| oil platform |
| Hey Noel, I like the platform. I think it will be a fun project to work on with almost no plans. And you know how I am about plans. But I do have a BOM! Ron |
| Ron Hill - 03/26/2009 - 19:42 |
| Oil Platform |
| I was lucky enough to watch Noel build the oil platform first hand. It is really an amazing piece of work and seemed easy, but then again it was Noel building it and not me. |
| David Zinsner - 03/29/2009 - 15:32 |
| Oil Platform |
| Thank you for all of the nice comments. It is great to get positive feedback on an article. David, You need to post a picture of your bridge. David used the plans I got from Ron Hill for my bridge to build one for himself. I got to watch him try his first project in building something for Large Scale. He did a great job. Thanks, Noel |
| Noel Widdifield - 03/29/2009 - 16:25 |
Top of Page
|


