Scenery
:
People
How to Paint Figures - Part 2
Aug 11, 2004


By Noel Widdifield
LSOL.com Managing Editor |
Author
Bio
This is the follow-on article about painting figures for model railroads.
|
This is the follow-on article about painting figures for model railroads. The first article focused on assembling the right tools, paints and brushes. This one will describe how I prepared and painted four people that Jon had sent to me. I will include four different techniques that were recommended in my research for this article At the end of my first article, I provided a list of several references on painting figures. Reflecting on these articles and videos, I decided to try four different techniques described in the articles about painting figures. I thought it would be interesting to see how the figures would turn out using each of the different techniques. I began by washing the figures in warm water and dish detergent 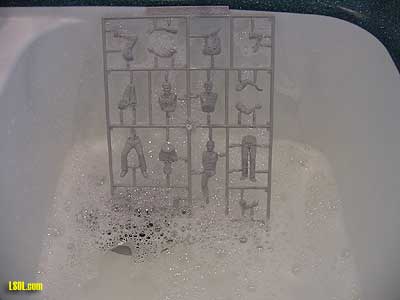
It is important to remove all of the oil left from the molding process. Since the figures were made in 1988, the accumulated dust and dirt from the last 16 years had to be removed. I let the figures soak in the soapy water for a few minutes and then gently washed each figure part with a clean soft cloth. I wore rubber examination gloves while I washed the figures to prevent the oil from my hands from getting on the parts. After gently drying the parts with a clean soft rag, I let them air dry for a couple of hours. I used this time to bring all of my materials, tools, paints and brushes into our kitchen 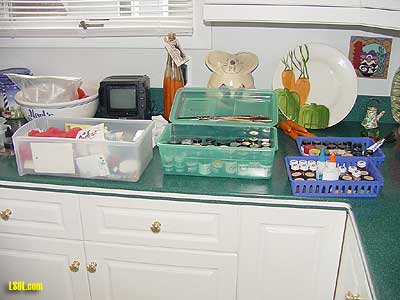
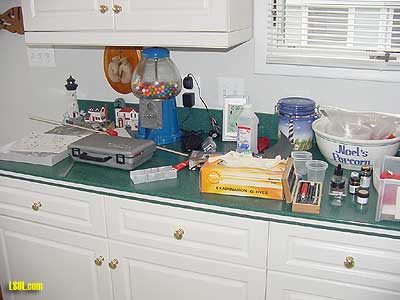
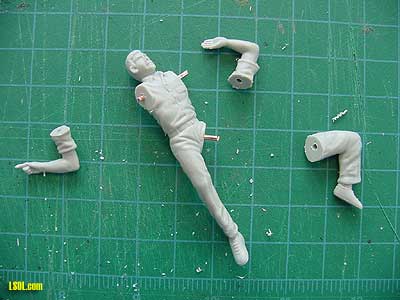
I do a lot of my work in my workshop, but when I am taking pictures for an article, I have much better lighting in the kitchen. I also use an Ott Light that greatly improves the lighting while I am painting. My wife has been very supportive of my working in our kitchen. When the figures were dry, I put them on my cutting mat 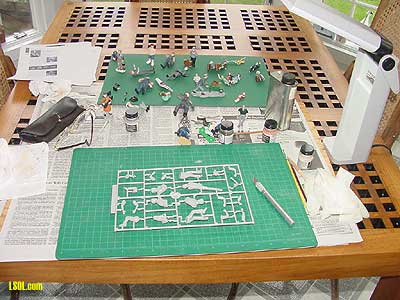
and used a sharp hobby knife to cut the individual pieces from the sprue. I sorted the parts into separate containers so that all of the parts for one person were grouped in a single container. In the past, it took me a couple of tries to determine which arms, legs, heads and torsos actually went together when I dumped them all in the same container. I then used a sharp hobby knife to remove all of the "tabs" and flash from the parts 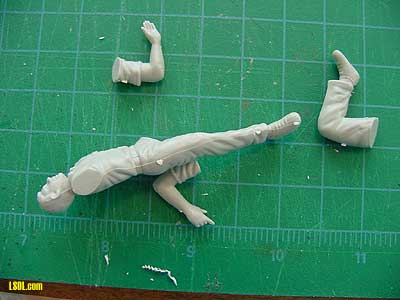
I also scraped off the casting lines with the sharp hobby knife. This is very important if you want your people to look somewhat human. If the lines are not removed, you have people with large seams down their sides and across their heads. Of course, if you have dinosaurs and cartoon characters on your railroad, the casting lines might be appropriate.
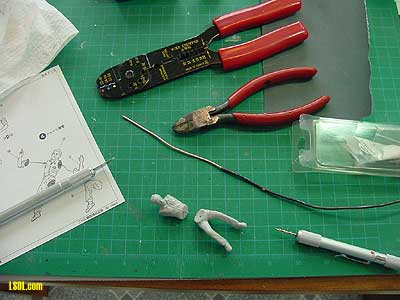
In order to fit the arms, legs, torsos and heads together, I drilled a hole in the center of one part where the parts fit together. I used a pin vise with the appropriate sized drill bit for drilling the hole. I used 14-gauge copper core electrical wire to hold the parts together. I first striped off the installation and then cut the wire in half-inch sections using side cutter pliers
I inserted one end of the wire into the hole on the first part and held the second part up to the wire to determine where to drill the hole in the second part 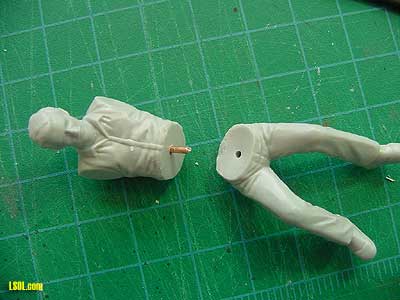
I did this for all of the parts that needed to fit together 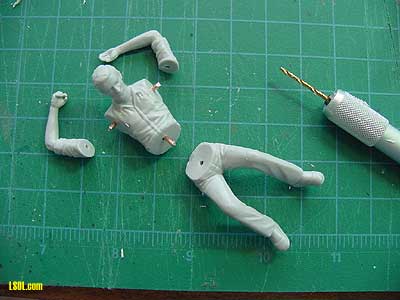
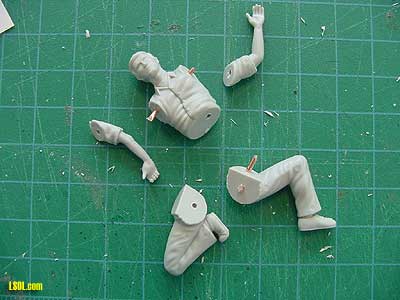
After test fitting all of the parts together, I used Testor's plastic model cement to glue the parts together 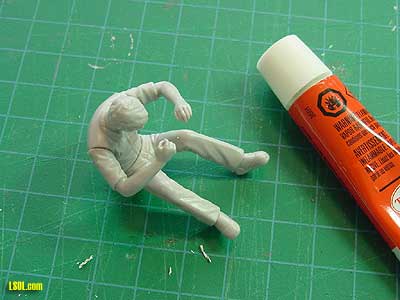
The material from which the figure is made determines what type of glue you use. I next filled the space left between the parts with Green putty. Letting the putty dry overnight, I filed and sanded the putty to fit the contours of the figures. This step is a lot of work and should only be done on those figures that will be up close to the edge of your railroad. Once you paint a figure and place it more than a few inches from the edge of the railroad, few people will notice those fine lines that have not been filled. In order to have a "handle" to hold the figures while painting, I cut some 1/2" X 1/2" wood into about 4 inch lengths and glued the figures to them using White Lightning clear silicon adhesive caulk 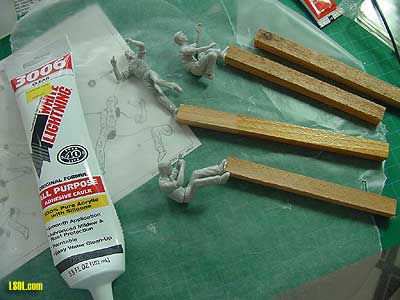
I placed the figures and the wood on waxed paper while they dried. The adhesive caulk holds the figures in place and is easy to remove from the wood and figures once painting is finished. I use toothpicks inserted into holes drilled in the feet of my smaller figures 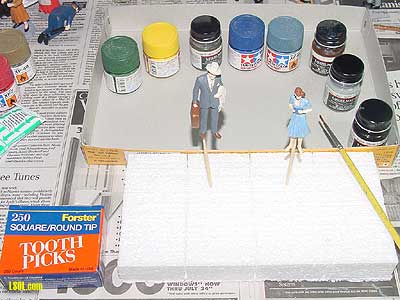
The toothpicks can then be inserted into a Styrofoam block to hold them erect while painting.
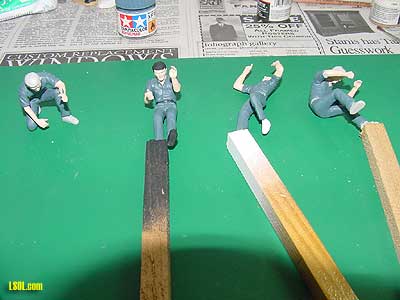
In my research, I found three interesting theories on painting figures. The first suggested that the figure be spray painted white before painting the final finish on the figure. The second source recommended spraying the figure black before finish painting. Thus, I used Krylon flat white on one and flat black on another of my figures 
The third source suggested using India ink wash on the figures after the finish painting, so I finished painting the third figure and applied the wash. I just painted the fourth figure as it came from the manufacturer 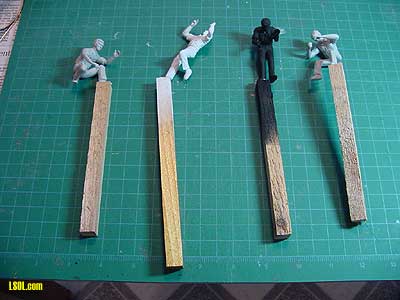
The results will be at the end of the article. To begin the finish painting, I first painted the "flesh" areas of the figure using Model Master's enamel flesh colored paint 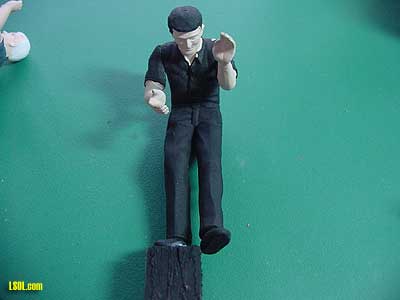
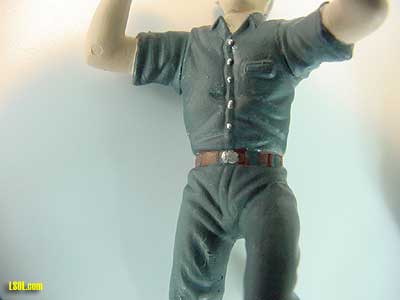
I then painted the major areas of clothing using a flat gray Tamiya Color acrylic paint 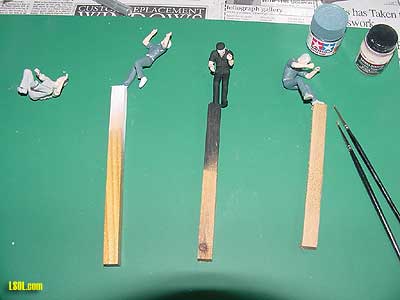
I used the gray color for the coveralls on the figures; because they would be "working" in my Texaco gas station, and the other guys who worked there also all wore that color of coverall 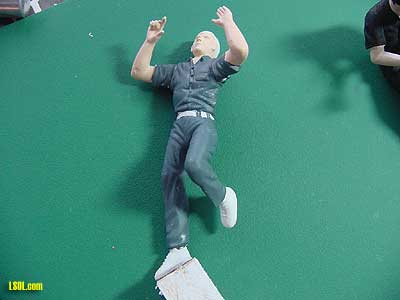
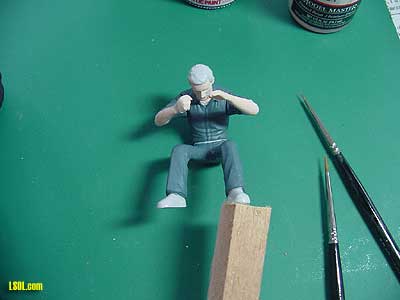
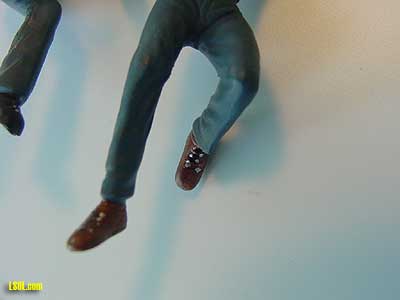
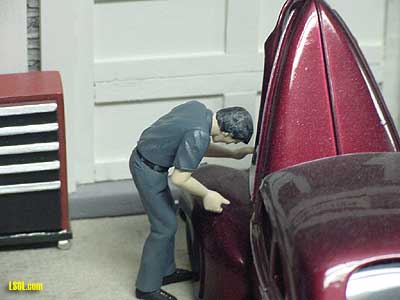
This process was not a one-time paint job and you are finished. I went back and forth between the two colors finishing the edges between the flesh and the clothing several times to get the lines correct. I then painted the details, such as eyes, eyebrows, lips, buttons, shoes and shoelaces 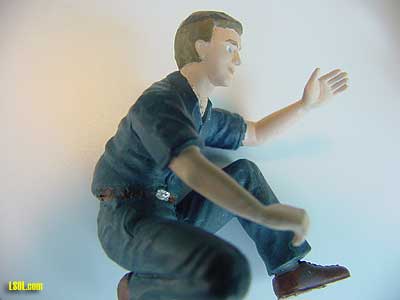
This is done with a very fine 10/0 brush 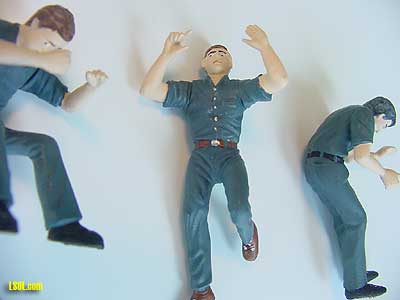
On some of my previous figures I use the Deco Color very fine paint pens, but on these figures I used only the brush. Most of the details are cast on the figures so it is a matter of just touching the details with the tip of the brush. For the eyes, I first painted the eyebrows and then used flat white to put the whites in the eyes and then brown, blue or green for the pupil. It is important to make sure the pupils are painted in the same position for each eye 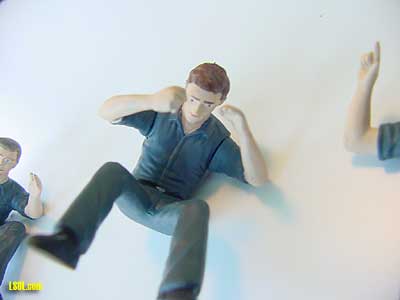
The hair needs to be dry brushed with a light gray after the desired hair color is painted 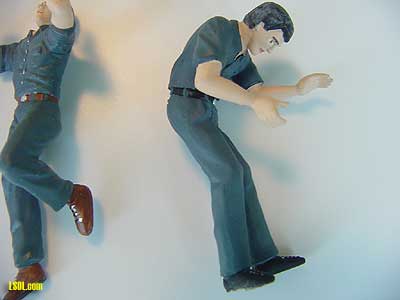
This takes some of the sameness out of the color. I used Testor's silver for the belt buckles and the shoelace eyelets 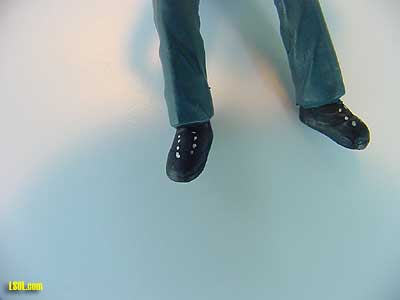
After finishing the figures, I put the India ink wash on one of them 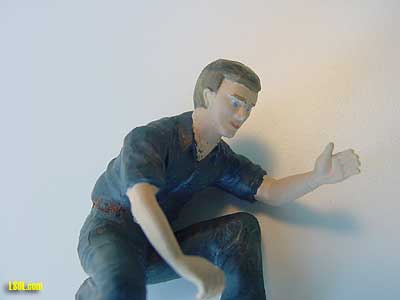
This resulted in a nice finish on the clothing, but gave this guy some "chest hair" that wasn't as realistic as I would have liked. I didn't get the ink wiped off quickly enough. In terms of the three different techniques that I used, I found the following. The figure sprayed black first resulted in some nice very thin black lines between the colors and in the deep folds and creases. This looked pretty good to me, but it is too subtle to be picked up well in the photos. This made the figure seem a little more real looking than the others. The figure that was sprayed white first, made it easier to see the lines and features on the figure for painting, but didn't seem to make much difference in the final results. The figure that was washed in India ink and alcohol had many of the same thin black lines found on the one that was first sprayed black. This technique resulted in "dirtier" clothing on the figure and is a good technique to use on any figure you want to look a little worn and dirty. The one that was painted as it came from the factory lacked some of the finished look of the black sprayed and India ink ones and will need to be weathered with India ink to look more realistic. Truthfully, I found that each had some nice features. They all looked pretty good, because of the finish painting and attention to detail. I think you could safely use any one of them and get good results. After finishing the figures, I took them upstairs to my indoor railroad and put them to work at the gas station. I think they turned out pretty well and want to thank Jon for sending them to me.
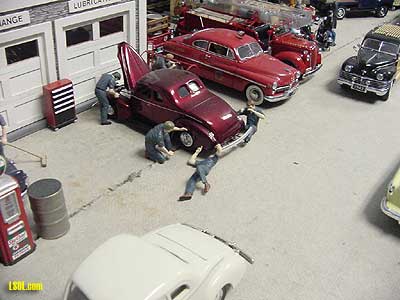

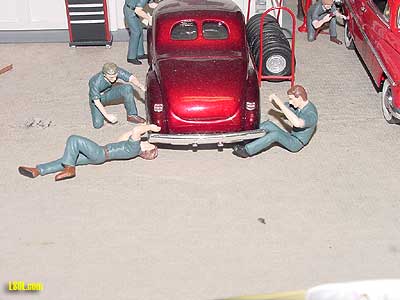

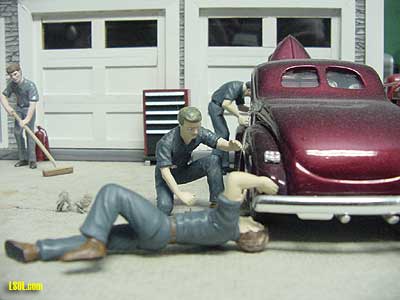
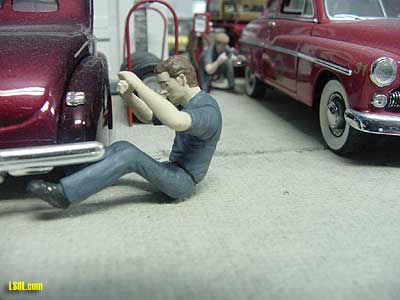
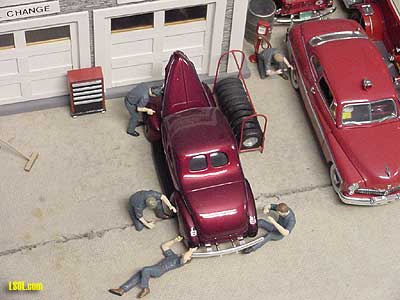
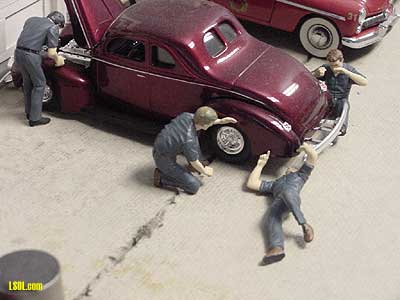
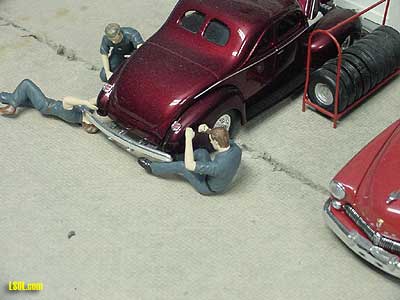
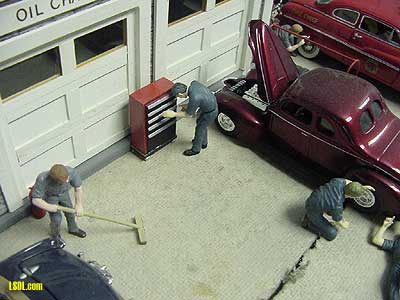
You can see that they fit right in with the other workers already employed at the station 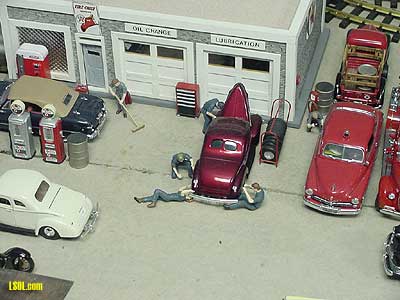

I am preparing to leave on vacation with my wife, and I have had a difficult time finding the time to prepare and paint the people to complete the article before we leave. We are going to fly to Chicago and then take the Amtrak's Empire Builder to Seattle. We will pass through Jon, Jo Anne and Bryan's hometown in the middle of the second night on the train. After spending two weeks visiting our friends in the northern part of Washington State, we will fly first to Denver for the Garden Railway convention and then back home.
| Nice garage scene |
| I'd like to bring my car to your garage for service - four mechanics at one time! |
| Ray Turner - 03/25/2009 - 09:51 |
| Painting Figures |
| Ray, I just paint them and place them as they come. My Texaco station is fully staffed. Remember my railroad is set in Sep 1954. Service was a lot better then and there were always a bunch of service guys in the station. The pay was about $1.00 and hour then, so you could afford a few more service people. Check out the service station on the railroad now. www.noelsbigfour.com Look under "indoor"and "current" buttons. Noel |
| Noel Widdifield - 03/25/2009 - 10:05 |
Top of Page
|


