When my wife and I first viewed the backyard of a house that we were interested in purchasing, one of the first thoughts that I had was that it would be ideal for a garden railway. The area is 40 feet deep and 80 feet wide and had originally been set up as a formal Japanese garden when the house was constructed in the late 1920's. There was a pond, dozens of trees and bushes and rock walls throughout. Unfortunately it had not been tended to for several decades and the pond looked like it had not seen fish or held water since before I was born! But the potential was there.
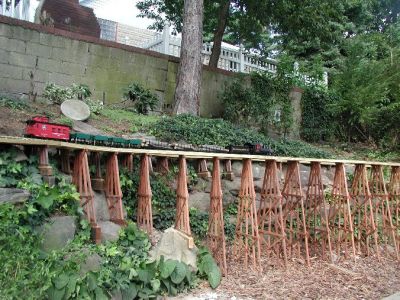
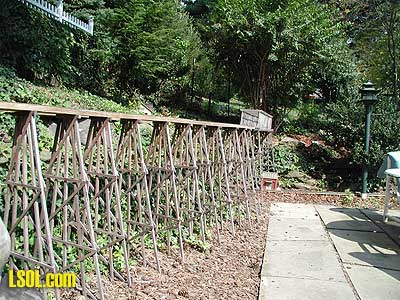
After we purchased the house we spent several months clearing out overgrowth, cutting trees and exposing the rocks and paths that had been overgrown. I began construction of the main loop of track knowing that it would be necessary to support most of the track on trestles to navigate the boulders that comprised much of the garden. I wound up making over 100 bents from wood that was salvaged from an old hot tub. Very few bents were identical and it felt like each section was custom made to fit a particular area. When I was done I promised myself that I would come up with a better way to mass produce bents and trestles should I expand the railway.
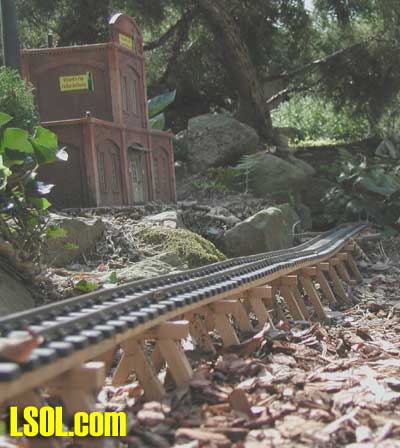
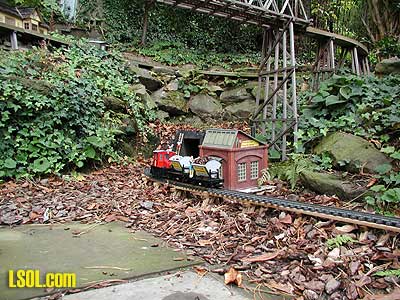
This summer I decided to add a short run line that would connect our newly discovered coffee mine with the coffee refinery. The train, carrying prehistoric coffee beans, would exit the coffee mine, travel 1000 (scale) feet to the refinery, pause, reverse and return to the mine. The engine would be controlled by the microprocessor that was the subject of an earlier article on LSOL.
This area was nearly level, but I chose to raise all of the track a few inches above the ground to help keep debris off of the track and to make it more visible. Remembering the time consumed by the construction of the earlier bents I experimented a bit and came up with an efficient method of fabrication that is described below.
The Design
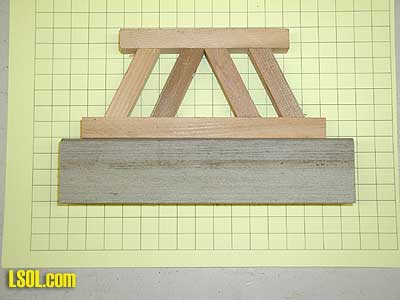
Each bent is made up of a top, bottom and four diagonal supports. This photo shows these pieces laying on a piece of 1/2" graph paper. If having a supply of scale graph paper interests you, have a look at Tips, item #11, for the steps you can follow to create graph paper for any scale using Microsoft Word
Tools
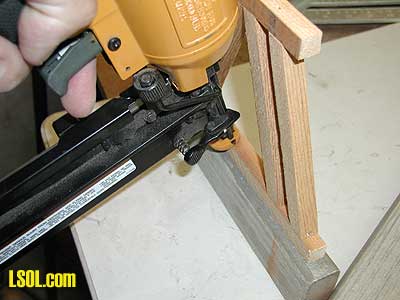
The components of each bent are nailed together. Although a careful and patient person could construct them with a hammer and nails I chose to use a nail gun. I have two nail guns that would have worked, one for brad nails and one for finish nails. Since the finish nails have a larger head than the brads I decided to use it. 1 1/4" long nails worked well.
The other tool that makes the job go quickly is a table saw. Just about any size will do as long as it has a rip fence and a miter gauge. Again, one could use a hand saw in a miter box but power tools sure have their place!
Wood
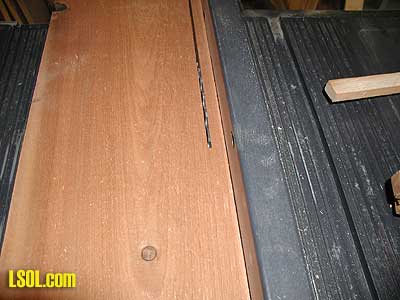
The original trestles and bridges on my railway were made from wood that I had salvaged from an old hot tub that came with the house. It turned out to be Jarah wood, an Australian hard wood that is naturally resistant to decay. I was just about out of wood from that source so I chose to use red cedar. It is soft, easy to work with and readily available in most areas. Redwood would be another good choice, but it is becoming more and more difficult to come by. The design keeps much if not all of the bent above the soil so other, less decay resistant species could be used. An overnight soak in Thompson's Water Seal or a similar preservative would be a good idea. I mounted the original set of bents on footings made of pressure treated 2x4's. For this project I opted to use a less toxic deck material, a wood composite, made of compressed wood chips and recycled plastic. It can be found at most home centers and is generally available in 5/4" x 6" x 8' sections. I found all that I needed in a scrap area at Home Depot.
Wood Preparation
To simplify things I made all of the components of the bents from 1/2" x 1/2" stock. This is equivalent to the timbers used by railroads for most scales that we work with. Please feel free to adjust this dimension as you see fit.
Half inch square strips were cut on the table saw from 1" x 12" pieces of cedar. Providing instruction on how to use a table saw is beyond the scope of this article but I will give a few tips on methods that I used to cut many identical pieces.
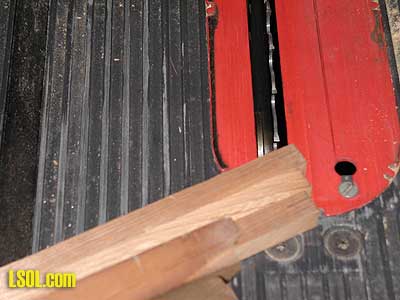
After placing the rip fence 1/2" from the blade I cut the 1 x 12" cedar boards into 1/2" x 3/4" strips. Make sure you use a push stick to make the last few cuts from each board so that your fingers NEVER come close to the blade.
Cutting these strips to 1/2" x 1/2" is a bit more challenging. I clamped a scrap board to the rip fence just a bit more than 1/2" above the table. This board keeps the strips from rising up and clearing the blade. Again, a push stick is a must. Please note that the object in the lower right corner of the photo is a clamp, not my finger!

Cutting duplicate lengths
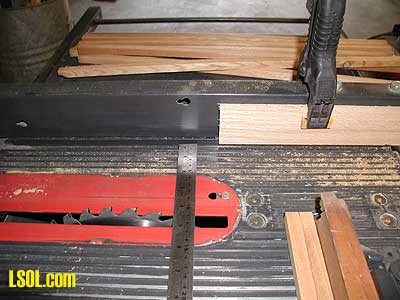
The tops and bottoms of the first set of bents that I made were 4 1/2" and 6 1/2" long respectively. I needed a good number of each so I used the miter gauge and rip fence to help me mass produce them.
There is one very important thing that you need to notice in the following description. You MUST use a scrap of wood on the rip fence to set the length of the pieces that you want to cut and this scrap must not extend into the area near the saw blade. If you were to use the bare rip fence to set the length you are sure to have a piece of cut wood bind between the fence and blade. This usually sends it flying into your body with uncomfortable results!
To cut the 4 1/2" pieces clamp the scrap to the rip fence and set the distance to the blade.
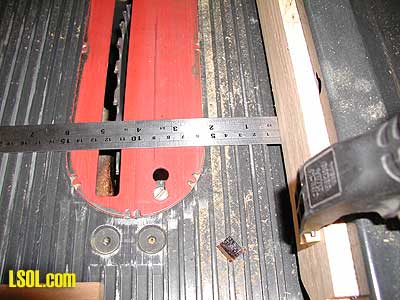
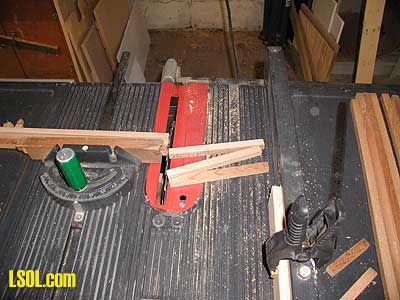
Then unclamp the scrap and slide it back and clear of the blade.
Place several lengths of 1/2" x 1/2 " stock together on the miter gauge and slide them tightly against the scrap so that they are all together. Turn on the saw and slide them into the blade together. If you positioned the scrap piece of wood properly they will be clear of it before hitting the blade.
This technique allows the pieces to free themselves from the blade without binding. Continue cutting until you have enough of the top pieces for your project. Repeat with the bottom sections.
The first set of bents that I made had a total height of a little over 3 1/2". The diagonal pieces are 2" long. I found that a 25 degree angle worked well for this size bent.
I used a technique similar to what was described above to make a good number of these pieces.
First, set your miter gauge to 25 degree.
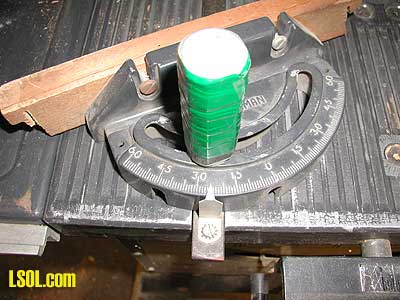
Place several pieces of 1/2" x 1/2" stock on the miter gauge and cut all of the ends to that angle.
Slide the cut ends against the scrap that is clamped to the rip fence. With the saw OFF slide the pieces up to the blade and measure the length of the cut. Adjust the rip fence to give the desired length. Pull the miter gauge back, turn on the saw and make a cut. Continue cutting until the remaining pieces are too short to cut safely.

Putting the pieces together
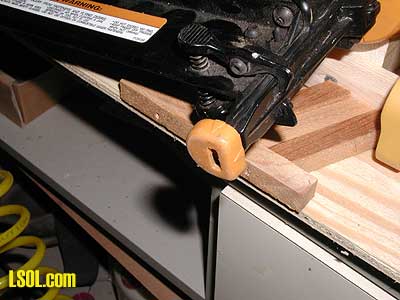
I found that putting bents together with a nail gun was easy as long as you could do three things: hold the pieces securely against a flat surface, hold the pieces tightly together while nailing to maintain the 25 degree angle and keep all fingers and other body parts away from the flight path of the nails!
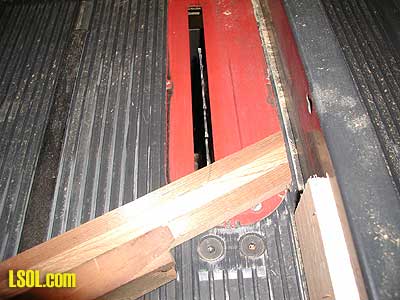
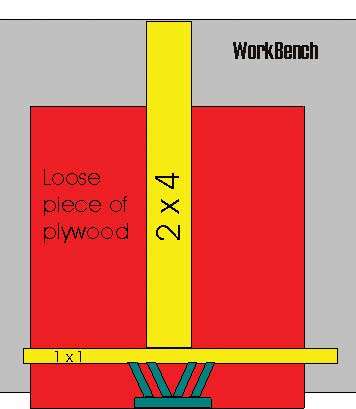
A simple jig made up of a few scrap pieces of wood and two clamps did the trick. I made a "T" shaped unit from a 2" x 4" scrap of wood that was 3" short of the length needed to extend from the front of my workbench to the wall behind it. I screwed a 1" x 1" x 12" scrap to the end of the 2" x 4" making the "T". This I placed on a scrap of plywood that I could slide back and forth under the "T" so that the piece to be nailed was just at the edge of the plywood while it was held tightly against the "T".
These pictures should make things a bit clearer.
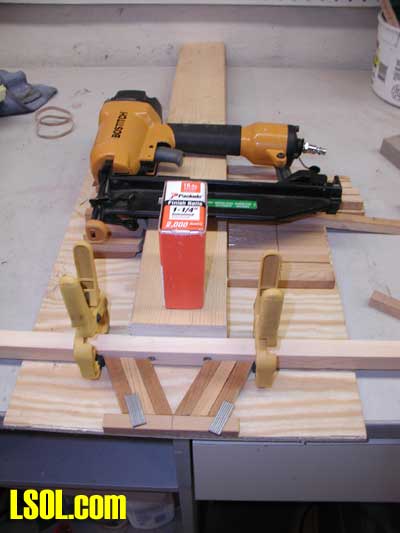
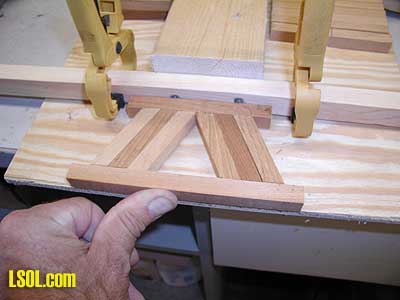
Mark a center line on all of the top pieces.

Place six of the angle cut pieces and the top of a bent against the jig as shown. (Note that we will only nail the outer and inner two angled pieces - the other two are just to maintain the proper spacing!)
Align the center of the top piece with the point where the center two angled pieces touch. Use a clamp on either side of the jig so that the other end of the angled pieces cannot move. You should be able to put a good deal of pressure against the top piece of the bent without anything moving.
Adjust the piece of plywood so that the edge of the top piece of the bent is flush with it. This placement will make nailing with a nail gun much safer and easier.

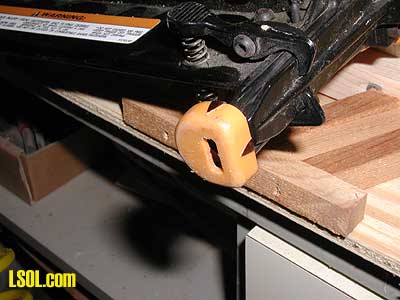
Most nail guns have center marks on the tip to help you align the gun for nailing. On my gun they are difficult to see as they are molded into the plastic tip. I colored them with a marker to make them more visible.
Nailing is easy with the nail gun once you figure out just where to hold it. Resign yourself to ruining a few of your first attempts as you are sure to have some nails come through at odd angles or go into the angled pieces that are used for alignment - they are quite difficult to remove if a nail happens to get into them!
The trick is to align the arrows on the tip with the edge of the top piece and to hold the gun perfectly level as you pull the trigger.
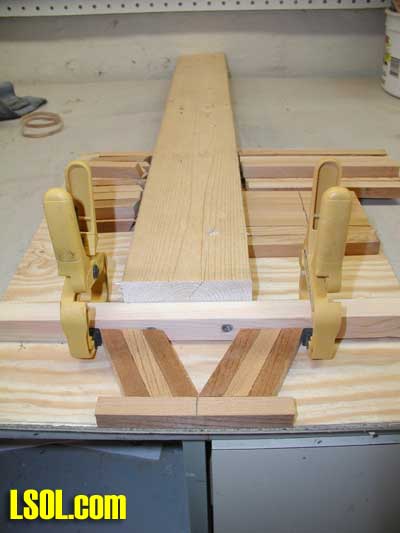
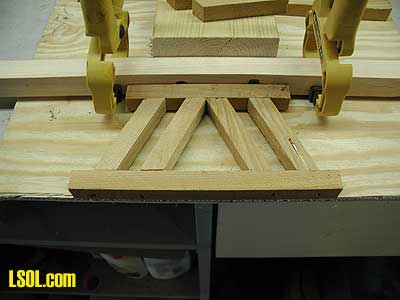
Once you have nailed the four angled pieces from the top support rotate the whole bent so that the top piece is against the jig, center the bottom support and nail from that side. Remember, no nails into the center pieces!
With any luck you will have your first bent, but minus the visible nail that you can see in mine!
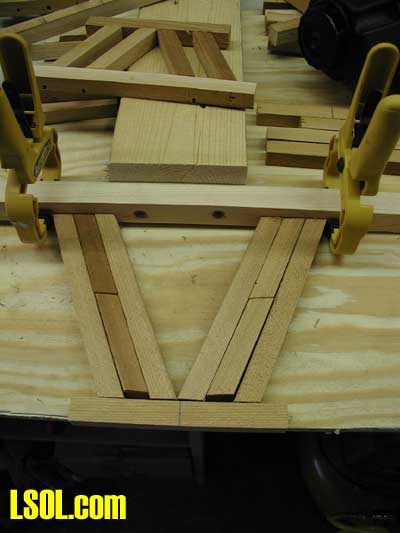
This picture shows the construction of a taller bent. I just used scrap pieces of 1/2" x 1/2" wood to set the space between the outer and inner sections. The only other change is sliding the plywood out a bit so that it aligns with the nailing area.
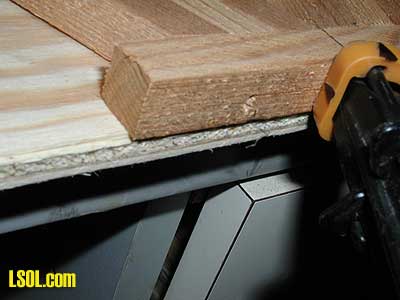
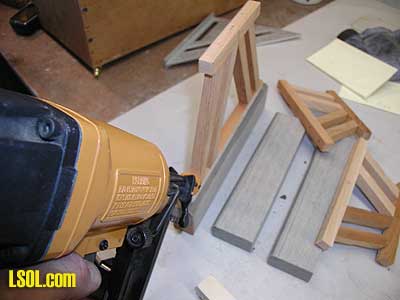
The last step is to nail each bent to a piece of rot resistant lumber. I used 5/4" thick lumber that was about 2" high and 1" longer than the bottom piece of the bent.
A nail in each end and one in the middle holds it all together securely.
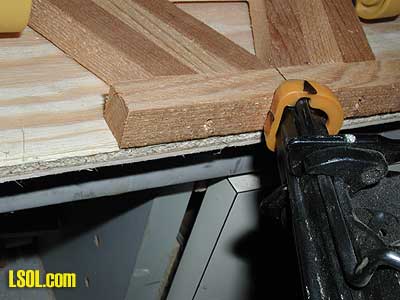
To connect the bents and construct a trestle connect the tops of bents with 1/2" x 1/4" strips of wood. I generally do this after burying the bottom of each bent in the ground and leveling the tops of adjoining bents.

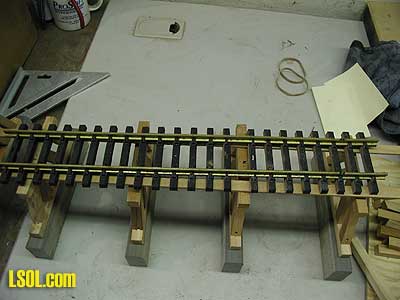
After the track is placed a few screws through ties hold everything nicely in place.
Here are a few pictures of the first set of trestles....
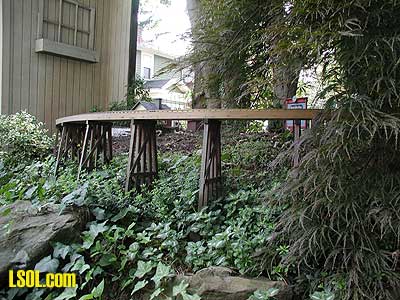
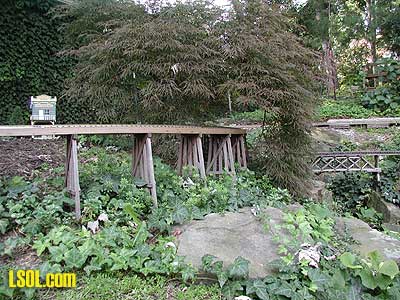
and of the new version.
Good luck and be careful with the power tools!
Top of Page