Power, Sound, R/C
:
Sound
Phoenix Sound Systems Part 2
Jun 23, 2004


By Jon C.A. DeKeles
LSOL.com Editor in Chief |
Author
Bio
It took us under an hour to open up the Dash-9, install the board and then close it up again.
|
In the first part of our series we saw how easy it was to set up and test the Phoenix 2K2 sounds system. So how easy will it be to install inside the Aristo-Craft Dash-9 engine? Before we installed the board it was time to do some Manual configuration. manual configuration is accomplished by connecting volume inputs to ground before turning the board on. The system sees that the volume inputs are not in their normal "off" state and will enter one of three configuration modes: Option Selection, Start Voltage Adjustment, and Rate Adjustment. What this means is that you will need to connect terminals 4,5,6 together to enter Option Selection mode. For Start Voltage Adjustment you hold the volume switch in the lower position and apply power. To enter the Rate Adjustment you do as in the previous step, but hold the volume switch in the raise position. The instruction manual has easy to understand details on how to enter each of these programming modes and how to access the features in each area. You can also adjust bell and horn to manual for remote control or if you are double heading locomotives. Look for future articles on using the computer interface. In this process we will need to remove the top shell of the engine. There are several screws on the bottom of the engine to remove. Please refer to the Outside/In! - Aristo-Craft Dash-9 for detailed pictures on getting inside your Dash-9. As always be careful in what you do. Opening and damaging your engine is not covered by the manufacturer's warranty nor by LSOL.com 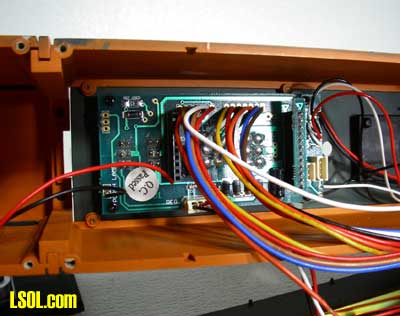
One of the nice things about installing sound in the newer Large Scale engines is that the manufacturers have upgraded their electronics so that installing sound is more plug and play than ever before. Mounted on the inside top of the shell is the electronics board that controls the power to the motors, lights and smoke. 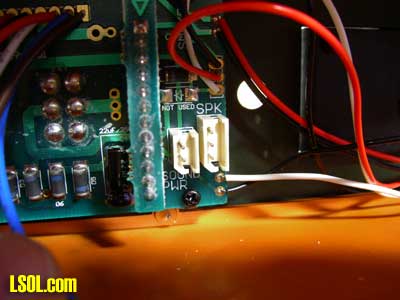
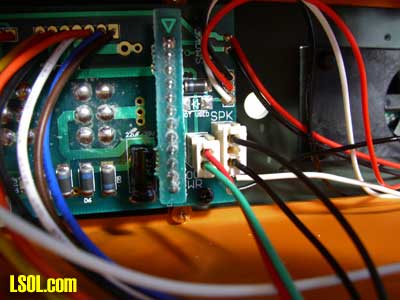
In the "old days" to install sound one would have to find power wires, cut them, solder them, and shrink-wrap them. Plus there was no speaker already installed. In the Dash-9 you just look for the jacks that are marked Sound PWR and SPK. This PWR is for you to attach a plug to power your sound board. The SPK is for you to get sound to your pre-installed speaker. 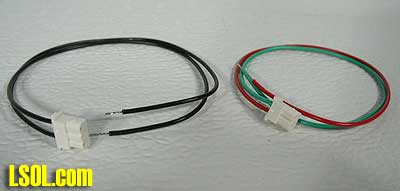 The Phoenix kit came with both sets of wires. The plugs on the wires are different so you can not make the mistake of plugging into the wrong jack. You can, however, attach the bare ends to the wrong terminals on the 2K2 board so make sure to read the instructions carefully. 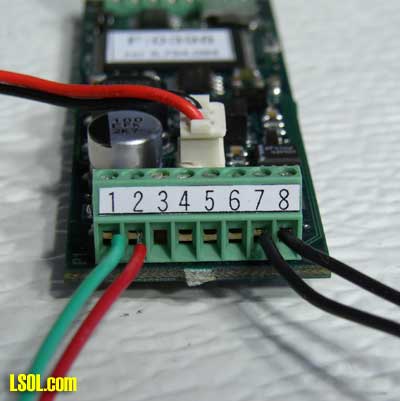 The red and green wires were attached to the plug that fits in the power jack. We attached these to the terminals 1 and 2 as indicated in the instructions. It does not matter if red is in terminal 1 or 2. The plug with two black wires will attach to terminals 7 and 8, and then plug into the speaker jack on the Aristo-Craft electronics board. If you did your test setup, you should already have these wires attached.
 Plugging the plugs into the board is simple. The jacks are keyed and can only plug in one way. 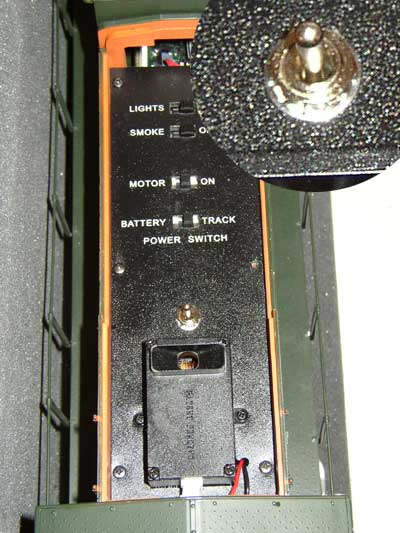 We did not ponder long on where to put the volume switch as we noticed a hole already right in front of the smoke unit. It was just the right size and we did not have to do anything, we pushed the switch through and attached the nuts. We attached the wires to terminals 4,5,6 as we did in our test. We mounted our switch so that to lower the volume you would push the switch toward the front cab. 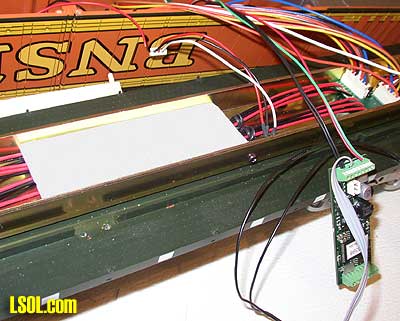
There is lots of room inside the Dash-9 to place the 2K2. We knew that we were going to be installing the Aristo-Craft TE soon so we used double stick tape and a small piece of foam core to make a semi-permanent platform to mount the 2K2 board.
 We used double sided tape to attach the 2K2 board to the foam core and we were ready to close up the patient. Before we did we made sure to test the unit by applying power to hear the engine start up, get to speed and shut down. We also tested the volume switch installed in the top of the unit. It took us under an hour to open up the Dash-9, install the board and then close it up again. We had a chance to run our Dash-9 at a friend's house right after we installed the sound. Sound really makes a difference in the experience of running trains. One of the people commented on how good the sound was and that it had such a full sound to it. Well he was right. We did some special updates to the installed speaker, as well as adding something special... which we will tell you all about in our next article. Top of Page
|


