Product Close-ups
Outside/In! - Aristo-Craft Dash-9
Mar 10, 2004


By Jon C.A. DeKeles
LSOL.com Editor in Chief |
Author
Bio
There is nothing more fun than getting a new Large Scale product. I don't care what it is, engine, rolling stock, new building, or even some new accessory. There is something magical about taking it out of the box with that new train smell.
|
There is nothing more fun than getting a new Large Scale product. I don't care what it is, engine, rolling stock, new building, or even some new accessory. There is something magical about taking it out of the box with that new train smell. 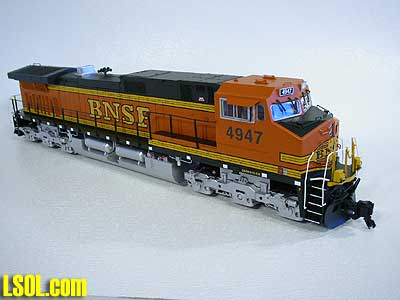 I also really enjoy taking the pictures for you. I set up our photo area to take pictures, then it is "lights camera, action." This time we are starting something new. We have created a series called Outside/In. Here not only will we take pictures of the outside of the product, but if it is appropriate we will take pictures of the inside. They do say, "It's what's inside that counts", and "Beauty is only skin deep." Our first victim, product is the new Dash 9 from Aristo-Craft. First though: This is one big engine. Weight: 15.8 pounds
Length: ~32"
Height: ~7"
Width: ~4.5"
Manufacturer Features: - Two 3 Axle Ball Bearing Efficient Power Trucks
- 2 Motors per Truck with Low Amperage Draw
- Modular Electrical Connections and Car Body
- Operating Diesel Smoke Unit
- Super Bright White LED Directional Front & Rear Headlights and Ditch Lights.
- Lighted Front Numberboards
- Interior Cab Lighting and Interior Cab Details
- Lighted Porch & Step Lights
- Solid Metal Railings and Lift Rings
- Clear Plastic Windows with Opening Side Windows
- Super Detailing including Windshield Wipers, See Through Steps, and M.U. Hoses
- Operating AAR Knuckle Couplers
- Extra Weight for Better Performance
- Prototypical Painting, Lettering, and Road Numbers
- Quality Water Resistant Speaker Included (Sound System Sold Separately)
Unpack - Get Ready  You know this is a big engine just by looking at the box, but then when you go to lift it you know that it is a heavy engine too. The engine comes packed inside a shipping box and inside a display box. The unit is placed inside a plastic bag, and there is a top and bottom piece of foam holding it in place. 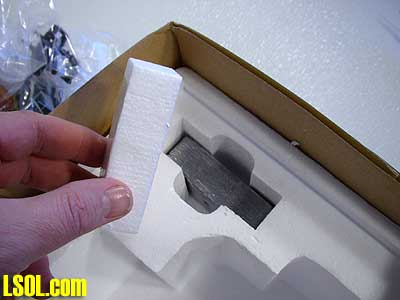 Once you remove the engine look around. There are additional weights that are not installed in the engine. Note: If you do not remove them, and throw away the box you will throw them away! They are in the top corners of the box. Just cut the tape and remove them. There are two each weighing 2 pounds each. Look around the box and you will find several plastic bags containing sun visors, mirrors and antennas, hand rails and couplers. There are also some instructions you will need for putting in the weights. These instructions also contain several pages of an exploded diagram of the unit. Take a look at these for a minute and you will only start to understand the magnitude of making a highly-detailed Large Scale Engine. 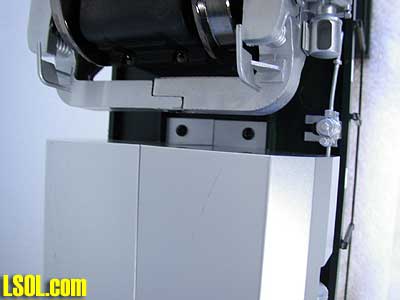 If you want to add the weights do this first. Find a towel and invert your Dash-9. The weights go in the fuel tank. There are two small screws on each side of the tank. If you unscrew them, you can lift the tank up straight and the screws will stay in the holes. This makes it a lot easier for putting it back in place.
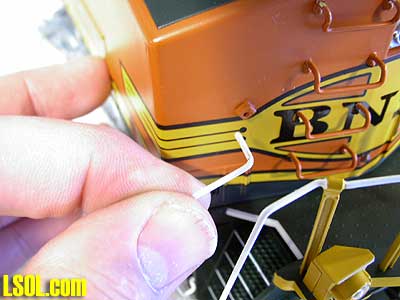
 Adding the weights is simple, just unscrew the two screws on either side of the Dash-9 installed weight and place them in, replacing the screws. These small blocks are small, but weight 2 pounds each. 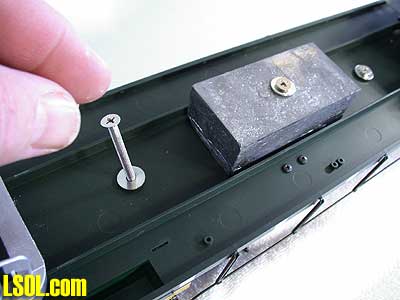 Just replace the fuel tank and you are done. You have just added 4 pounds of weight that can help with pulling long loads by giving you added traction. 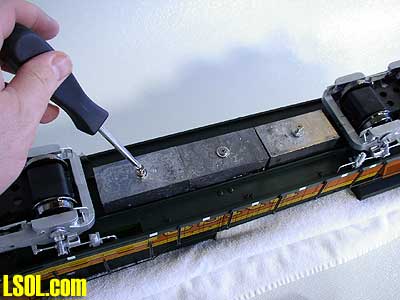 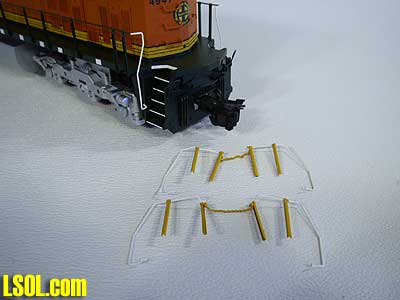 The next step is adding the front and rear hand rails. Unlike the SD-45 from Aristo-Craft the Dash-9 has the side rails installed. Make sure you look carefully as there is a front rail and a rear rail. They are already bent to fit, and mine were easy to install. It only took a few minutes. 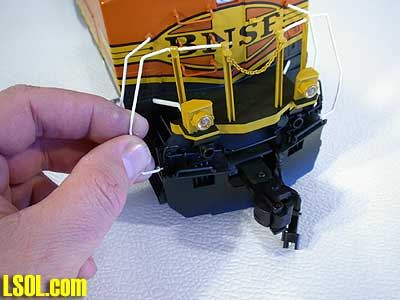 If you have a problem pushing the white wire railing into the plastic make sure you do not use a metal pliers or you will scrape the paint off the wire.
The third and final thing you will need to do to your Dash-9 to get it "track legal" is to add the antennas, window shades and mirrors. Go slow and take your time. These are the delicate parts and that is why they are not installed at the factory. They would not have made the trip on the big boat over the big ocean installed. You may want to take the time to dry fit them without glue. This way you can get a feel for how they are to go on to the Dash-9 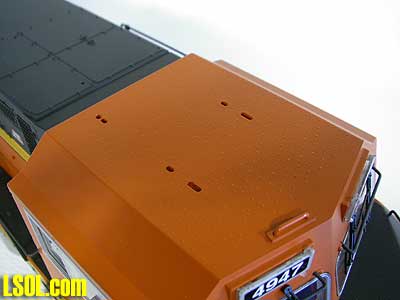 I started first with the antennas. I used regular model glue, and used just a little to hold them in place. Do not push down hard on the top of the antennas as you can break the plastic. Be extra careful with the smallest antennas. 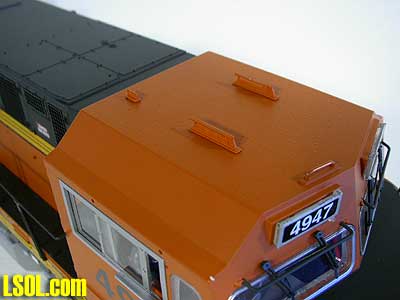 Next I installed the mirrors and sun shades. I install the mirrors first, then the shades, this makes it easier to see the holes. Be careful with the shades. Any downward pressure on them once they are attached can make them break off. My unit had two extra shades. 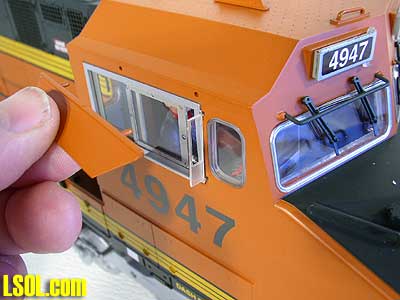 These small steps really gave it the extra details it needed. I felt like I had just added the eggs and water to the mix, but I could take credit in helping to build this fine model.
Detailed Pictures Taking pictures of the Dash-9 was a joy. This is one beautiful engine. We chose a BNSF. Near us in the Spokane switching yard and we see these units all the time. Take a look at the detail on the front of the cab with the window wipers, the front door and ditch lights.  Also check out the side door grills and the top vents on the engine. The detail is very nice. The painting on our unit was sharp and crisp too.
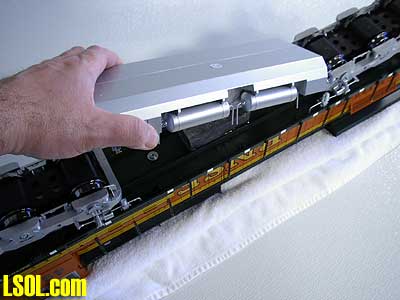
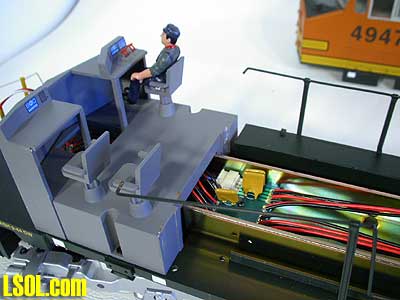
Outside/In! So what is inside? We wanted to know. We recommend that you DO NOT try this to your engine. You could damage it, lose parts, or void your warranty from the manufacturer. This is why we did it for you. 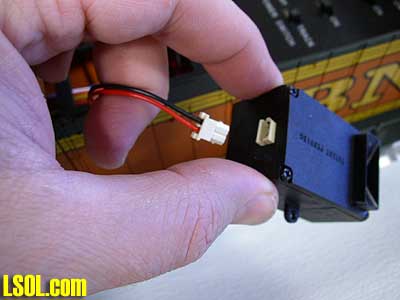 We started by taking out the smoke unit. This was a simple two screw process. There is a quick disconnect and the unit is out. This is one of the new Aristo smoke unit that will shut off when out of smoke fluid. (And man does it smoke.) 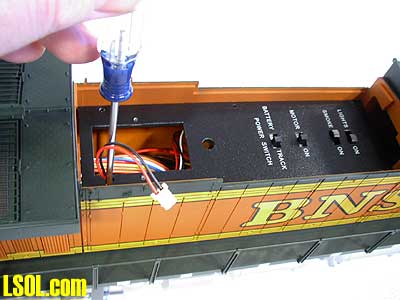 You really do not need to remove this to open up to get inside the engine. Next we removed the switch control board from the top of the train. This has the switches for the Lights, Smoke, Motor, Battery/Track power switches. There are several screws that hold this in place. Do not try to pull this out. It is connected below to the main part of the train and also there is a porch light LED that is hard wired into the board. 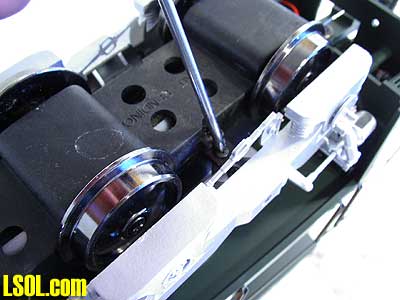 Next we thought we would look at the motor blocks. There are only four screws that hold it in place. When you remove them you can just lift the motor block out, there are no wires to worry about. 
Check out this picture and see how the Aristo-Craft engines have created a system that will make it easy to replace and repair your motive power. We also open up the motor blocks to see what was inside. There are several screws that seal the box to keep out moisture and dirt. Inside we found two motors powering the three wheel sets, all the gears were sealed. 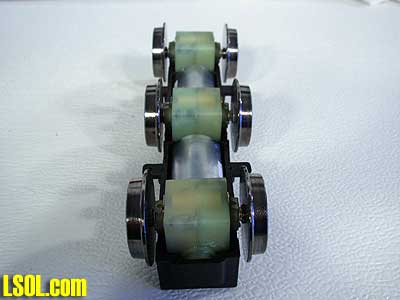 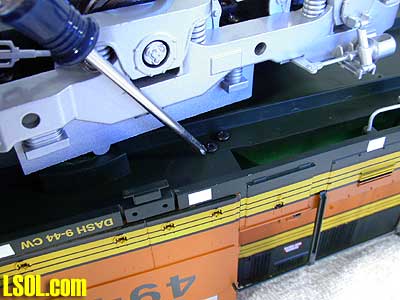
Now it was time to go inside. We looked at the bottom of the engine and identified the screws that hold the top pieces to the bottom. They were easy to find and not one of them was in a hard to get at place. Once you remove the screws you will need to remove the hand rails that are attached to the top of the unit.
You do not need to remove the complete handrails just the parts that attach to the cab. Make sure you check both sides of the cab. On one side there is a vertical handrail, but on the others side there is not. Don't miss this. 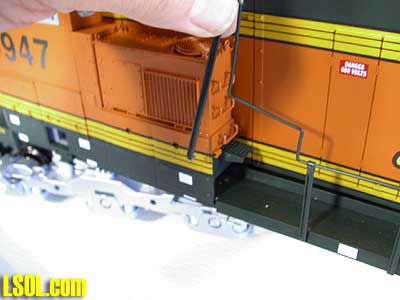 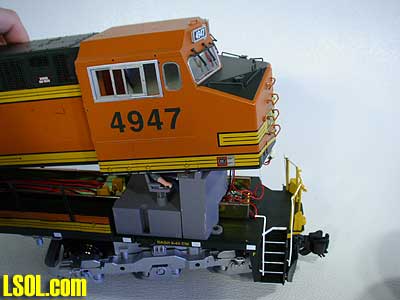 Once you have removed all the screws, you can lift up right behind the cab. This may take a little force, but if it is not coming up, you may have missed a screw, stop and check. 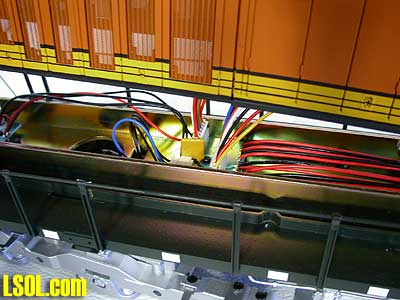 As we lifted up the back we stopped so that we could remove the connections from the top power board to the base. We also had to remove a connector from the power board as well to finish the removal of the top section of the engine.
 Once there we were able to get a detail look at the engine. Cab Interior Shots The cab has nice details, but there is room to add some more. The engineer inside looks 1:29 scale as he is the same size as one of Aristo-Craft's other sitting figures. 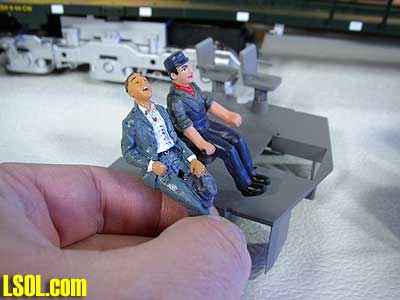 Bryan found that his Lego People fit just great in the cab and before we shut ours up we glued in one of them to help drive the train. I hate to admit it, but he really does look cool sitting in there. He has already turned a few heads. 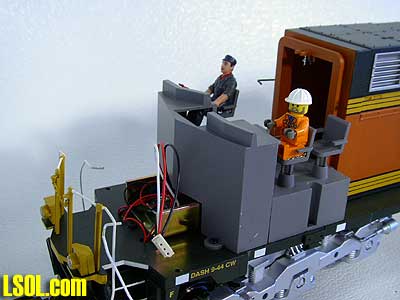 So what is the bottom line? What do we think? I like it. This is a well designed engine inside and out. So far we have run ours for hours without a problem. Top of Page
|


