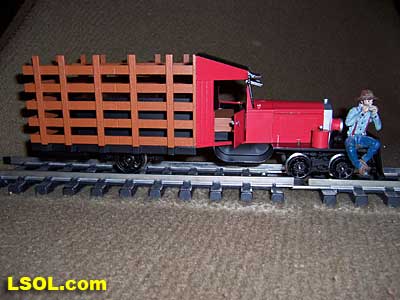
Bachmann has introduced their first narrow gauge item based on a Colorado prototype. Bachmann selected a good candidate for their foray into an era of ever popular Colorado railroading. Production of a model based on Rio Grande Southern Motor #1 will not disappoint most narrow gauge operators.
For an additional look at this fine little rail truck check out LSOL's introductory video.
Link to video
HISTORY.
The following is quoted from the 2005 Bachmann catalog. "Along with the financial devastation of the Great Depression, the Rio Grande Southern faced natural disaster as well when a mudslide cut the railroad in two places. A divided line severely reduced rail traffic, and the struggle to remain financially solvent in the face of these difficulties inspired the RGS to develop Motor Car #1, a cost-effective solution to severely reduced passenger and freight traffic.
Based on the replica of Rio Grande Southern Motor #1 that resides in Colorado's Ridgeway Railroad Museum, our large scale Rail Truck brings whimsy and realism to narrow gauge modeling."
For additional in-depth information on Motor Car #1 and the Ridgeway Railroad Museum check out this web site. http://www.ridgwayrailroadmuseum.org/index.html
BACKGROUND. 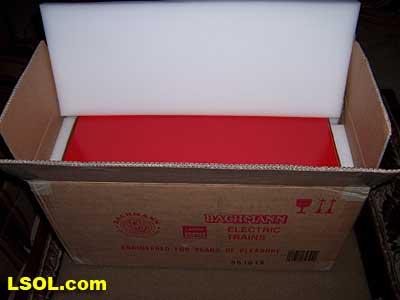
The rail truck is shipped in the now familiar foam lined cardboard box that all but insures arrival in undamaged condition.
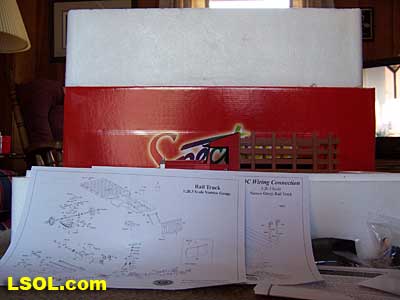
Inside this foam lined shipping box is a Spectrum box containing the rail truck. As shown, the truck is packed in a clam shell to further guard against damage. Along with the rail truck you will find two pages of documentation consisting of exploded parts diagrams plus information on DC and DCC wiring.
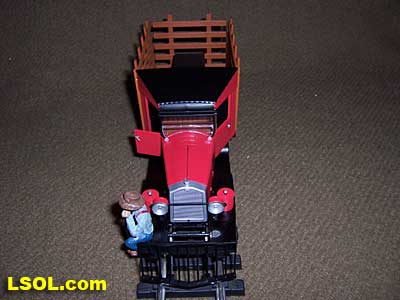
There is also a small snow plow and driver figure included. On a negative note, Bachmann does not include any type of Owner's Manual or even instructions on lubrication. The expected DVD that has been supplied with almost all recent Bachmann models is also missing. Lack of lubrication instructions and the DVD is a disappointment but something that most new owners can survive.
Lubrication. Recommend a plastic compatible lube such a Bachmann E Z Lube or similar type be used for the rail truck. Sparingly lubricate the front truck axle bushings, rear axle ball bearings, universal joints, and motor armature shaft and worm gear.
The motor armature bushings are lubricated by removing the Buick motor casting to expose the can motor. Removal of the motor casting is covered later in the article. Remove the hood to gain access to the motor.
The hood is removed by slightly pulling the radiator forward. Grasp the radiator at the cap and pull slightly forward This will release the hood pins so that the hood halves may be removed Reverse this procedure to reinstall the hood halves. The rear motor shaft and worm gear is accessible through the firewall.
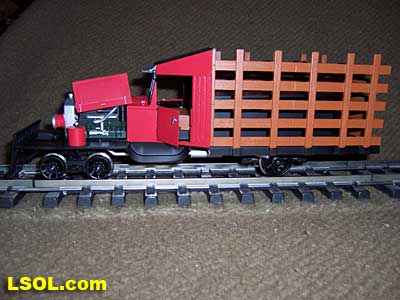
Here are the Rail Truck's vital statistics.
Length:12 7/16 inches (with cow catcher attached)
Width: 4 1/16 inches (bed width at stake pockets)
Height: 4 3/8" (from railhead to top of cab or side boards)
Weight: 2 pounds, 12 ounces
With its light weight the rail truck can not be expected to serve as a yard goat. In fact, as delivered, it has just enough traction to handle one metal wheeled box car on level track. The truck will handle 2% grades just fine.
Climbing any grade over 2% will depend on the condition of your rail along with the condition of the rear drive wheels. As the rear drive wheels lose some of their slickness, with clean and dry rail, the truck should be able to climb a 4% grade. For folks with grades of 4% it may be necessary to add small amounts of weight to the bed in an area over the rear drive wheels to gain additional traction.
OUTSIDE.
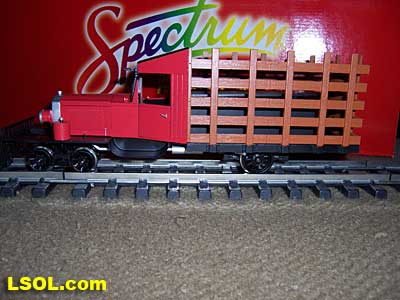
For the most part all major components of the rail truck are metal. Metal is used for the frame, bed, cowl, hood, and rear axle. The cab and detail items are plastic.
Everywhere you look abundant detail is found. Bachmann must have gone over Motor #1 at the Ridgeway Museum with a fine tooth comb to capture the detail and charm of this little jewel.
Following are a series of pictures that provide a look at the fine detail of the rail truck.

There are several other details worthy of note. Following are several pictures that display these details. 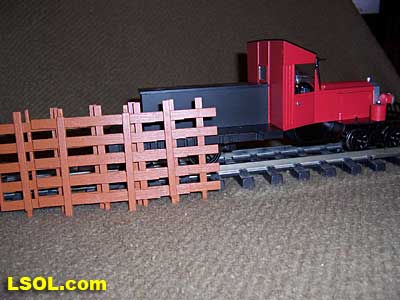
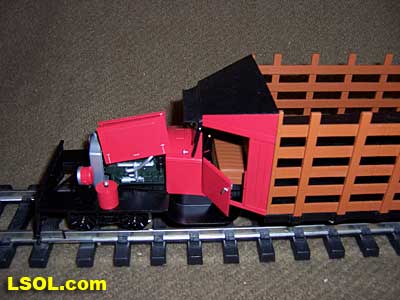
The first picture shows the side and rear bed racks removed. These racks slip into pockets molded to the truck bed.
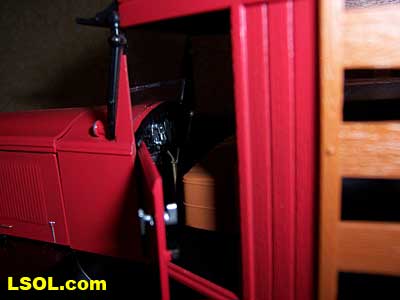
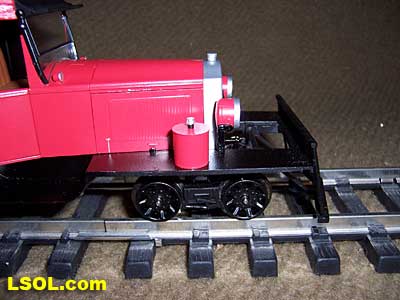
Sanders are shown in the second picture. These can shaped sanders are used to place a fine stream of sand on the rails to assist with braking. There are no sanders for the rear drive wheels. It appears that stopping the rail truck was of more importance than providing rear wheel traction.
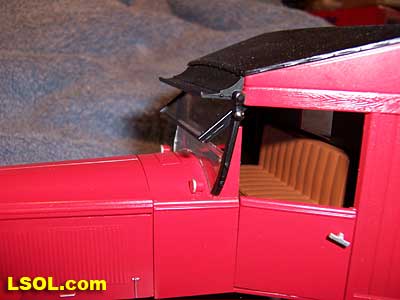
The cab interior is well detailed as can be seen in the above picture. Interior features include a detailed dash as well as gear shift and brake levers. Obviously there is no steering wheel required.
The seated figure is most easily placed in the cab through the right side door. Don't forget to latch the door after placing the driver in the cab. You don't want the poor little guy falling out thus generating a claim against your railroad; those cinders are difficult to dig out of skin.
RUNNING GEAR.
The rail truck's running gear is worthy of note. Detail of the front truck and rear wheels/axle is well executed.
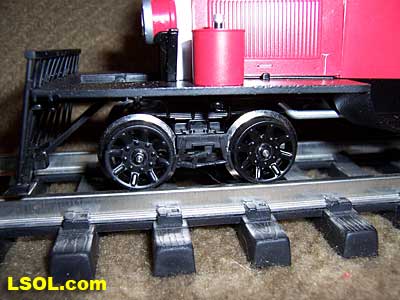
Front truck detail is crisp and appears to be an accurate representation of the prototype's truck. Inside hung brake shoes add to the fine detail. A word of caution. The brake shoes set very close to the wheels.
There is a tendency for debris found along the track to become caught between the wheels and the brake shoes. If you are running through "trash" along the track then keep an eye on the front trucks as the wheels may become jammed with debris.
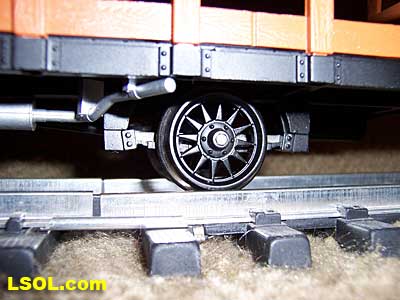
Rear drive wheels and spring detail is well executed. The wheels look very much like the cut down passenger car wheels that were used on the prototype. As you can see, rear axle suspension detail is clear and crisp.
INSIDE.
Now we'll take a look at some of the inside details of the rail truck. Once again Bachmann engineers have demonstrated their innovative approach to model rail equipment design.
This picture will give a better view of the front truck detail. Note the two spring loaded electrical contacts, one on either side of the truck pivot (king post). As mentioned in the video, the front truck snaps in place.
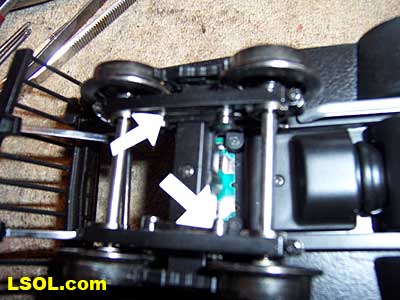
In the above view the electrical pickup that conducts power from the wheels to the front PCB is highlighted. There is a pickup at each wheel. Two of these four pickups are designated by the white arrows. Bachmann uses a unique pickup to contact the wheels.
Each contact has a very small roller that runs against the wheel. This type pickup first appeared on the Heisler, if memory serves. Friction is not a factor with this type contact. This roller contact is used on the rear wheels as well. Front axles turn in brass bushings that further reduce friction. 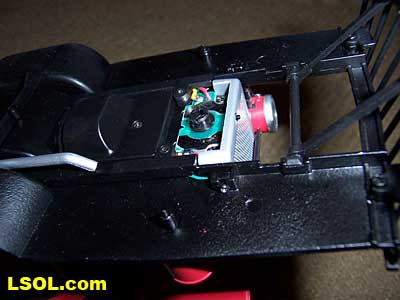
Power from the rails is transmitted through the two spring loaded contacts mounted in the top of the front truck to the PCB pictured above. Bachmann continues to refine this setup on each new model. The PCB and pickup on this rail truck follow that further refinement. These pickups should provide trouble free service and will be simple to keep clean and functioning at full capacity.
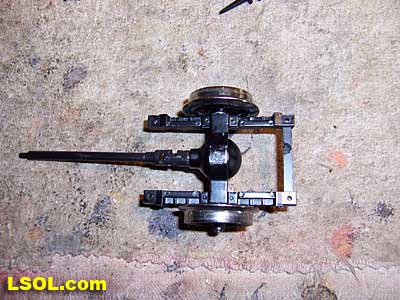
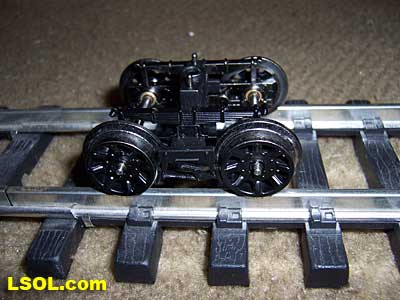
The rear axle is pictured removed from the chassis. Four screws attach the axle to the truck chassis. This rail truck is unique in that the electric motor is mounted under the hood.
The motor transmits power to a gear case under the cab floor. From there power is transmitted to the rear axle by means of a drive shaft equipped with a automotive type universal joint at each end. The rear axle contains a gear set somewhat similar to that found in a 1:1 automotive differential. Bachmann went to great length to replicate a drive train that would be found in an automotive application. So far in operation the system works well for this little rail truck.
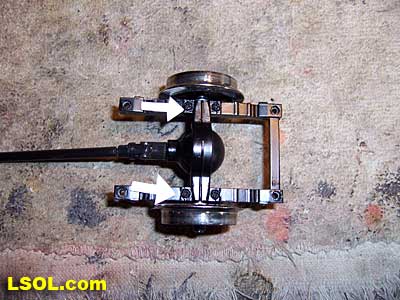
The white arrows designate the two screws that must be removed to split the rear axle halves.
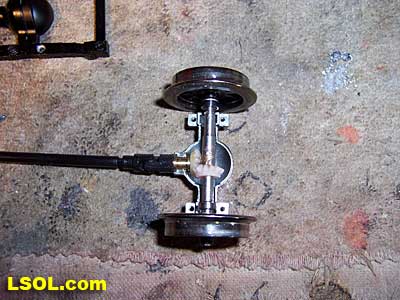
Shown above is the interior of the differential with its drive gears. I found the rear gears and gear case to be well lubricated. Note that the gears are small and given the nature of the rail truck they do not appear to be designed for excessive gear loading. Again, the little rail truck in not designed nor intended to be used as a yard goat so gorilla gears are not necessary.
Another nice touch is the fact that the axle runs in small caged ball bearings. There is a ball bearing at each axle end. The rear axle turns with a minimum of friction due to these ball bearings. Note: Should you open the differential make certain the bearings are placed in the axle housing recesses when putting the two differential halves back together. A note about the automotive type universal joints. These universal joints are made of a tough flexible type plastic. They appear up to the task of transmitting power to the rear axle.
However, they do have a tendency to oscillate when turning. So far when running the rail truck this oscillation does not seem to cause a problem. The truck runs smooth and there is no noticeable vibration in the truck as it is under power at prototypical speeds.
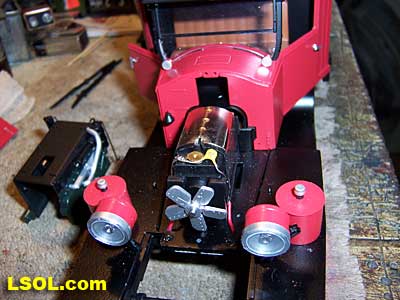
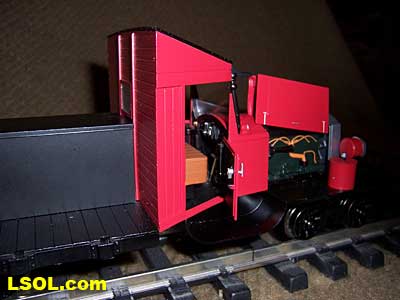
As previously mentioned the motor to power the truck is located under the hood. The motor is covered by a plastic casting that represents a six cylinder OHV Buick engine of the late 1920 period. This plastic motor cover snaps in place over the can motor. Supplied documentation explains procedure for removing the Buick motor cover to access the can motor.
The Buick engine is highly detailed. You won't be embarrassed to open the hood on this little truck. A "gee wiz" feature is a fan blade that rotates when the motor is running. You really can't see it when the truck is in operation, but it is a nice detail touch. 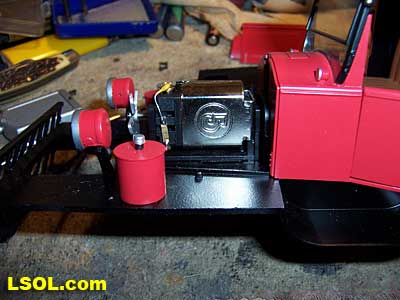
The can motor is of more compact design than motors used in other Bachmann products. The sides of the motor case are somewhat flat thus allowing the Buick engine cover to fit tight up against the sides of the can motor. Notice the fan blade mounted on the protruding motor armature shaft.
ELECTRONICS.
The electronics package used on the rail truck is of rather simple design. Documentation provided details DCC installation. A second diagram addresses DC wiring.
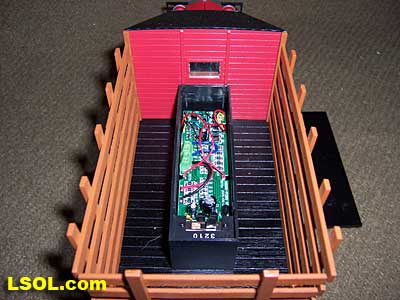
The circuit board is contained within a long plastic box mounted in the truck's bed. The circuit board is not sophisticated. The board serves as a central connection point for track power, supplies the LED lights, and wiring for the combination NMRA/Large Scale polarity switch. In fact, the circuit board could be removed for running the truck with either rail or battery power.
LED lights could be connected to resistors and wires from the front and rear pickups could be joined together eliminating the unnecessary NMRA/Large Scale polarity wiring. Only reason to retain the board would be for installation of DCC. Removing the circuit board would gain space for a RC receiver and batteries should that be an operational choice. 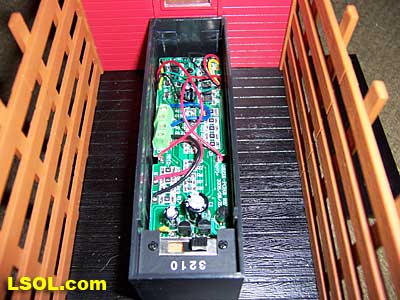
This picture shows the power control switch. The switch allows four-way power control. At Position 0 all power is off, Position 1 provides power to lights, Position 2 sets NMRA polarity, Position 3 sets large scale polarity. By retaining the circuit board it will be possible to park the truck on a powered siding with the lights illuminated when the power switch is set at Position 1.
For DCC operation the DCC wiring diagram lists either a Bachmann 44913 DCC Decoder or a LENE 1835 Decoder. I am not familiar with DCC so this decoder information can not be evaluated.
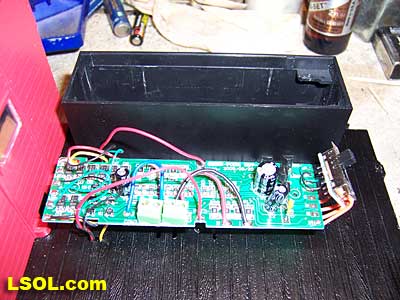
Here is a picture of the tool/mail box removed to provide a better view of the circuit board. Two screws attach the circuit board to metal posts cast into the truck bed. The box is attached to the truck bed with one screw at each end.
In order to remove the cab the circuit board and box must be removed. There are two screws up through the truck chassis into the rear of the cab. Remove these two screws, slide the cab back slightly to disengage front tabs and the cab lifts off the chassis.
I found that the truck starts to move at four volts of track power. During testing with a speedometer car the truck would travel at 8-9 scale MPH on 10 volts of track power. At 15 volts track power speed was measured at 20 MPH.
At no time during testing could I get the truck to draw more than .4 amps. Your amperage draw readings may vary. Since the truck has such a low amperage draw it would be a good candidate for battery power; should run for just about ever on a battery charge.
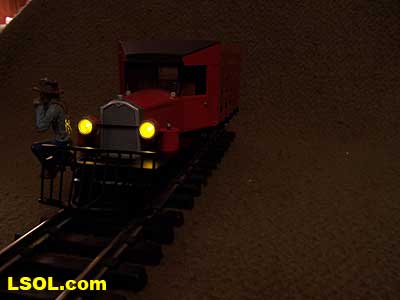
One last note. The headlights on this truck, with their off-white LEDs, produce a very prototypical light that one would expect from a motor car of 1920s vintage.
THE BOTTOM LINE.
After operating the Rail Truck for these past weeks I'd have to say that Bachmann has hit a home run with its latest offering. This truck puts all the high priced brass rail trucks in the shade. For just over $150.00 Motor #1 has to be the best bargain on the market.
The rail truck will more than hold its own with any brass model for both exacting detail and operational performance. Bachmann has put ownership of these most unusual pieces of narrow gauge railroading within the reach of most large scale operators. Adding a Bachmann Rail Truck to your railroad's roster will be painless from a monetary standpoint while incorporating a most interesting replica of railroad history. Let the Goose fly!
Top of Page