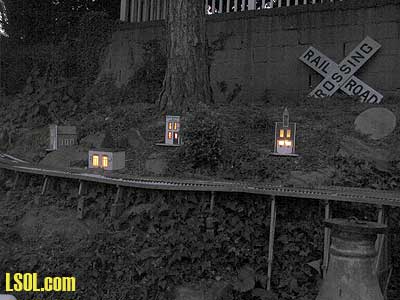
I have been using low cost solar garden walkway lights for illuminating the interiors of my buildings for some time. By removing the solar panel, two AA NiCad cells, circuit board and LED you can easily mount the solar light components in buildings. The amber LEDs in Malibu brand lights give a nice glow to building windows that looks like candle, kerosene or gas lights.
When it came time to illuminate two of my larger buildings I decided to design and build a solar lighting system that would be sufficient to power 8 or more LEDs. (The parts that I used and the circuitry will be the subject of a future article.) I completed the lighting for one building with parts that I had on hand. I was ready to reorder high output LEDs when I remembered that a friend had given me an LED light for my laptop computer that was designed to get power from the USB port.
I recalled three things about this light: It was VERY bright, worked off of the 5 volts provided by the computer's USB port and was purchased for a dollar at a DOLLAR TREE store. Since many of the high output LEDs that I had ordered from various parts suppliers were as much as $2.00 each I decided to more closely examine the laptop light with an eye towards repurposing one or more of them for my remaining building. 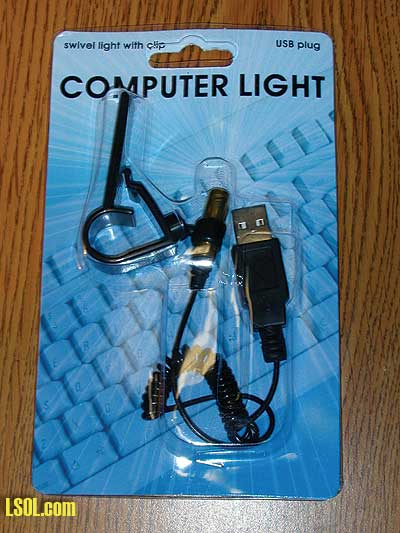
What I found convinced me that I had stumbled on an ideal source for bright white lights for buildings. Not only is the price right but the LED had a number of characteristics that make it easy to use within buildings:
1. The LED is at the end of a coiled cable that can be extended to more than a foot
2. The LED end of the cable has a built-in dropping resistor that limits the amount of current that is drawn by the LED.
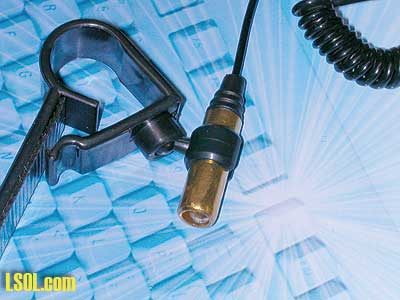
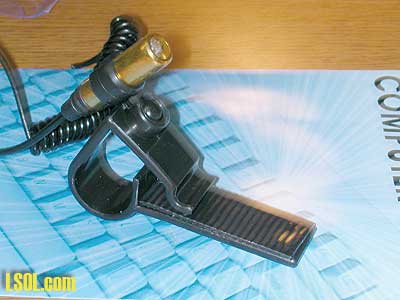
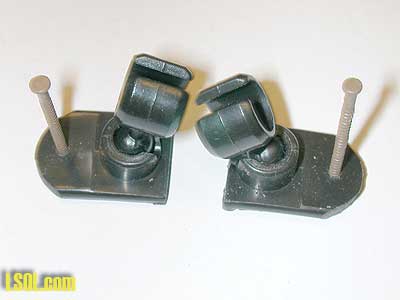
3. The LED itself is mounted in a brass colored, metal cylinder that is attached to a swivel mount. The swivel mount is then attached to a clip that you would snap onto the top of a laptop's screen. The swivel is provided so that the light can be precisely directed onto the keyboard.
I found the lights at several Dollar Tree stores in the Pittsburgh area. Jon DeKeles also found them at a Dollar Tree in Idaho. Hopefully they are available throughout the US. If you would like to give these lights a try on your railway you can learn a bit from my experience and follow these steps:
1. Test the light in a USB port to be sure it is OK. So far all that I have purchased have been good right out of the package.
2. Cut off the USB plug as close to the strain relief as possible.

3. Once the USB plug is off bend the black wire back about 1" from the end and GENTLY cut into it with a razor blade or X-acto knife - the idea is to cut through the black insulation and a thin layer of white insulation without nicking the conductors inside.
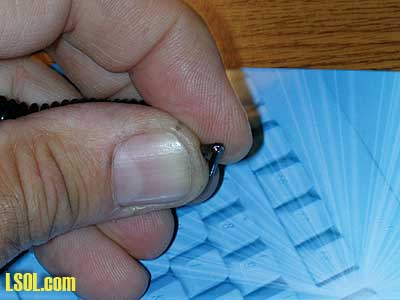
4. Bend the black wire the other way and cut into the back as you did the front: Gently!
5. Using a finger nail or wire strippers pull the 1" of insulation off
6. If you are lucky you will see a bundle of gold and a bundle of red colored strands of wire. If you cut a few that should not be a problem.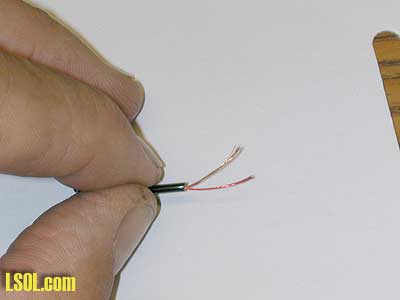
7. Separate the two bundles of strands and twist each set between your fingertips to group them. Make sure there are no reds in the gold bundle or visa versa! If there are it is guaranteed not to work!
8. Notice that there is no separate layer of insulation on the wires. You may wonder why they don't short out inside of the insulation! The gold and red colors on the wires come from varnish that acts as insulation. I remember the first transistor radio I had as a child came with an earphone that used a similar technique. It is also found on the wire used to make motors, electromagnets and such. The good news is that you don't have to manually scrape or sand it off as you do on some magnet wire!
9. Heat up a soldering iron and place a large blob of liquid solder on the tip. Dip the end of one of the bundles of wire into the solder until it binds to them. Repeat with the other bundle.

10. Since there is an internal dropping resistor on the LED you can simply touch the wires to a 9 volt battery to test. CAREFUL HERE! The worldwide standard for the color to indicate the positive wire in a circuit is to color it red. The folks who designed and built these lights switched things around. Touch the solder-tinned end of the RED bundle of wires to the negative terminal on the battery and the gold end to the positive. The LED should light nicely.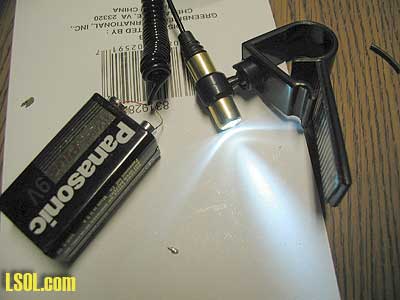
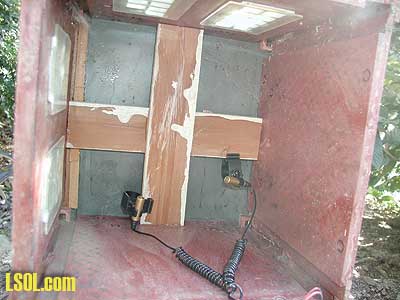
Mounting the LEDs
To mount the LEDs in my buildings I used the existing clip that is attached to each one. If I didn't have a convenient attachment point in a building I simply glued a horizontal wooden bar across the center of the building's interior and clipped all of the LEDs to it. The swivel mount made it a snap to direct the beam of the LED at windows and doors.

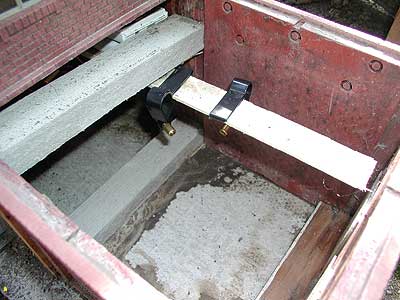
This picture shows another mounting option, using the LED light as a spotlight on the outside of a building. The bicycle hanging over the front door is nicely highlighted by the two LEDs above it. 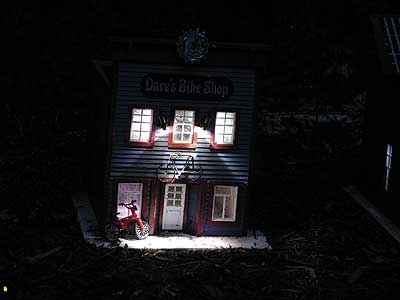
To use this mounting technique just cut away the mounting clip as in the photo. I also drilled a hole in the mount so that a single nail could be used to fasten it to the outside of the building. An 1/8" hole above the mount was used to route the wire through the wall into the interior.
Powering the LEDs The simplest way to power these lights is with batteries. Just wire a few LEDs in parallel (all red wires together and all gold wires together) and connect them to 4 AA cells through a switch and you are in business. Although you could hard wire the lights to a source of 6-12 Volts DC I hate running wire between buildings and digging trenches to bury it. This becomes less of a problem if all of your buildings are in the same area but mine are spread out over the entire 80' width of my back yard! Another option that comes to mind would be to recharge NiCad batteries with track power.
If you connected a bridge rectifier to the two rails and then to your battery pack it would charge the batteries and illuminate the LEDs any time you ran your trains. I haven't experimented with this yet but may give it some time in the future as this option would be a great way to use these LEDs to illuminate rolling stock....
Stay tuned! The use of medium size solar panels to recharge batteries and turn the LEDs on at dusk will be covered in detail in an upcoming article. That is the way I did it and it works very well! Good luck with this project and let me know how it works out for you.
Top of Page