Scratch & Bash
:
How-to's
Simple Train Carrier
May 25, 2005


By John B Pedersen |
Author
Bio
Just what we need. Another carrier for our trains, right? This one is a little different from some I have seen as this can be made simply without too many tools or skills.
|
Just what we need. Another carrier for our trains, right? This one is a little different from some I have seen as this can be made simply without too many tools or skills. I keep a train outside in a covered shed ready to run at any time, but I do like to change rolling stock for variety. I store cars and locos in a shed near the railroad, but you still have to carry them to the tracks. Carrying large engines can be detrimental to their parts at times. I did not want to build wooden ones, too hard to store several of them, so I got to thinking back to when I repaired sewing machines. They are unbalanced and awkward to move and carry as their weight is way off center. My wife made a canvas carry sling that could carry them with ease, so if heavy unbalanced machines could be carried easily why not large scale trains? 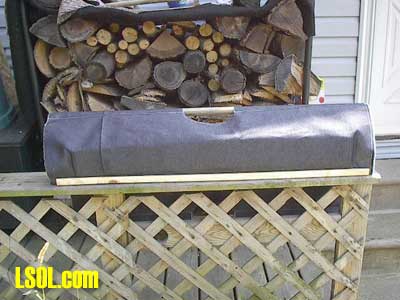
I measured some of my rolling stock for size; I measured my Pacific, and my Bachmann Consolidation to get good over all dimensions. The Pacific and tender, the longest loco I have, coupled together measured at 35". The Connie was shorter but measured larger around so I made a good compromise and came up dimensions that would work for both units. Next was what to use for materials. That was solved at the fabric store, denim was on sale for 50% off, so denim it is. You will also need some 1" foam used for chair cushions, and 1/2" or 3/4" dowels, and some 1 X 6" board for the bottom I made 4 carriers with 60 wide denim, 2--24" wide and 2-36" wide. The basic cut for the material is 24" X 311/2" to 34" depending on how much extra you want for your locos. 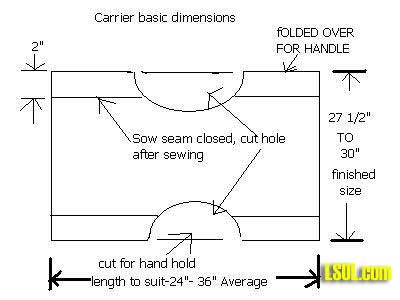
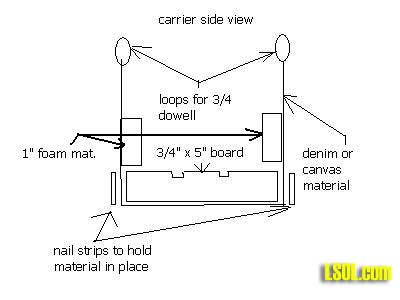
Now to cut and paste (sew) the parts together. I used 36 X 32 as my cut size, and my wife sewed the ends over as shown for the handle pockets. I used 2" turned over for the handles. After sewing we cut out the semi circles for the hand holds where the dowels will be. 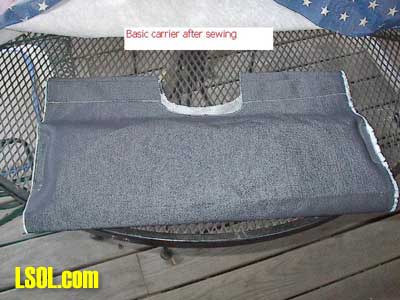 Next I ripped the 1 X 6 down in 2 passes to get to 1 X 5. The 2 thin pieces were to be used as nailers to hold the material from moving. I cut slots in the board for the wheel flanges, but this not needed, but is nice. You can leave the board surface plain or put a small board down that will fit between the wheels, it is your choice. Next I ripped the 1 X 6 down in 2 passes to get to 1 X 5. The 2 thin pieces were to be used as nailers to hold the material from moving. I cut slots in the board for the wheel flanges, but this not needed, but is nice. You can leave the board surface plain or put a small board down that will fit between the wheels, it is your choice.
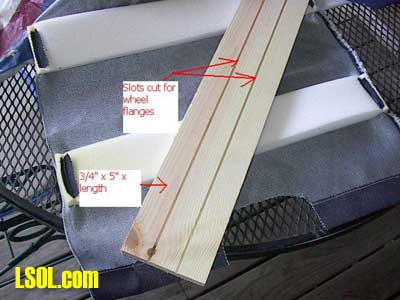
Next cut foam strips any where from 2" to 3" wide by the length of the carrier, and set to the side. Next set the board inside the material and center it. Using the 2 small thin strips from the resizing of the board and nail thru them into the board to hold the material in place. See Basic Dimension 2 Picture. Now sew the foam in place on the side pieces as shown, with the foam starting about 1" above the board. Sew about 1" from the ends only. Let it float the rest of the length. 
Insert the dowels thru the pockets and secure to the fabric. I used a small dab of hot melt glue on the top of one end of each dowel and let it stick to the material; it stays fine and doesn't shift. Now that wasn't so hard was it? I am told you can use glue to glue down the fold for the handles that will eliminate sewing that, but you still need to attach the foam and I don't think I would use glue for that. I can now carry any combination of rolling stock to the tracks easily. 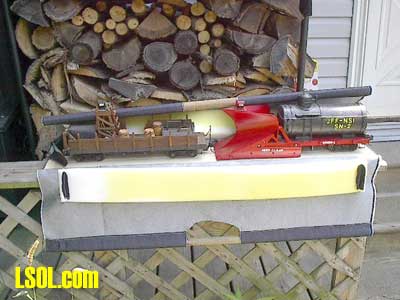
Some advantages of this system are they can be stored in less space, the contents won't shift in them, and you can set them side by side in a car trunk with confidence. Put a Velcro strap around the handle to keep it closed, and a small scrap of the foam under the handles to protect the loco roof. 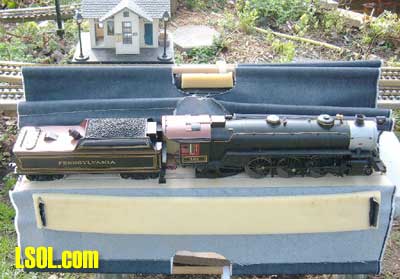 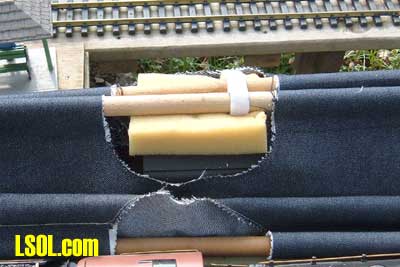
They make transporting your larger locos so easy anyone can do it. 
I simply put the carrier on a section of track and move the loco on to the rails, make sure all wheels are on the track and ready to go. I added a small bevel on one carrier to make it a bit easier to put on the rails, and here again it's your choice. 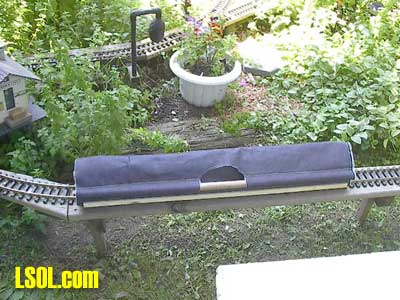
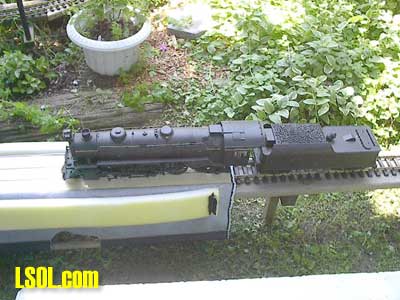
When I said they won't slide around in them look at this picture. 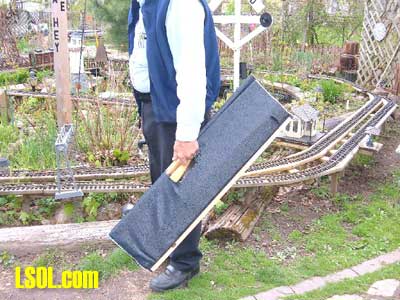
That is my Bachmann Connie setting on a 45 degree angle toward disaster, but it won't fall out. I have done the same with all different size engines and rolling stock with the same confidence. Just remember one thing, Mr. Murphy is always looking over your shoulder, whether or not he gets in front of you is mostly your (and my) choice, and I value my rolling stock so I try to keep him at bay. He did get me plowing snow this year, but no harm done. Happy Railroading, John B Top of Page
|


