Scratch & Bash
:
How-to's
Dry Letter Transfers - A Beginners Attempt
Jul 20, 2012


By Peter De Keles |
Author
Bio
I bought a Dry Letter Transfer kit at Michaels a year ago. After staring at the kit, I decided to open it up and give it a shot. See and read about my results.
|
In response to the Tuesday Topic a few weeks ago, I said I would take a try at Dry Letter Transferring.
I bought a kit at Michaels a year ago. (Grafix Arts Website) It was one of those, "I want to try that" but I never got up the gumption to open the package. I just kept reading the directions over and over. I had to inspire myself by writing a Tuesday Topic that would force me to commit to giving it a try.
Why do I need lettering?
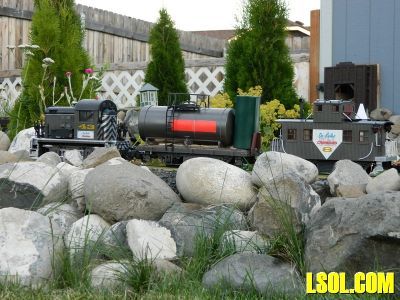
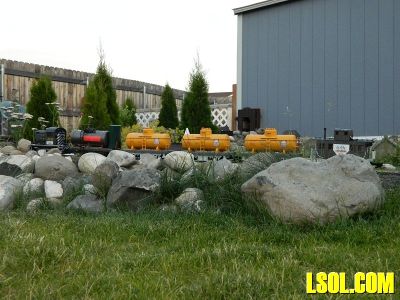
The back story of which trains would get the lettering goes like this. De Keles Chemicals plans on opening a production facility later this year. In preparation of the factory, they have already purchased a work train that will be used to haul their supplies and their customer's tank cars.
All of the equipment is used and was purchased from the Burbank & Kennewick Railroad. The engine and caboose were manufactured by Aristo-Craft. The tank car, which still needs lettering was kit bashed from using LGB and Aristo-Craft parts. A flat car is currently being kit bashed also.
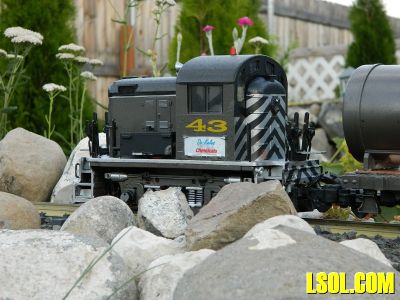
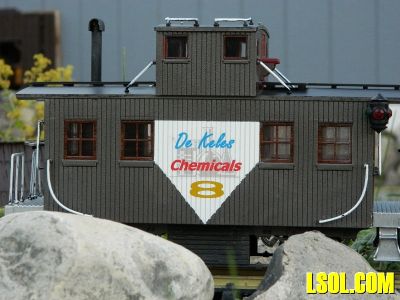
The De Keles Chemicals train is painted in "Hammered Gray". White boxes were painted on the engine and a convex pentagon was painted on the caboose so the lettering would show up better. This was an afterthought when I realized the lettering would blend in with the paint too much.
Creating a Design
The first step is to create what you want to transfer. In my case it was designing a logo that I could use on any equipment or buildings that would be owned by De Keles Chemicals.
Designing something can be as simple as words in a document or as creative as you want in a drawing program. When designing, I find it best to work big. If you need a 2"x2" logo. Design it at 8"x8", and then print it out at a reduced size. You will like the results much better.
As you design, you need to keep in mind that when your file prints, it will print as a reverse image. To grasp the concept, draw some lines and letters on a piece of paper and then look through the paper from the back. All lettering will be reversed.
Once I had my logo completed I saved it as a .jpg file. This will allow you to open it in any editor. Also make multiple copies of the file. You always want to have an original file. Edit and work with copies!
When you print your design it needs to be a reverse image of what you created. If your design software doesn't allow you to flip or reverse your file, open your working copy file in Paint, it's on all Window platforms; If there isn't any lettering in your file you don't have to reverse the picture.
From the Home menu it's --->Rotate, --->Flip Horizontal. Many modern printers have a "Print Reverse" option.
Test Printing
With your design complete, print out a test copy. I print test copies in black and white and at low resolution. I cut out the logo out and place it on the model to see how it fits and looks. I then make final size adjustments and print a final color copy on regular paper. If that looks good it's time to load the Transfer Paper
Final Printing
Each sheet is 8 1/2" x 11". To save paper, design as many logos as you need and print them all at the same time. Fit as many as you can onto one piece of paper. If you are only making one logo, place it in the top corner of your document to save paper.
Your printer options should be set to "High" resolution and "Photo Paper". The paper you will print on has shiny side and a dull side. "Print on the Dull" (Matte) side.
My printer has a paper feed from the tray and one from the rear. Using the rear feed, I know to put the "Dull" (Matte) side up. If you're unsure how your printer feeds, mark one side of a piece of paper, put it in the feeder you want to use and see if the printer flips it or if it sends it straight through when you print something. Load your Transfer Paper accordingly.
After the logos print, set the paper aside so it can dry. I let it dry overnight. The instructions don't say you have to let it dry, it just made sense.
Applying the clear adhesive is next. You want to cut out a piece that will cover all of the logos that you printed out. With the white liner of the adhesive facing up, peel away the white liner and apply the clear film, Sticky Side Down, onto your design.
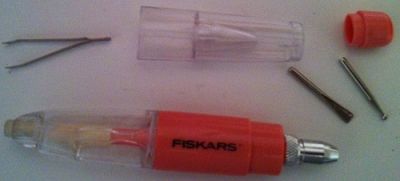
Now you will burnish (rub) the clear adhesive so it adheres to your design. You can use the Popsicle stick that comes with the kit. I use a burnishing tool that has multiple ends. Take your time, rub gently and then rub a little more.
You can now cut out each logo. Cut as close to the design as possible to avoid having too much clear film visible.
This next part is where I made my first mistake. I peeled the backing incorrectly.
Holding the logo facing you, gently bend a small piece of one of the corners. You want to peel the very thin backing that is the last layer of the logo, as it faces you. After you peel this away, the back of the logo will be ready to apply to your model.
I used a very clean (new) #11 Xacto blade and placed a tiny portion of the logo on the tip of the blade. I then CAREFULLY placed the logo in position on the model.
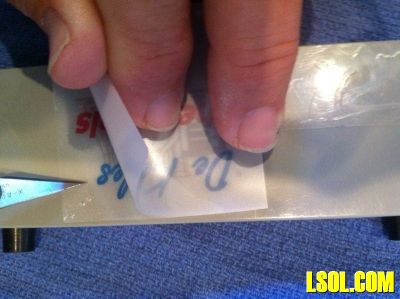
You now get to burnish again. Again, slow and steady wins the race. As you burnish you will see the logo dull as it transfers to the model. Using the Xacto knife you can now lift off the shiny side of the transfer paper that is covering your logo.
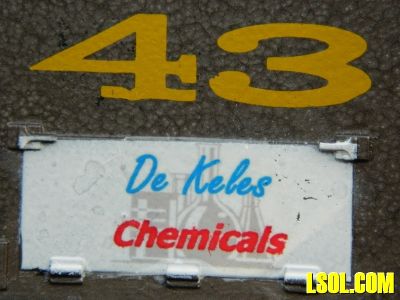
Macro Closeup
Macro Closeup
I haven't applied anything to the top of my logos yet. I was going to see how they do without anything applied to protect them. My train yard is inside, so they are only subjected to the elements when they run. If you have a suggestion as what to use to protect them let us know.
"?
| Dry Transfer How To |
| Sure looks like a neat product. I can see a lot of posibilities for this product. Nice chemical train by the way. |
| Joe Fotschky - 07/20/2012 - 13:47 |
| decals |
| I really like what was shown here .... very precise and informational... A very nice , NEAT JOB too. I hope this withstands the weather and time... Would be a shame to lose this .... Congrats ... CTK |
| carl kokes - 07/20/2012 - 14:59 |
| decals |
| Great article. You did a terrific job on these. Like the shadow effect in the background. Very well done. Gary |
| gary - 07/21/2012 - 06:17 |
| Comments |
| Hi Peter, So nice you were able to accomplish this and it inspired you to let us ALL know how it can be done. It looks a little tricky, but I love the fact that YOU learned to put a painted motif down first. Neat to know that... Sealing will be another matter, maybe someone has experience and can let us know. That was always my main concern: keeping the hard work intact. Our weather is tough on most things, so we always have to think ahead. Great job... Elaine |
| Elaine Haggenbottom - 07/21/2012 - 08:29 |
Top of Page
|