Scratch & Bash
:
How-to's
$5 Projects - Turnout Control
Jan 18, 2013
By Peter De Keles
Author
Bio
This $5 project will show how I used a power door lock, designed for your car, for turnout control.
I'm sure we all look at every little item we see a little differently than most people. We have to be a little more creative than other train hobbyists. We just can't bust out the Walther's catalog and order what we need.
So, every item we run across has the potential to end up on our railroad. This $5 project will show how I used a power door lock for turnout control.
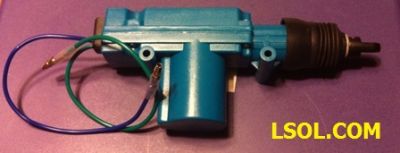
I was looking for a more cost efficient way of controlling turnouts. I had a couple of power door locks I found at a garage sale. So I started to play with them to see if I could use them on my railroad. The mechanism is a standard two wire automobile, power, door lock. They can be found at various stores on the Internet. They range from a couple of dollars to about $10. Here are a few places you can price shop.
You will also need a DPDT Momentary switch to control the mechanism. Ebay, Radio Shack, All Electronics or your junk drawer are good places to look. I have purchased from All Electronics before and can recommend them. Caveat emptor on the others.
Since last month's project was less than $5.00, we have a little extra for this month. The door lock and switch should run about $7.00. My 18 years in aerospace has served me well. I knew I had to run a proof of concept test before I could move into the Testing and Production phase.
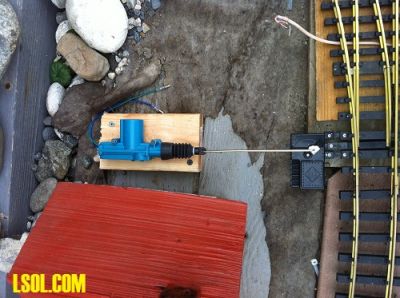
I mounted the motor to a piece of wood and applied power to it to see exactly what type of movement I had. My initial idea of connecting it directly to the turnout proved flawed since the once the motor "threw" in one direction it returned to a neutral position. I was looking for positive pressure to hold the turnout in position.
My next idea was to use the manual turnout control supplied with the Aristocraft turnout. It would provide the needed holding position and the return to neutral of the motor did not have enough power to move the manual control. You can see my official Proof of Concept testing in this video.
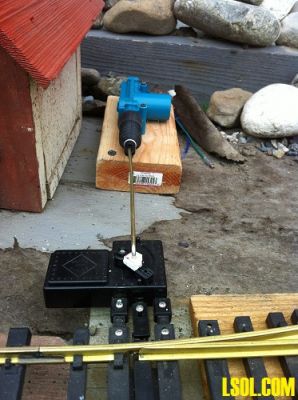
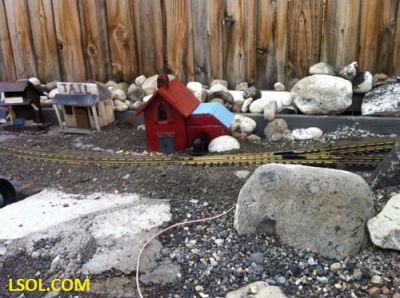
So I set out to install one on my layout. I have multiple turnouts on my layout but only one is outside on the mainline, so it became the victim. To strengthen the manual turnout control, I added some styrene to the top of the "finger" of the turnout control.
A 1/8" hole was drilled to accept the brass rod from the door motor. I found in my testing that the system worked more efficiently if the brass rod was inserted closer to the hub than the end of the "finger". The motor was attached to a piece of wood. The motor was mounted so the brass rod movement was as level and straight as possible. You need to avoid any binding since the door actuator motor will win out over the plastic, manual turnout machine.
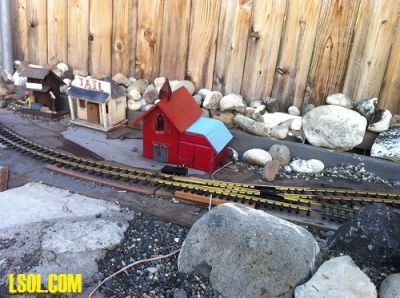
I built a 3 sided shed out of scrap wood to protect the motor and placed it next to the sanctuary.
I couldn't leave well enough alone so I added some PVC and made a pump house.
Power required for operation is 12 volts. I use PC power supplies for 5 volts and 12 volts accessories. I also have a 12 volt car battery system to run lights. You could also use a train transformer that has 12 volts constant output or use the variable output.
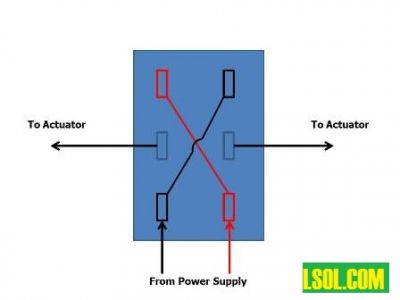
I used my car battery system for the 12 volts. That way I didn't have to fire up any of the PC power supplies just to throw the turnout. Wiring the DPDT switch is very straight forward. Power is attached to the either pair of the end posts. You then cross wire the other pair of end posts from the power end posts. The two middle posts are wired to the actuator.
When you push the toggle switch one way it sends Plus/Minus power to the actuator. Moving the toggle switch the other way sends Minus/Plus power to the actuator.
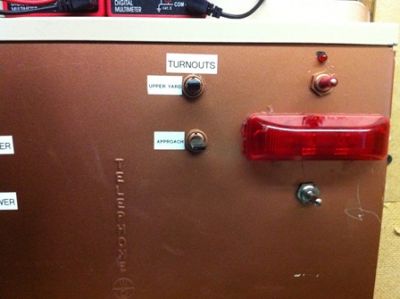
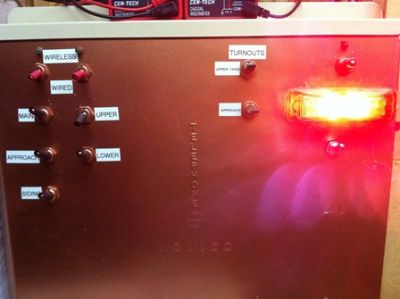
I attached the toggle switch to my panel and labeled it, so I would remember which way to throw it and why it was there. I have a nice, big, red LED that shows the battery system is on.
Now I'm able to control the turnout from my shed. It has made the operation of my railroad much easier and more realistic.
Clever!!
Very clever, Peter. I like the way you hid the unit and have it away from the track. With the ballast you used, the original switch machine doesn't look bad next to the track, but if someone wanted to they could put the switch machine in the building and link to the switch with piano wire. It looks like Amazon has those actuators for $4.75, so even with shipping the cost would be reasonable.
Bill Ness - 01/18/2013 - 11:07
Switch machines from lock motors
So if this is so simple with an after market replacement part, why don't the track manufacturers just adapt these little lockset devices and include them installed on their track? Even Lionel in the olden days sold accessories and track items 'ready to run.'
Mike Evans - 01/18/2013 - 14:34
door lock switch
when you show the DPDT wired, is that what you are referring to the " actuator" ??
carl kokes - 01/19/2013 - 08:55
door lock
when you show the wired DPDT switch, and refer to the " actuator" - is that the door lock ??
carl kokes - 01/19/2013 - 08:56
Yes
Carl, Yes
The middle posts go to the two wires on the door lock