Scratch & Bash
:
Engines / Rolling Stock
The Largest Tank Car Ever Built
Feb 16, 2011


By Steve Seidensticker |
Author
Bio
This is the story of how I build a #1 scale model of GATX 96500, the largest tank car ever built.
|
This is the story of how I build a #1 scale model of GATX 96500, the largest tank car ever built. Back in my N-scale days I had a model of this car. It was impressive. I thought it would be just as impressive on my wife's and my garden railroad, the Gopher Canyon Line (December 97 Garden Railways). This is not intended to be a how-to-do-it article, but some of the techniques may be useful to you on similar projects. As you can see from the following builder's photo, it is a monster. 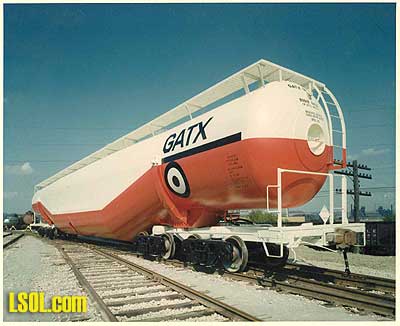 Here is a picture of the finished model from about the same angle. I can't stand fresh-from-the-paint-shop models so I had a friend, Jim Bence, do some "light weathering." 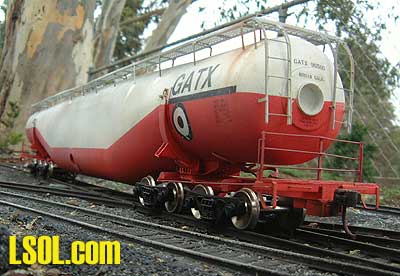 Side view of the original followed by the model. 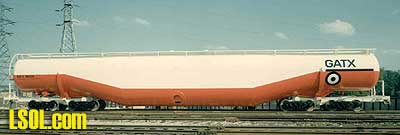 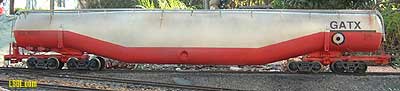 Although I have a fair amount of experience detailing models, building structures, laying track, etc., I had never attempted to scratch build a car. The N-Scale model of the car did not have a lot of detail and looked doable for someone with limited skills.
Note from Jo Anne:
Here is a picture our son Bryan (age 10 - 2004) standing in front of the real thing at The Museum of Transportation in St Louis, MO.
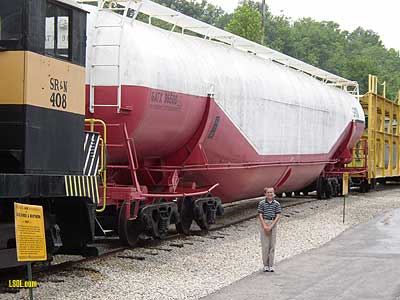 The "Whale" The "Whale" The "Whale" is the world"s largest tank car, 96 feet long and it holds 63,000 gallons.
I tried to do some research on the prototype. I could not find anything on the Internet. But one night on the LSOL chat room someone mentioned that the prototype was at the St. Louis Museum of Transportation. Sure enough. I checked their web site and there it was. The web site also contained a brief write up. What surprised me was that only one car of that design/size was ever built. It was built to haul LNG (Liquified Natural Gas) in 1965 for GATX, a company that leases tank cars to railroads, shippers, or companies that deal with bulk liquids. At 60,000 gallons is was the largest tank car ever. UTLX, a similar company, had a similar but slightly smaller car built for it in 1963. It also ended up being one-of-a-kind. I have never found a reasonable explanation why these cars were not commercially successful. If anyone has any information on why there were only one of each built, I would like to hear about it. I contacted Ron Goldfeder of the St. Louis MOT staff to get more information. He sent some builders plans that they had and the builders photos. He also offered to take some detailed pictures of the prototype to help in the modeling. It took awhile to get the pictures, but when they arrived in January I understood the delay. Many of the pictures showed icicles hanging from various parts of the car. Although I was born and raised in Wisconsin, 40 years in San Diego has led me to forget how unpleasant winter weather can be. The plans and pictures that he sent were invaluable and much appreciated. From both the builder photos and the detail photos that Ron took it became obvious that significant modifications had been made during the car's life. Additional ladders had been added to the ends and jack pads had been added to the yokes that support the tank. I ended up modeling the configuration as it is in the museum.
As often happens when I start a project ambitions started running away with me. I started dreaming of a fleet of such cars. Then the thought of creating kits of the car and selling them also started dancing in my head. I had monkeyed with making molds and casting parts several years ago and decided that this was the way to go on this project. The molding and casting process turned out to be much more complicated than I had envisioned. I learned a lot in building this first car, but need to learn more before making additional copies. Making masters of the parts was not the problem. I generally had to make two or three moulds before one came out that was usable. I generally had to throw away the first five or six cast parts before they came out well. Voids and bubbles are the main problems. I am getting better at both processes, but it is still tricky to get things just right. The tank is made up of five sections. The two end sections are perfect cylinders. The center section has an oval cross section. The other two sections are just the transition from the cylinder to the oval. Because the tank sections are symmetrical I was able to construct a mold for each different section out of styrene. I made a simple plug to set in the center of the mould. The wall section of the tank is about .25" thick. 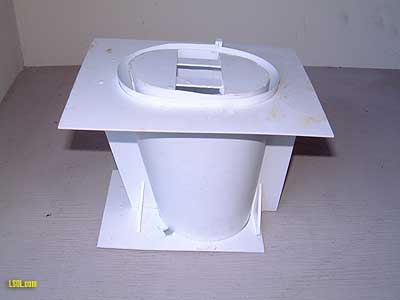 The biggest problem I had making the casting with this arrangement was sealing the bottom of the mold. I tried several sealing methods including tape and modeling clay. As the picture shows, these methods were not successful. I finally solved the problem by mixing a small amount of the casting resin, pouring it into the mold, letting it leak out, and then set. The set plastic then acted as a seal while I poured in the main mixture. 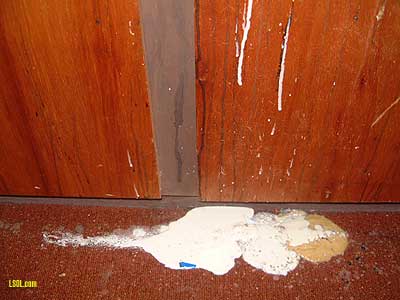 The tank sections are made using a urethane casting material called SilCast. Smaller parts were made with the CR-900 high strength casting resin from Micromark. The latter product has the advantage of a very slow setting time. After each section had been cast I simply epoxyed them together. A friend turned the ends on a lathe from hardwood. With a couple coats of sanding sealer these became good masters to mold the final end caps. The following pictures show the different sections as well as some dark filler to hide some imperfections that crept in. The brown section was cast with another brand of resin.
 One of the key components are called span bolsters. These are the structures to which the trucks are attached and they are attached to the tank. Each of the trucks pivot under their span bolster and each of the span bolsters pivot under the tank. Although the car is quite long (39") this pivot arrangement allows the car to go through curves that are quite sharp. The following picture shows the master span bolster and the RTV mold made from it. 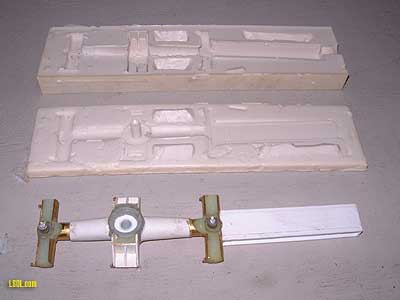 Couplers, grab irons, platform, and some of the air brake plumbing are then attached to the span bolster. This was all done with brass rods of various sizes, brass bar stock, and styrene shapes. The grating is molded from an Aristocraft see through roof walk. Couplers are Kadee 1789's. 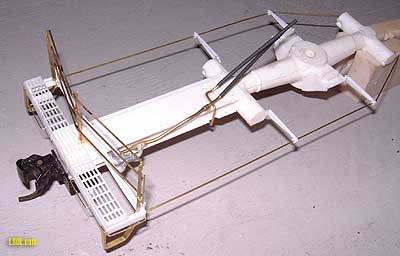 Although there was little detail on the N-scale model there is plenty on the prototype. And when modeling in #1 scale one cannot ignore it. Because it is a tank car most of the brake components are clearly visible, not hidden under the floor. Plus there are two brake systems. The control valves and reservoirs came from Bob Uniack who kindly gave me some leftover from his days of kiting and selling #1 reefers. The brake cylinders are part of the trucks on the prototype so there are no brake beams or rods on the bottom. On the reference photos the plumbing was just a mass of pipes and hoses. Having read a bit about air brake systems I knew what had to be connected to what. With that in mind I built the model air brake plumbing in the following picture. It looks good but I have no idea how close it is to the prototype. 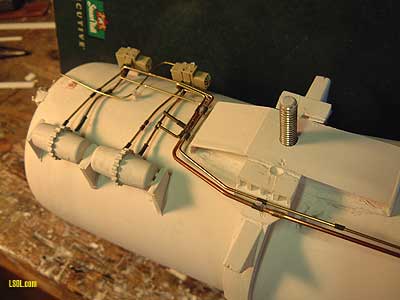
The bolt sticking out the bottom is what the span bolster pivots on. One of the major problems turned out to be the trucks/wheels. The prototype's plans call for 33" wheels on roller bearing trucks. However stenciling on the prototype says it has 36" wheels. I started hunting for #1 scale trucks and decided that I would accept either size wheels. I also was looking for rotating bearing caps on the ends of the axles. That looks so cool, particularly on tank cars where they are so visible. Aristocraft made a good looking truck and wheel set, but at 1:29 scale they were way to large for the model. After looking through every source that I knew I settled on trucks from MTH, which had just come out with a #1 scale line of cars. The truck frames were the correct size but the bearing caps were very oversize and they did not rotate. I ground off the bearing cap detail, drilled the axle hole clear through the frame, and inserted Aristocraft wheels through the holes. I then put Aristocraft bearing caps on the ends of the axles. The result looked good. But as soon as the truck/wheel set problem was solved I met James Catlin of Wasatch Models at the Queen Mary show. He had the trucks/wheels I had been looking for. They were elegant, so that is now what the car rides on. They also came with Gary Raymond wheels, a big asset when looking for scale accuracy. Another problem was the roof walks that completely encircle the top of the car. I tried casting just the fine mesh of Aristocraft roof walks. No matter what I tried I could not get a decent yield of usable parts. I finally compromised by using four whole roof walks straight from the Aristocraft parts department.
Anyway after about five months I got the whole car assembled. This is what it looked like before painting.  I don't like airbrushing so my friend Jim Bence agreed to do the painting if I did the masking. The decals are simple. I created them using Canvas on my Macintosh and printed them on a laser printer. The result is below. 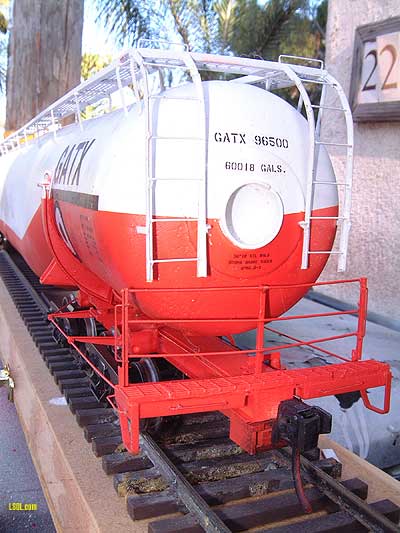 I hope you enjoyed this article and I hope you learned something from it. If you want to try building this car, or something similar I will be happy to provide any help that I can. Click the TalkBack link on the right side of this page.
| Tank car |
| Steve, Nice job!! WOW! A very interesting article and great real looking model. |
| Gary Condry - 02/16/2011 - 08:14 |
| The "Whale" |
| Steve, That was a big project and you pulled it off very nicely. Your methods are interesting and it is a great looking and unique model. |
| Bill Ness - 02/17/2011 - 17:05 |
| The "Whale" |
| A very unique tanker and you did an excellent job of constructiong a very detailed model. Your modeling skills are first rate. Enjoyed your article. Thanks for sharing. |
| JD Miller - 02/17/2011 - 21:47 |
| The "Whale" |
| Steve, what is the minimum radius this tank car will take? Looks very good and would be interesting in a train consist. |
| Ron Hill - 03/08/2011 - 10:29 |
Top of Page
|


