As delivered the LGB Genesis diesel locomotive is not equipped with a smoke unit. The Genny could use some smoke to add additional visual interest. A readily available unit, realistically priced, that produces a good volume of smoke is Aristo-Craft's ART 29311 fan driven model. This unit has been a favorite of modelers for installation in a number of non Aristo-Craft locomotives. Potential ease of installation make the Aristo-Craft unit a good candidate for adding smoke to the Genesis.
INSTALLATION
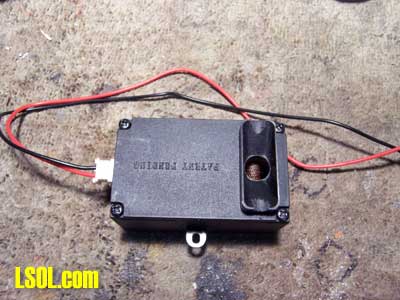
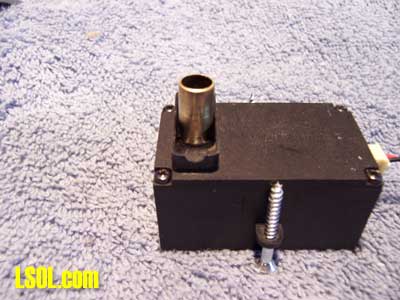
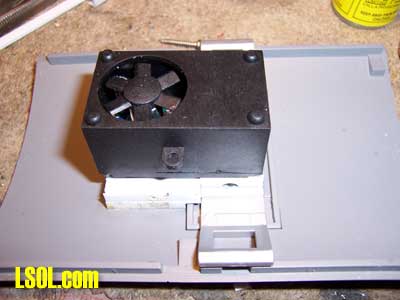
For those not familiar with the Aristo ART29311 the unit is pictured above. This smoke unit has a fan that insures a good volume of smoke. The unit is compact while having a more than adequate smoke fluid reservoir.
Note that in this picture the fill area shoulders of the unit has been notched on each side. These notches are necessary to allow the smoke exhaust port to clear two small screws that attach the piece that snaps in place to hold roof panel. It is important that the smoke unit exhaust port fit tight against its mounting surface.
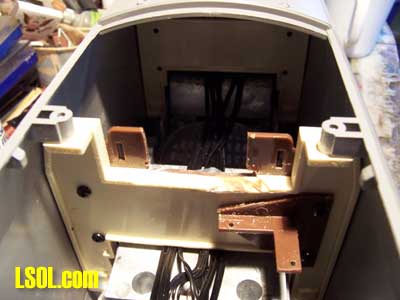
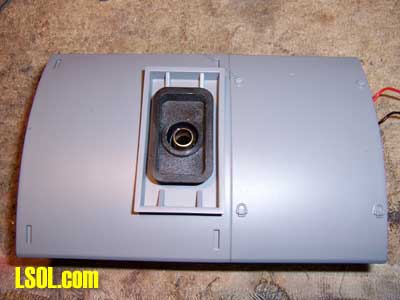
CHECK FIT AND ALIGN SMOKE UNIT I started the installation by test fitting the smoke unit to the Genesis roof panel that contains the exhaust stack.
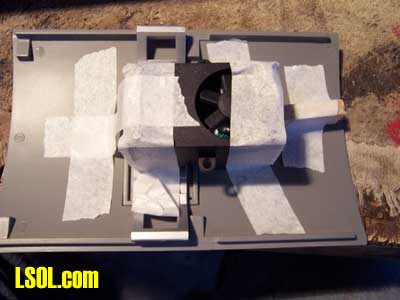
The smoke unit was put in place and held with tape in order to check its fit. The unit will set partially down in a bulkhead so it is necessary to carefully align the unit centered on the roof panel. The hole in the smoke unit used for filling and where smoke exists the unit must be exactly aligned with the exhaust stack on the roof panel.
Mark the outline of the smoke unit on the roof panel. Use this outline marking to insure the smoke unit will be centered after a filler is added that will support and position the smoke unit.
PREPARE BULKHEAD
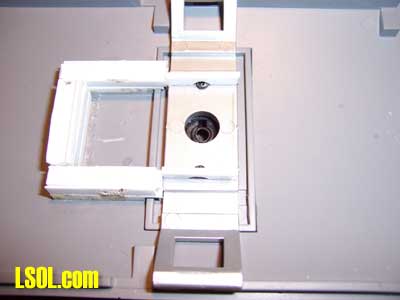
The brown filler panel, screwed to the bulkhead, must be cut in order to accommodate the smoke unit. The panel should be cut with the opening exactly centered in the panel. The width of the cut should be 1 3/16" wide and 5/8" deep. Cutting this size opening will require a slight cut into the bulkhead to obtain the necessary depth for the smoke unit.
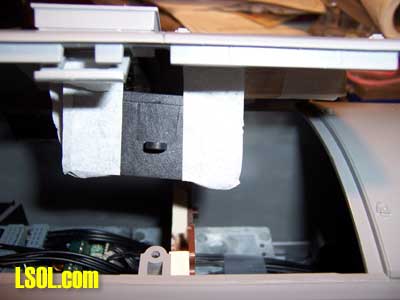
Above is a closer view of the opening required at the bulkhead to accept the smoke unit while allowing it and the roof panel to snap in place on the locomotive roof. Ideally the opening cut in the bulkhead filler will just meet the bottom of the smoke unit case. Cutting the bulkhead filler to this exact size will help support the smoke unit when it is place.
BASE TO SUPPORT/SECURE SMOKE UNIT The base to support the smoke unit was constructed using Plastruct. I could not easily find MEC industrial solvent so Tenax-7R plastic weld solvent was used. The Tenax-7R works well with the plastic that LGB uses for their models.
The base was constructed to align the smoke unit with the exhaust port opening and to keep the unit level. Note that in the area of the exhaust port opening, on each side there is a small screw that attaches a silver colored plastic piece that serves to hold the roof hatch in place. The filler piece on each side must be notched to clear the screw. When the filler is complete it should allow the smoke unit exhaust port to set flat against the silver plastic piece that contains the opening for the locomotives exhaust.
SMOKE TUBE EXTENSION

It will be necessary to construct a smoke tube extension. The tube extension is made of brass. Without this smoke tube extension smoke will "leak" from around the interface of the smoke unit with the exhaust port on the roof hatch. The smoke tube extension uses 5/16" OD brass tube. A piece of 9/32" OD tube is placed into the 5/16" tube and soldered.
Purpose of this smaller ID tube is to slide into the smoke unit opening. When soldering the 9/32" piece in place make certain it does not extend down into the smoke unit to come in contact with the wick element. Pushing the tube too far in to the smoke unit will damage the wick assembly. This extension centers the tube in the smoke unit.
Pictured above is the smoke tube extension placed in the smoke unit opening. When constructing the smoke tube place it in the smoke unit, put smoke unit in place, then cut the tube length so it is just short of the top edge of the diesel's smoke stack.
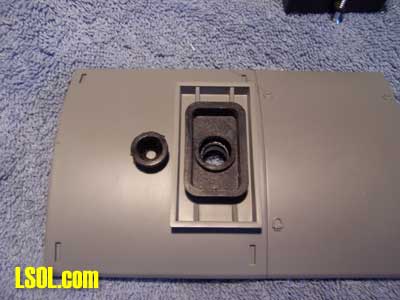
In order to accommodate brass smoke tube extension the exhaust stack filler must be removed. Pictured above is the stack filler removed and placed next to the smoke stack housing. This filler is easily removed by pushing the filler out from the bottom side. Removing this filler will open up the smoke stack for the tube.
View of the smoke tube extension centered in the diesel's smoke stack.
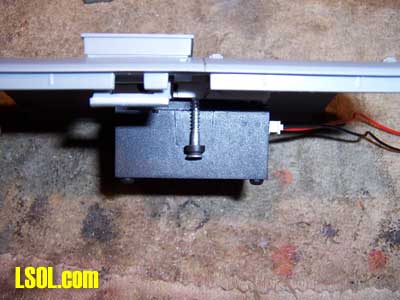
Side view of smoke unit mounted in place.
ATTACH THE SMOKE UNIT
The smoke unit is attached to the base with a screw on each side. There are mounting tabs molded to the smoke unit that will hold the unit tight against the base and in the area of the smoke exhaust port opening.
MAKING SMOKE
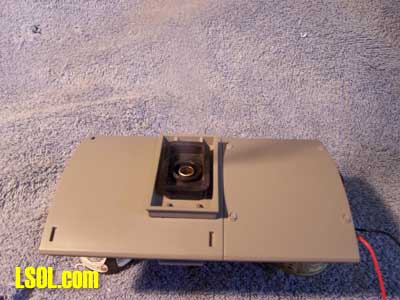
Bench test of smoke unit. In this picture the smoke is a little difficult to see against the blue background.
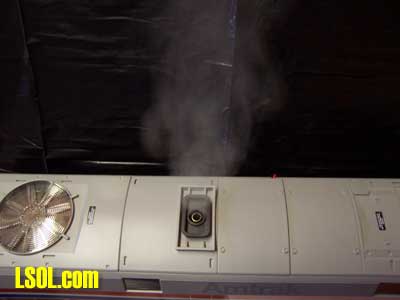
A better view of the smoke unit in operation. The volume of smoke is actually a little greater than could be picked up in this picture.
POWER
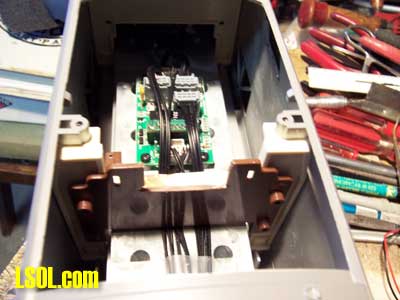
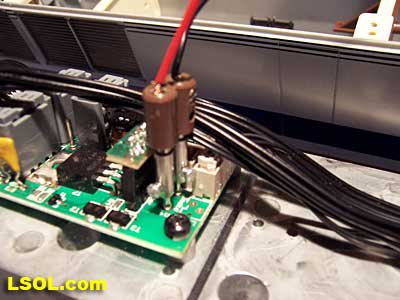
Power for the smoke unit is picked up at the circuit board. There are two pins on the circuit board marked smoke. Use these pins to power the Aristo-Craft smoke unit.
I did not have a LGB plug to connect the unit. Two bullet type plugs that I had in a stock of electrical parts were used. The picture below shows the location on the circuit board of connection points and the plugs used.
You may also want to put a single pole single throw switch in one leg of the wires feeding the smoke unit. There is plenty of space for one.
Or, to turn the unit off the other option is to lift the top hatch and unplug the feed wire from the smoke unit. Either way it's a good idea to be able to turn the unit off when you don't want smoke.
OBSERVATIONS Pro: The unit is easy to install with a minimum of tools. This smoke unit has demonstrated the capability to produce more than adequate volumes of smoke. Cost is reasonable for a unit with of this caliber. Powering the unit was simple. The unit was connected to the electrical out put that is used to supply power to passenger cars and other off board accessories.
Con: As installed in the Genesis the unit produces a higher volume of sound. This could be do to the body shell acting as a sound chamber. I have a feeling that this particular unit is louder than others that I have. Installation of a sound unit would help mask the smoke unit's sound.
Remember, when the installation is accomplished properly where there is smoke there should not necessarily be fire!
Top of Page