Scratch & Bash
:
Engines / Rolling Stock
Build a Large Scale Engine Carrier
Nov 9, 2005


By Bob Gentile |
Author
Bio
Build an Aristo Craft Mallet Carrying Case with Hillman Bridge clamps
|
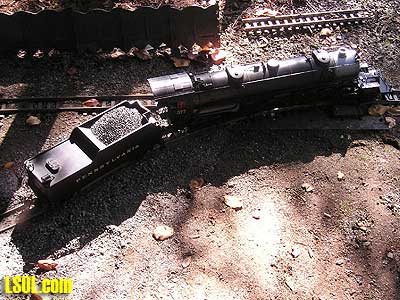
I enjoy modeling in 1/20 scale but after attending the ECLSTS in April 2005 and viewing the Mallet I knew I had to have one. When I returned home and gave it a lot of thought I decided I would like to have one. What helped make my decision was Rick Brown kept sending me photos of his Mallet and he kind of had fun doing it. I made my purchase from LSOL and received it within a few days of ordering it. I opened it and was amazed at how heavy this engine was. I ran it for a few days and realized carrying this in and out to the layout was not going to be something I really wanted to do. I needed to do something to make it easier getting outdoors. I thought a carrying case of some kind would be the ideal thing to have. So off to the drawing board (my head) it was. 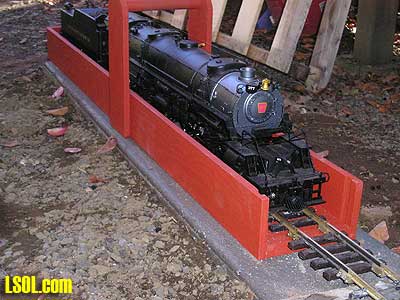
This is a simple project that would take about 4 hours to do. I gathered up the materials available in the workshop. I used one piece of pine and several pieces of plywood. The plywood being 7/16" thick and the pine 3/4" thick.
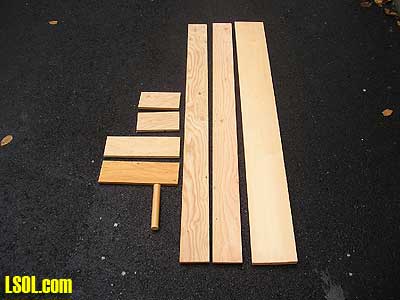
Below is a list of material with the sizes you would need to build one. (1) 47" x 5 3/8" x 3/4" Pine
(2) 47" x 3 1/2" x 7/16" plywood
(1) 6 1/4" x 3 1/2" x 7/16" plywood
(2) 10 3/4" x 3 1/2" x 7/16" plywood
(1) 5 3/4" x 2 3/4" x 7/16" plywood
(1) 15/16" x 7 1/4" Dowel
If you plan on building one try and use the same sizes listed above. I say this because of the sizes and the location of the handle will determine its balance. To be completely honest with you this is my second carrying case. The first one, the location of the handle was off by a half-inch and the case when lifted tipped forward about a half inch and that was not acceptable. I had no idea how to figure the location of the handle so everything was trial and error. My first step was to make a groove on the 2 47 x 3 1/2 inch pieces. I made these grooves a 1/2 inch in from the edge. 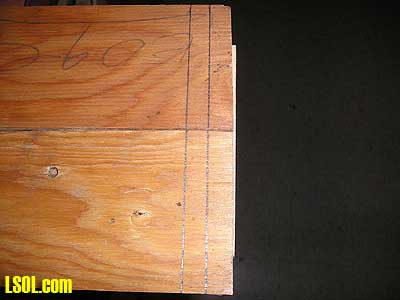
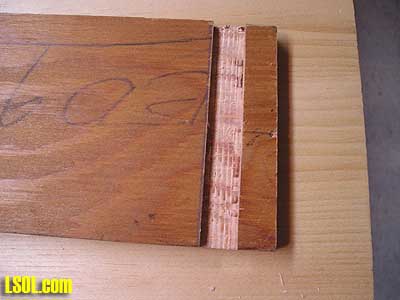 The grooves are 3/16 inch deep. I test fit all the parts before gluing. The grooves are 3/16 inch deep. I test fit all the parts before gluing.
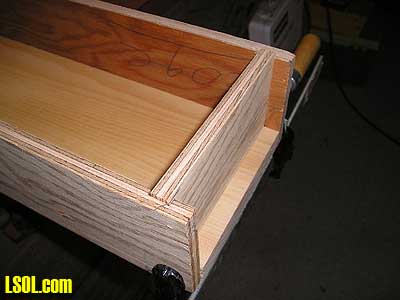 The piece that is 5 1/4 x 2 3/4 is also fitted to make sure it can be taken in and out easily. 
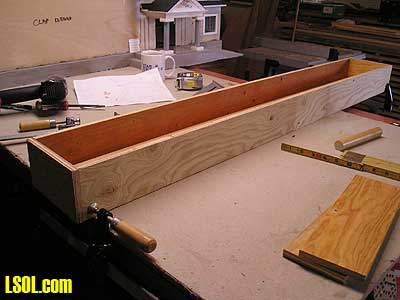
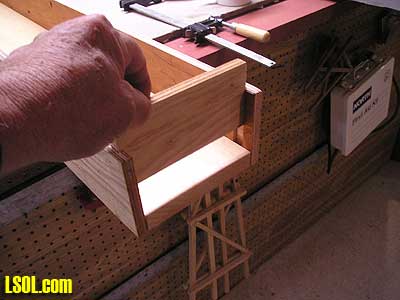
Once I accomplished that it was time to glue the case together. I used a brad gun for the sides
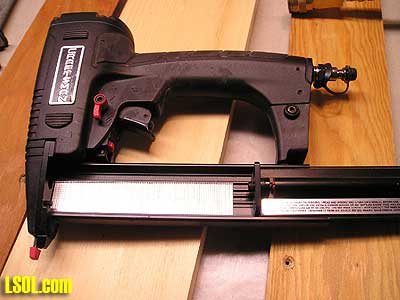 If you don't have a brad gun then you can use 1 1/4 inch screws and 1 inch screws for the handle. We will get to the handle shortly. I glued the sides and back and took a break for a short time while the glue set up. 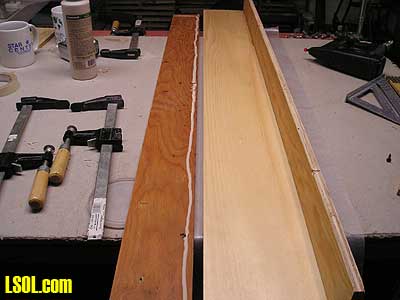
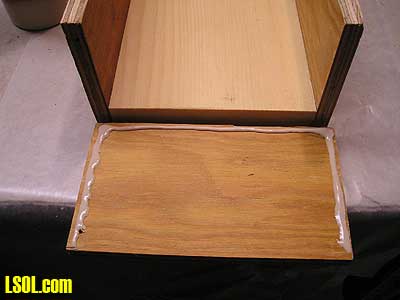
Notice I also did another test fit on the removable front.
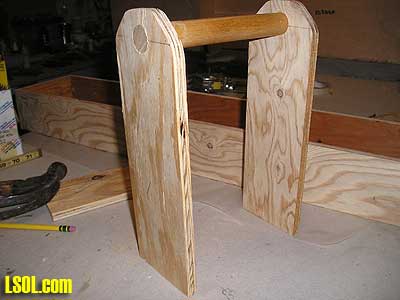
This next step is the handle and it is important to follow these steps if you intend on building one. The 2 parts 10 3/4 x 3 1/2 , I took them and made a mark 1 inch down and made a mark on each side of the line on a 45 degree angle 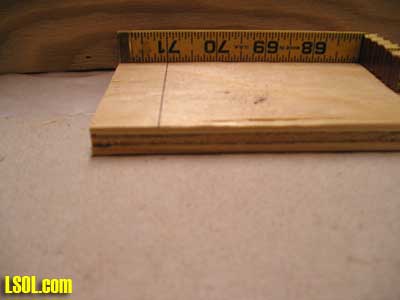
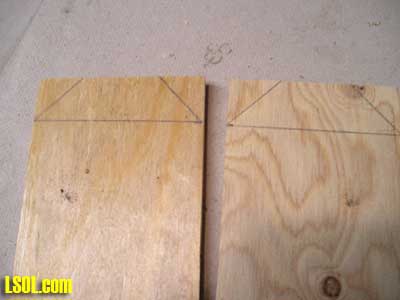
I cut the 45 degree angle on the band saw. Not to have sharp edges on the handle I eased the edges on the sander. 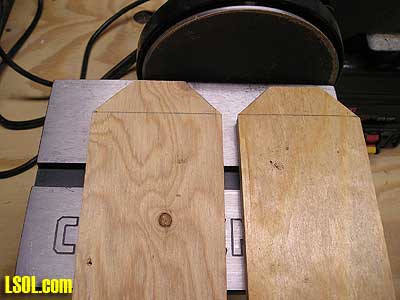
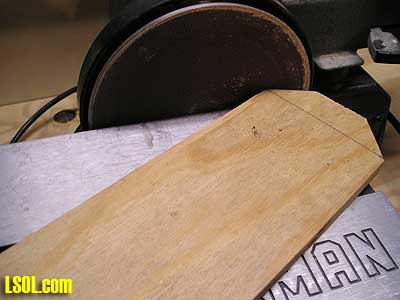
Next mark 1 inch down on the handles 10 3/4 inch pieces and make a center mark in the length and width and drill a hole 15/16 for the dowel. 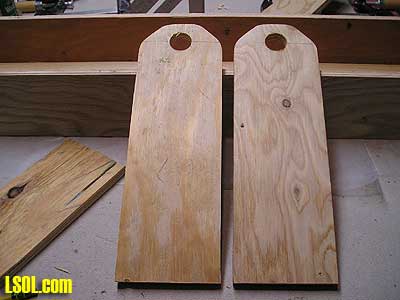
Test fit your dowel. I used 15/16 dowel because I was too lazy to go to the hardware store and purchase one. So I used an old broom handle. Works fine if you have one hanging around.
The next step was to put the handle on the case and this measurement is the critical one. This is going to give you the balance you need when you pick up the case. From the front edge of the case to the back measure 19 13/16, draw a square line and start the handle at that point. Clamp the handle and no glue at this point. Once the handles are square to the case put 2 screws on each side of the handles. 
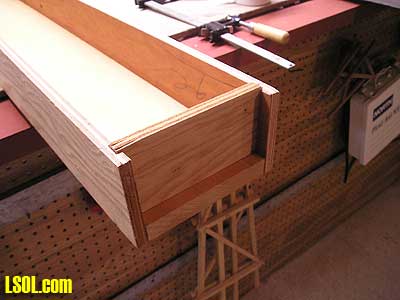
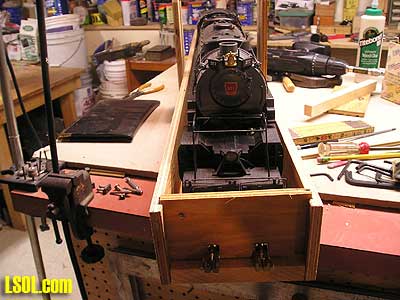
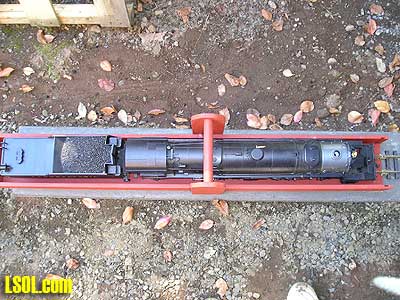
Once this is accomplished I put the track inside the case and used a gauge to center the track. 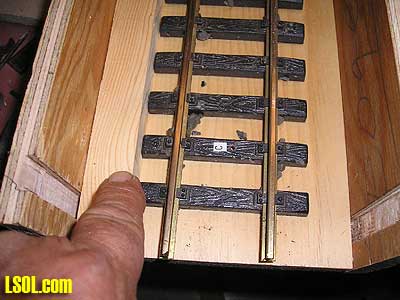
You can put the track in first before the handle procedure, but I got ahead of myself. Well I never claimed to be perfect. Once the track is installed it was time to test the case for balance. I put the Mallet on the track and for some unknown reason it was balanced perfectly. 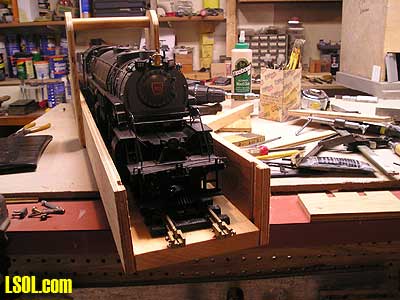
So I removed the Mallet and put the case back on the bench. I removed the handles that had been held by 2 screws on each side and glued the handles in place. I took the front piece that slides in the grooves and notched them so it sits at the bottom of the case and will help keep the engine from falling out in the event of an accident carrying it. 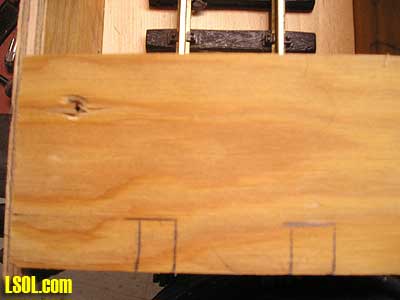

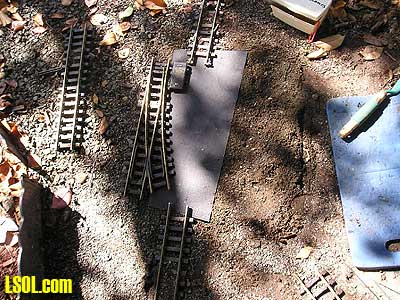
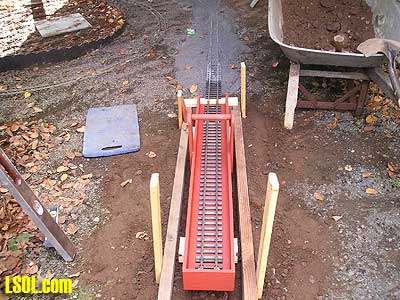
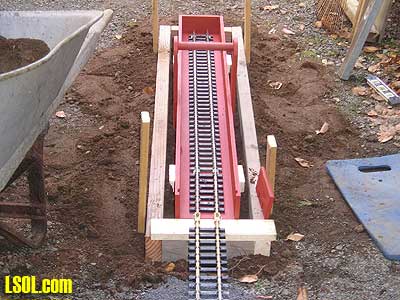
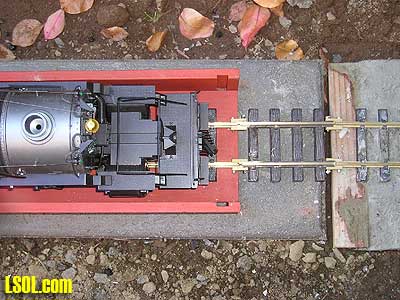
Before going any further I should have mentioned when installing the track be sure the track is right on the edge of the case at the front opening. I will explain the reason for this. My intentions for this case other than making it easier to carry is to set it down near a siding and driving it right off the carrying case. To accomplish this there are several things I need to do. First I installed two Hillman Bridge Clamps #332-010T to the end of the track. 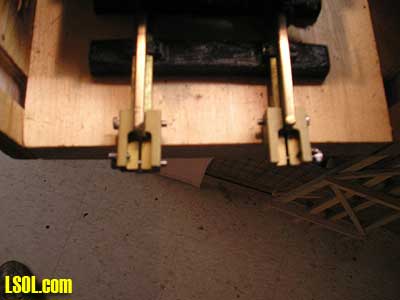
The next step was to snap a piece of track on to the clamps to see how they fit and if any adjustment was needed. Now was the time to do it and not later. There is a little plunger screw on the side of the clamp to adjust if needed. Once you have it so the track snaps in, there is no need to adjust it anymore 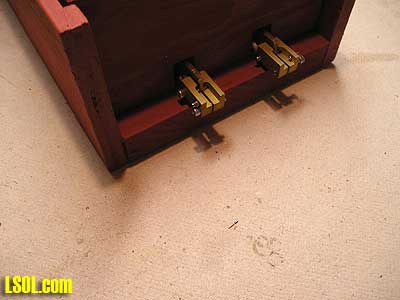
These Hillman Bridge Clamps are great for projects like this and save a great deal of time. My next step was to paint the case and then we will set it up to the siding and give it a test run. 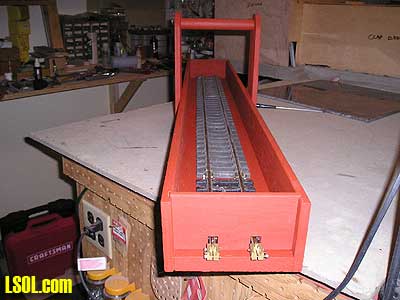

I had to put a turnout off the main line so to have the engine run from the carrying case to the siding and on to the main line without lifting the engine out of the case. 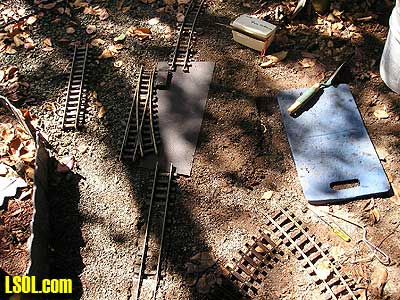
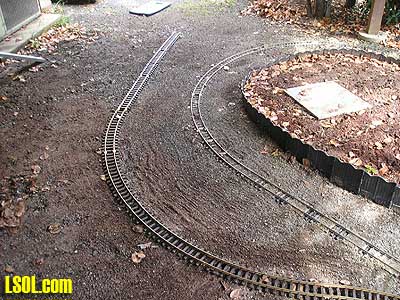
Once I had the siding installed I installed the stone dust. 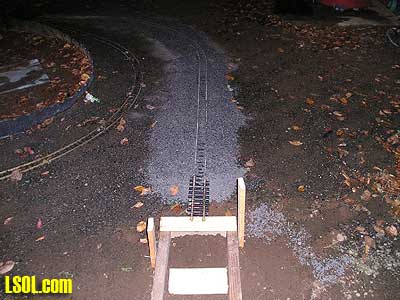
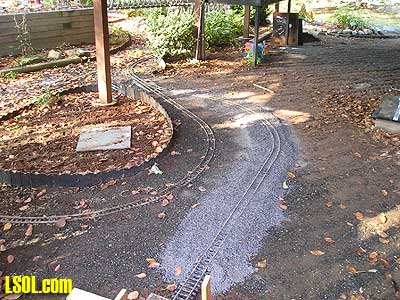
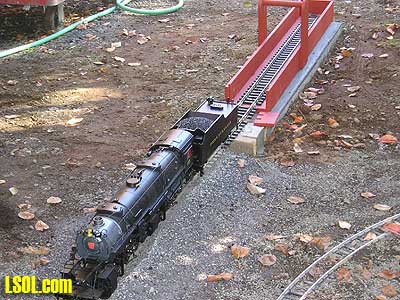
The siding will stop at a concrete pad and on the concrete pad the carrying case will sit on it. 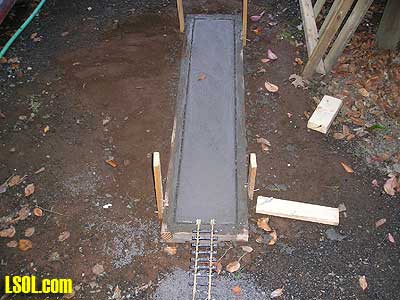
At the end of the siding I installed a set of Hillman bridge clamps. A small piece of track will be set in the bridge clamps on both the siding and the carrying case. I could have eliminated the small piece of track but it would have been too much of an overhang on the carrying case. 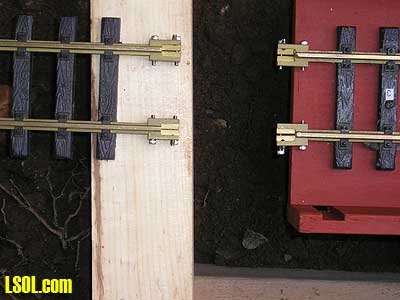
This part of the project I really like to do. Pour concrete, did you know us Italians are attracted to concrete? After 40 years of tile and cement work, concrete pads and cement shoes are my specialty. :-) (Just a little humor here so please don't take any offense.) 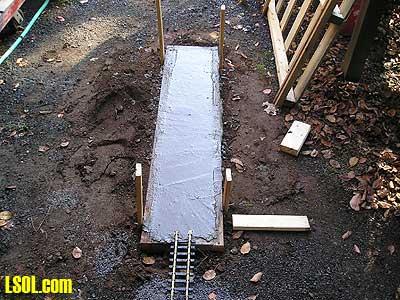
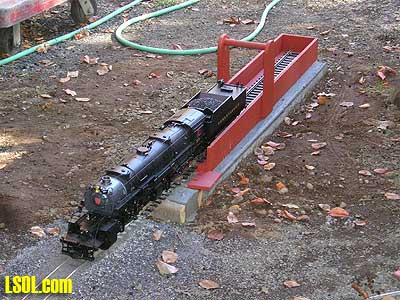
Once the pad is dry it's time to make the connection to the siding and carrying case. This is a nice easy way for the Mallet to get to the main line without handling the engine. I was very pleased at how well it has worked. What really worked well were the Hillman Bridge Clamps. If anyone attempts this project consider the Hillman clamps, you will be very pleased. 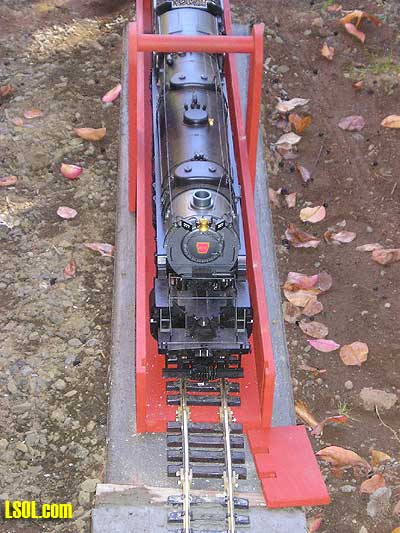
Top of Page
|


