
|

|
Track & Bridges
Hand MadeTrack -- Faster!
Jul 20, 2002


By Michael Mott |
Author
Bio
After reading the current material on spiking rail it seems that the most common tool is the inimitable needle-nose pliers. The problem, the way it seems to me, in using them is twofold:
|
After reading the current material on spiking rail it seems that the most common tool is the inimitable needle-nose pliers. The problem, the way it seems to me, in using them is twofold:
- Having to grip the pliers hard enough to prevent slipping.
- And pushing the pliers with enough force to drive in the spike.
I have made some headway with both of these issues in the following manner. The pliers have a simple plywood handle added to them and a separate finishing pusher is used to seat the spike snugly against the rail. The key is to be able to make the action of pushing also act as a way to increase the pressure of gripping the spike, for the first part.
The second part is to modify a square drive screwdriver to fit over the head of the spike so that the spike can be rotated if needed to align it squarely next to the rail, as it is pushed home.
Step one is to look at the pliers you would like to use, and determine whether the handles can be used "as is" or need to be straightened. When you can use the pliers without straightening the handles all the better. I have used some pliers without straightening the handles and they do not work quite as well as the ones with the straight handles.

Click for larger picture
| To soften the handles to straighten them requires heating them up to a cherry red and then letting them cool down slowly. It is important to not hurry this process by quenching the hot handles as this will only re-harden them. After the handles have cooled they can be flattened in a heavy duty vice. |

Click for larger picture
| After the handles have been straightened they need to be re-bent as in the picture showing the final shape. The exact angles are not critical. All you need to achieve is a similar shape, if the angle is slightly more or less it won't matter. |

Click for larger picture

Click for larger picture

Click for larger picture
| Step two is to shorten one of the tips of the pliers, it is best to soften the tip for this step because it also includes drilling a # 49 hole (.073"). A 5/64th drill would also work for the large spikes.
The best way to drill the hole is to clamp the pliers in a vice on a drill press, then use the # 49 drill bit.
If you do not have a drill press or a center drill you can punch the needle-nose with a center-punch and then use a small hand held drill.
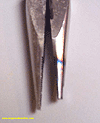
There is a short groove on the opposite side to the hole in the nose. This groove is on the long tip and helps to prevent the spike from slipping sideways as you push. |
  
Click for larger picture

Click for larger picture
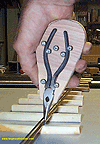
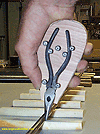
| The pliers are loosely held onto a 3/4" plywood body with #8 square drive round head screws. This allows the pliers to slide up and down without falling off the ply. |
  
The pictures above shows the difference between stock and modified handles. The screws are placed so that the pliers can slide back and forth on the plywood just enough to open and close the tip to about 1/8th of an inch.
Notice the pencil line outlining the shape of the handle, this is a personal choice what feels comfortable to me might not feel comfortable to you, experiment with the shape until it feels right for your hand.
  With the pliers open place a spike into the groove with the flange part of the spike hooked into the # 49 hole. As the ply is pushed the screws wedge the handles together gripping the spike harder as you push down. After the spike is pushed in, when you pull back the pliers open (about an 1/8th of an inch, do this gently). Sometimes the pliers stick a little, this is caused by minor differences in the spikes, don't worry, and if you can fix this occasional glitch let me know. The spike pushed into the wood easily, I would expect that for soft wood there are no problems, with harder wood perhaps pre-drilling would help prevent splitting. With the pliers open place a spike into the groove with the flange part of the spike hooked into the # 49 hole. As the ply is pushed the screws wedge the handles together gripping the spike harder as you push down. After the spike is pushed in, when you pull back the pliers open (about an 1/8th of an inch, do this gently). Sometimes the pliers stick a little, this is caused by minor differences in the spikes, don't worry, and if you can fix this occasional glitch let me know. The spike pushed into the wood easily, I would expect that for soft wood there are no problems, with harder wood perhaps pre-drilling would help prevent splitting.
  
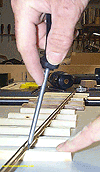
The spike is now pushed home with a large square drive screwdriver that has a small slot ground into the end, the small slot helps to fine tune the alignment of the spike as it is pushed home.

Click for larger picture | The five foot section that I am holding took about 30 minutes to spike.
I don't know if this is fast or slow, it was certainly easier to do than the first 15 feet of track just gripping the pliers in my hand. |
Top of Page
|
|

|
IMPORTANT LINKS

Get Your Official Diploma

Watch New Videos


New Products Online
|
|


