Track & Bridges
An Inexpensive Girder Truss Deck Bridge
Oct 19, 2005


By Brent Stuvland |
Author
Bio
Our hobby has a tendency to become very expensive. I look for ways to reduce any of the costs without sacrificing realism.
|
 Our hobby has a tendency to become very expensive. I look for ways to reduce any of the costs without sacrificing realism. My railroad empire is located in our side and back yards. The main line runs from one raised flower bed to under a staging area under our deck. This area spans a distance of thirty five feet. Building a girder truss deck bridge spanning a gap of thirty five feet was going to be very costly. I have found a few bridges in the local hobby shops, on the internet, or several G-Scale magazines. All of these bridges are beautiful and very realistic, and all would deplete my families' checking account. So in order to bridge this gap, I needed to find a low cost way to build this bridge.
I thought about building a trestle but in my corner of the world, the bridge would have needed to be made of Cedar or Redwood. Knowing that this type of bridge requires a large amount of wood, this would be another costly option. 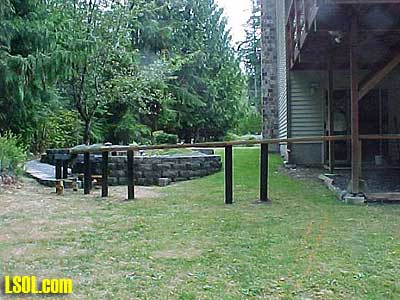 I am a member of the Puget Sound Garden Railway Society. I found an article in the club newsletter (July 2005) which described an inexpensive way to build a girder truss deck bridge. I used this idea in my railroad layout. This style of bridge fit right into my era of late steam and early diesel. The bridge on my railroad empire is curved and requires a shallow grade. The radius the arc is ten feet. I used a two by six inch by two foot long section of outdoor treated wood product for the decking. Each section was supported by a four inch diameter black plastic drain pipe. I dug a one foot deep support hole with a posthole digger. We live in an area where ground freezing isn't a problem. I placed a measured section of the drain pipe into the hole and filled the pipe with 5/8ths clean gravel. The gravel adds weight to the post, and provides water drainage. At the top of the pipe it left room for a circle wood plug cut from a scrap two by six.
The plug was drilled in the center to receive a foot long section of rebar. The rebar and plug was pounded down into the gravel filled drain pipe. The deck sections of the bridge were screwed into the wooden plug. Now the deck sections are held together by the screws, and the rebar holds the deck sections onto the drain pipes. All of the wood was painted with a black in color paint. 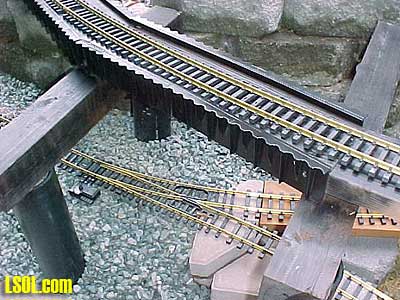 The girder truss sections were created from two by six dimensional outdoor lumber and a product called Emerald Edge. I measured the Emerald Edge two and one half inches down from the thickest edge, and cut it horizontality. The piece of edge I kept looked very realistic when compared to the side of the real world girder of a girder truss deck bridge. I screwed the cut edge to the side of the two by six inch outdoor wood. After assembly I painted the bridge with an all purpose black paint.
Emerald Edge by Easy Gardener - Product Information  | - Durable 4-ft sections
- Easy to install
- Long lasting
- Available at Lowes for less than a $1.00 a foot. Item #: 27876 Model: 87480A
|
Lightweight sections cut and securely connect to form a continuous border. Emerald Edge is flexible enough to create curves and tree rings, and hinges make corners and angles up to 120 degrees. No trenching or digging required - simply hammer into the ground and Emerald Edge creates a secure barrier between your landscaped area and yard. 100% recyclable plastic is safer than metal and won't rust, rot, chip or fade.
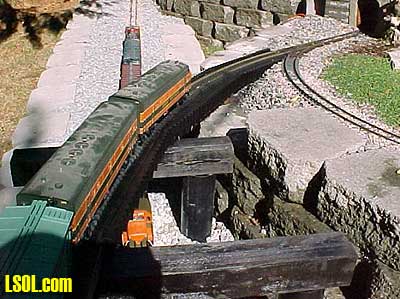
Portions of the bridge spanned over other track below. Three of the two foot trestle sections ended above this lower track. I had to support the bridge with a beam. I used a four inch by four inch post laid on its side and supported the beam with the drain pipe made into pillars. As you can see, I still have a long way to go before completion of this bridge, but overall construction cost calculate to be $20.00 for each two foot section, this includes the Emerald Edging, 2" x 6" x 2' decking, 4' section of drain pipe, screws, gravel, and paint. Good luck with your bridge building projects.
| Comments |
| This article does NOT look familiar to me, so Brent, great job.. How has it held up since the time when you started installation and did the article? Probably the "piping" would be very effective in FL too. |
| Elaine Haggenbottom - 12/22/2013 - 07:40 |
Top of Page
|


