Scratch & Bash
Basic Weathering With Powders
Aug 6, 2008


By Mike Moran |
Author
Bio
Weathering with powders is a means to make anything you wish look like it has been exposed to the elements. I will try to explain the basics to you with some pictures that I took along the way to make a piece of equipment look like it has been around for a while.
|
Weathering with powders is a means to make anything you wish look like it has been exposed to the elements. I will try to explain the basics to you with some pictures that I took along the way to make a piece of equipment look like it has been around for a while. 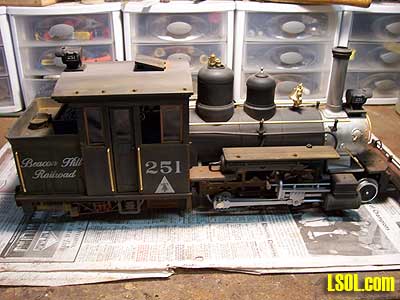 The weathering powders I use adhere to any non-glossy surface. They are NOT chalk. A single quickstep application gives a very realistic rusty, dusty or sooty surface - instantly. No drying or curing is necessary. They should be used sparingly; a little goes a long way. These products are made from real rust and other weathering agents that have been ball milled to a particle size over 100 times finer than chalk and blended with a pressure sensitive, dry adhesive. Since they are self adhesive to most surfaces, they do not need to be sealed.
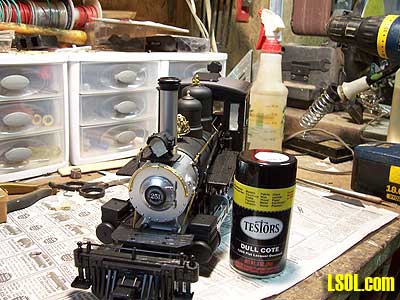
 First you have to make a decision on what you are going to weather. For this project I choose a new LGB Forney. The first picture shows the Forney as it came new out of the box. You will have to decide at this point if you are going to change the existing road name or add one if it did not come with one already painted on. I will not explain the removal of lettering or decal installation in this article so I can keep things simple. You must do the decals first before you start to weather the engine.
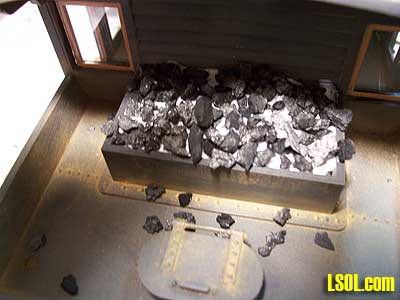
This picture is a shot of the Forney coalbunker as it came from the factory. I will explain at the end of the article a simple way to make this look realistic. 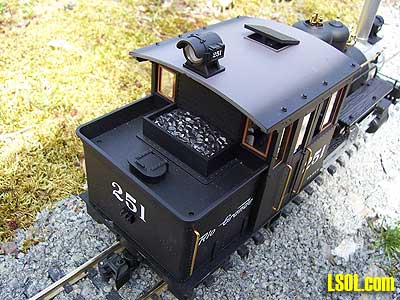 You will have to make a decision on how much or little you want to weather the piece you chose for this project. I like my equipment to look as if it has been well used and has had little maintenance.
The following techniques can be applied to anything you chose including buildings, rolling stock or whatever you want to weather. I will start by showing you what I use to get started. In the next picture you will see several hard bristle artist brushes, masking tape and the powders. The second picture gives a closer look at the powders. You will also need a spray can of Dull Coat. I use Testors but you can use any brand that will give you a dull finish when applied. 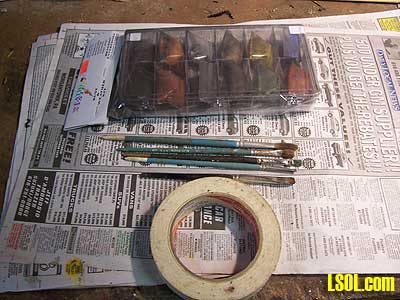
 With powders that I use, you do not need any special tools or talents to complete the job. All you need is the willingness to try. The powders I used are a product manufactured by Bragdon Enterprises from Georgetown, California and can be purchased locally at a good hobby shop or online at http://www.bragdonent.com 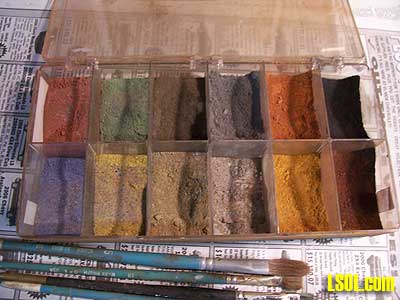 If you are weathering something with windows (or some part you don?t want dull) you will need to mask them off because the spray will frost the glass. After masking those areas you don?t want weathered, you will spray the piece you are working on with the Dull Coat spray and let dry.
By this time you will have made a decision on how weathered you want your model. I will tell you how I did mine. You can put on as much or as little of the powder as you like. Before you apply the powders put a newspaper down on your work surface. You will notice that as you apply the powders that some will fall to the work surface. This can be collected and reused later. Put the used powder in new container, as this mix of colors will make a brown that can be used as a dirt color. Also if you have an apron use it, because if the powder gets on your clothing it will stain them. Let?s get started!!!!!!!!!!!!!!! I started with the wood-like running boards on each side of the boiler on the engine. I used my brush dipped in the dark rust colored powder and tapped it on the side of the container to shake off any loose powder. I then applied it to the wood areas with a rubbing motion in the direction of the wood grain. Next I started on the main body. At this point you will be applying several layers of colors so start with lighter colors first. It is easier to cover lighter colors then it is darker ones. 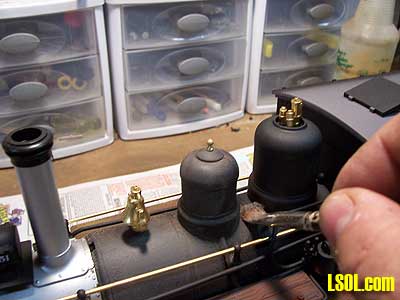
I started with the boiler, but you can start anywhere you like on the engine. Since I wanted the engine to look as if it was used and worked hard, I started with ash color as a base coat on all the black areas. The next color was a little darker color, grimy grey, and I used it to make a shadow effect along the bands on the boiler and other areas where more dirt might accumulate. All colors were applied the same way, with a rubbing motion so the powders are worked into the pieces. The rubbing causes the agents in the powders to adhere were they are applied. You can stop at this point if all you want is a locomotive that has been in service for a short time and is just dirty. You can continue to weather by adding darker color powders on places coming down from roof tops that will show dirt runs from rain. This is a good technique if you are doing boxcars or buildings. Some of the weathering effects you may have seen done with an air bush can be done with the powders instead. If you want to make the loco look even older, I would suggest adding some rust effects. Here again start with lighter colors.
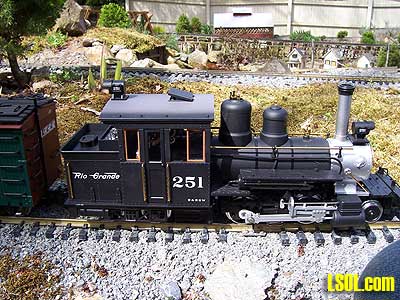
In the following picture, you see rust applied along the water tank and cab. I applied it to the rivets and other metal pieces. Start with light rust then medium rust. If you want darker you can use the dark rust color but be careful. Too much will cover the lighter colors completely. At this point I went over the entire engine to see what I might have missed. Be sure to look underneath the locomotive and don?t forget to weather and rust the trucks, springs piping and couplers. 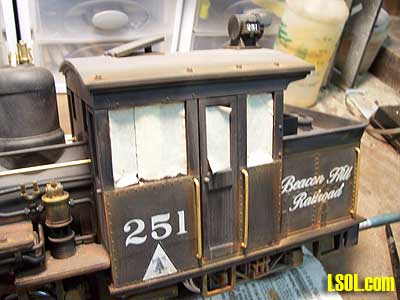
If you feel you added too much rust, since the engine was originally black, you can go over these areas with the black to cover some of the rust. Black can also be used on lighter colors to show dirt and aging. I have used blue, yellow and green powders on same color cars to make shadows.
At this point you are finished with weathering the engine. Remove any masking tape you used at this point. DO NOT APPLY ANY SPRAYS ON THE FINISHED PIECE. SPRAYS CAN HIDE MUCH OF THE WORK YOU JUST DID. At this point I took some aquarium charcoal and mixed it with white glue and applied it to the coal in the coalbunker. This will make it look like a real coal load. The aquarium charcoal is just the right size.
 This article should provide you with the basics for using weathering powders. I have applied my past experiences in using chalks to weather to develop some more advanced techniques using powders to get the more desired weathering effects. This whole project can be done in one evening. Go ahead and give it a try.
| Basic Weathering with Powders |
| Mike: Great article and even better pictures. This should get folk going on weathering projects. Jim |
| Jim O'Connor - 08/06/2008 - 11:54 |
| Basic Weathering with Powders |
| Thanks Mike This is a great artical. I had thought of using air brush methods but it seemed to much for equipment and mixing paint which could become a lot of work ands cost involved. This powder sounds and looks like an amiture could easily do it without a lot of cost in equipment and not as much mess. Roger |
| Roger Fitzjarrald - 08/06/2008 - 16:18 |
| Motivational |
| Weathering was not of interest to me, then I saw some very nice weathering. I have heard about chalks and airbrush. Was thinking I might give the airbrush technique a try. That was until reading this article. I have a question or two - what happens to the powders if the unit gets wet? Would airbrush be better choice for a wetter environment? Excluding what is masked off, do you have to Dull Coat the entire unit? It will still be some time before I do give it a try, but looking forward to giving this a try. |
| Kevin Lepel - 08/08/2008 - 10:48 |
Top of Page
|


