Scenery
Utility Poles: How to make your own
Jan 9, 2008


By Noel Widdifield
LSOL.com Managing Editor |
Author
Bio
Recently I was looking through some of the model railroading magazines and noticed that some of the really realistic railroads featured in the magazines usually had detailed modeling of the stuff you find along the right-of-way. After looking at what was available commercially, I decided to make my own.
|
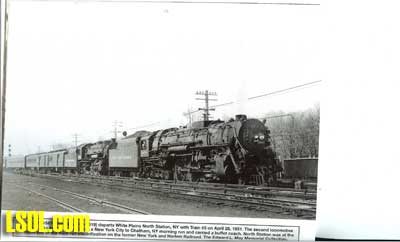
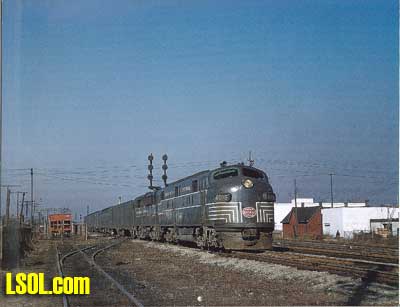
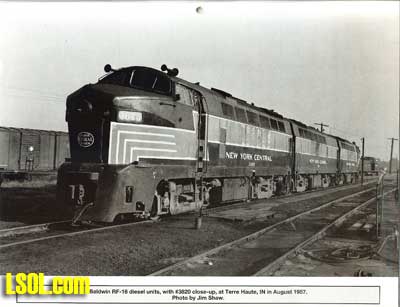
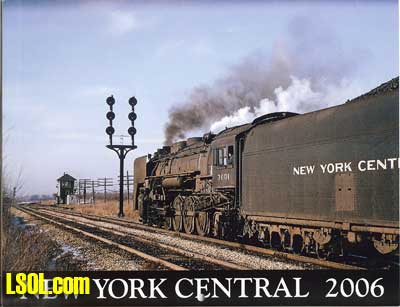
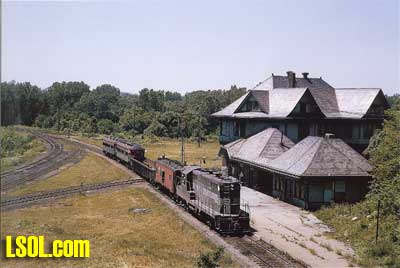
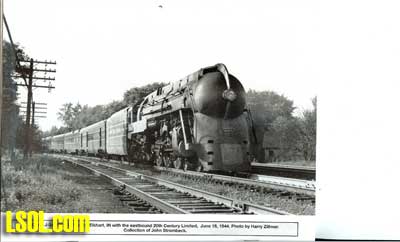
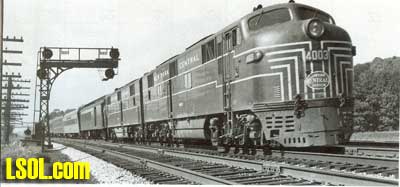
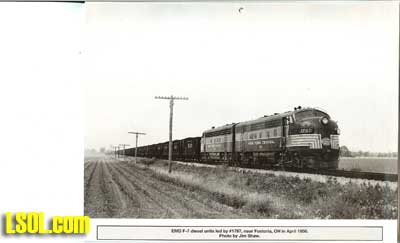
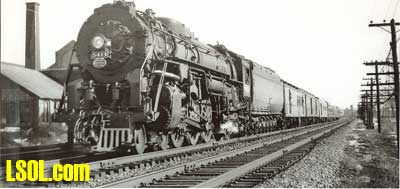
Recently I was looking through some of the model railroading magazines and noticed that some of the really realistic railroads featured in the magazines usually had detailed modeling of the stuff you find along the right-of-way. One of the things that seemed neglected on many Large Scale railroad is the modeling of utility poles. Since I had also neglected them on my railroad, I decided that I needed to add some poles for my mainline on my indoor and outdoor railroads. After looking at what was available commercially, I decided to make my own. Whenever I start a project, one of the first things I do is research the railroad books in my collection to find anything on whatever I am planning to build. I also check out the Internet to see what I can find there about the project. My books gave me some interesting pictures of utility poles along the railroads. I also found some really good pictures of utility poles along the New York Central in the calendars published by the New York Central System Historical Society. These pictures are from the 2006 and 2008 calendars and you can see that there are many poles along the right-of-way. Notice the variety of heights, number and size of crossarms and number of lines per pole. Note that one photo even has metal poles. 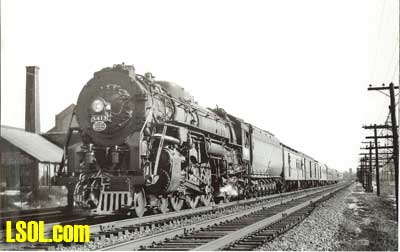
I was able to find a close-up picture of some poles from a Trains magazine to use for the model for my poles. 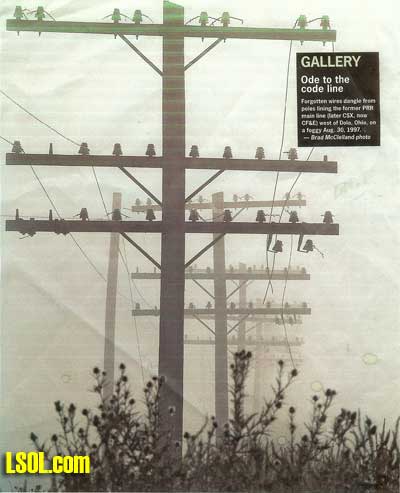
The Internet provided me with a very interesting site about all kinds of poles. Neal McLain created the site called ?Utility Poles? which provides a great amount of information including definitions, measurements and history about utility poles. It even contains a section on railroad poles and explains that they provided electric power, signaling and communications for the railroad. From this site I found out that all of the circuits on the railroad poles are open wire, implemented with un-insulated wire. I also discovered that poles come with up to seven crossarms along railroad right-of-ways. - See the details here. Because I spend the winter in Florida away from my railroads, I need a few Large Scale projects to keep me occupied while I am down here. For the past several years, I have worked on these projects using the island bar between the kitchen and dinning room for my work area. This has worked well for me in the past because it allows me to remain in the same area as my wife, Ann, and lets me view the ocean while I work. It has caused some discussion with Ann as to the appropriateness of my doing this kind of work when we have guests coming for a meal or a visit.
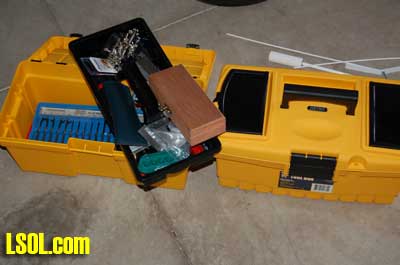
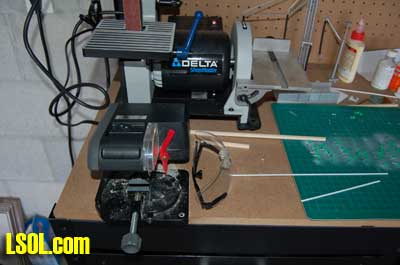
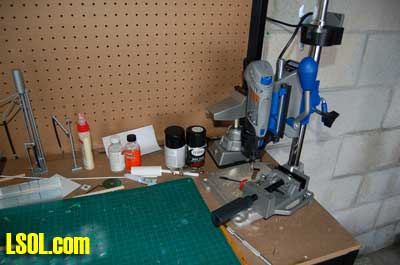
These discussions led me to purchase a workbench and set up a workshop in one of our garages this year. Since there is a new Lowes across the street, it was easy for me to find all of the things I needed for this shop. Over the past several years I had accumulated a second set of most of the tools that I needed for my railroad projects, so I only needed a few more to complete the shop. 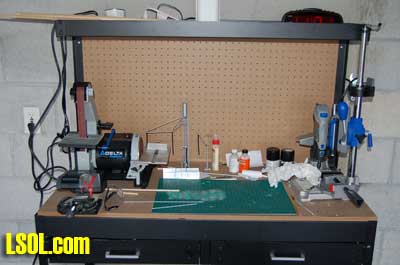
To begin the actual project, I spent some time measuring the pole in the picture above to determine actual measurements for the poles. I also measured some utility poles in the area to get a feel for the actual dimensions. From that I decided to use 10 ? 11 inch diameter poles for standard gauge and 6 -7 inch diameter poles for narrow gauge where smaller poles were normally used. I also researched several books for photos of poles on the New York Central to determine approximate dimensions for the poles found on that line in the 1950?s.
What I found was that poles along the NYC came in a wide ranges of heights and arrangements. So I used one of the photos from the area of the NYC that I model and made some basic judgments about pole heights and crossbeam width. I discovered that line poles were typically 22 feet from the ground to the top of the pole by reading an article in this month?s Model Railroader by Paul Dolkos. In that article, Paul explains that distance between poles varied from 130 to 200 feet. For modeling, that distance would be too great, but it is useful information to help me determine how far apart to place my poles. Using all of this information, I then converted the measurements into the dimensions in 1/29 & 1/20.3 scales so that the poles would be correct for my indoor and outdoor railroads. I drew up a sketch of the poles on some graph paper to use as the model for the construction of my poles. 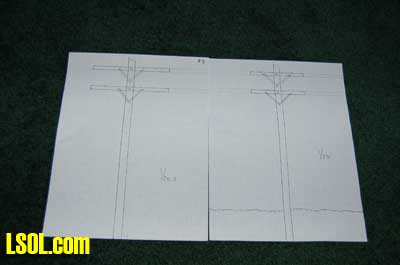
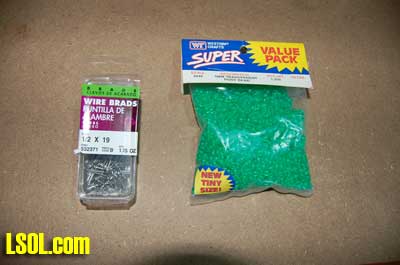
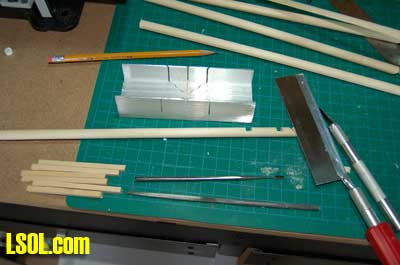
Now that I had a plan, I needed some raw materials to make the poles. Another trip to Lowes provided a good selection of 3/8? wooden dowels for the poles themselves, some 1/2 inch X 19 brads to fasten insulators to the crossarms and some 4-40 x 1/2 inch round headed bolts with nuts to fasten the crossarms to the poles. A trip to the local hobby store, Space Coast Hobbies, provided me with the basswood for the crossarms. I had purchased a few bags of Westrim Crafts 5 MM Transparent Pony Beads in a bright green color several years ago at a craft store, thinking at the time that they would make great insulators for poles for the railroad. 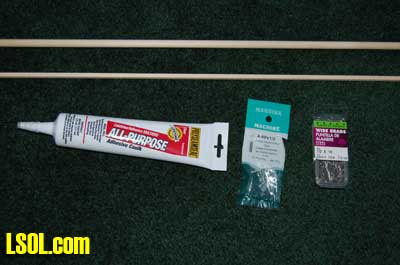
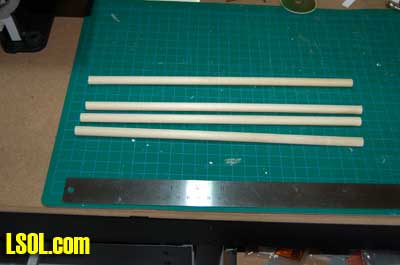
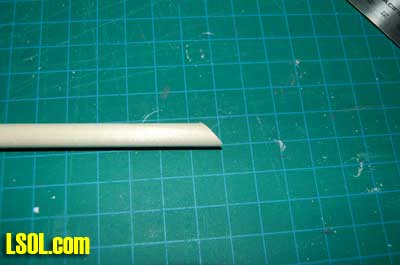
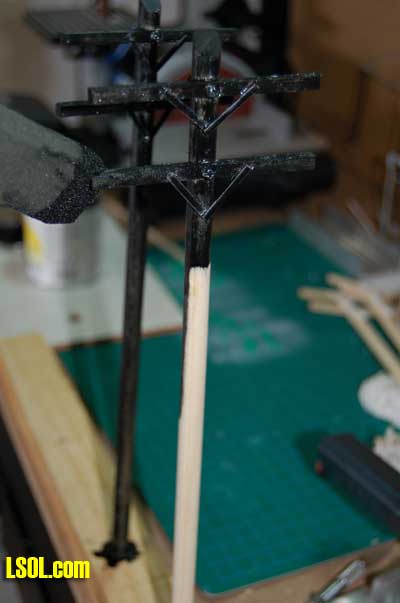
I began construction by cutting the 3/8? dowels to 12 1/2 inches long for the outdoor railroad and 12 inches long for the indoor railroad. I cut one end with a 45-degree angle to represent the top of the pole. This length is about right to allow attaching a 3-inch finishing nail in the bottom of each pole for the outside narrow gauge road. For the inside standard gauge, I would need a couple of inches of the pole to protrude through the plywood sub-roadbed to be able to secure it with 1? x 1? blocks under the tabletop. I will cut off any extra length when I secure them through the plywood. 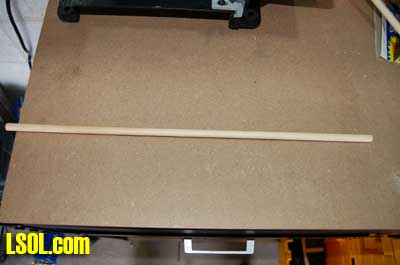
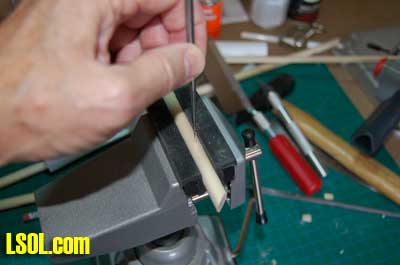
For ease of following I will describe the production of the 1/29-scale poles and then explain the differences for the 1/20.3 scale ones at the end of the article. Since the 3/8 ? dowels come in four-foot lengths, I first cut them into 12? lengths using my miniature cut-off saw. I then cut one end of each of the poles at a 45 degree angle. 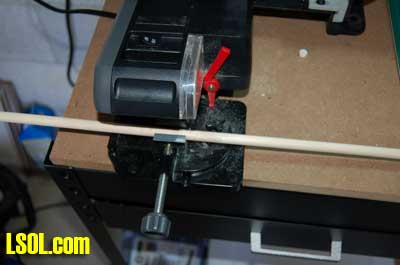
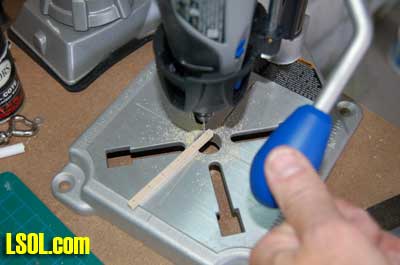
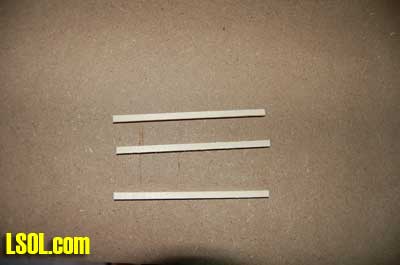
Next I cut the 3/8?X 3/8? basswood into 3 3/8? lengths (4 1/2? for the 1/20.3 poles) for the crossarms. I marked the center of the crossarms to line them up with the pole and also drilled holes for the 1/2? brads that would hold the insulators to the crossarm. 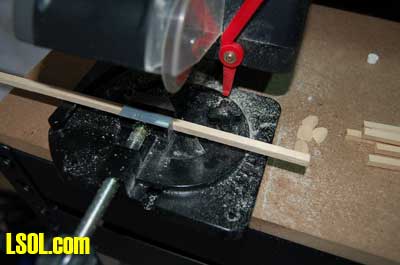
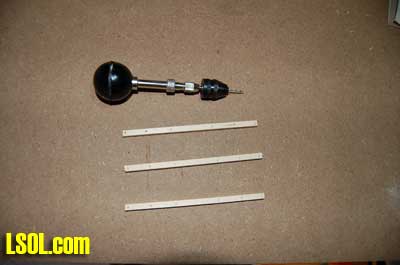
I cut notches for the crossarms into the poles by using a razor saw to score the poles and then used a very small chisel to notch out the wood. I used a small file to smooth the notches and square them. 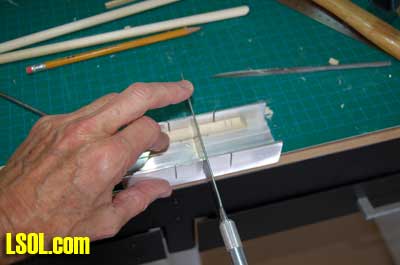
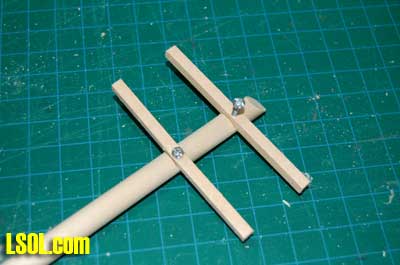
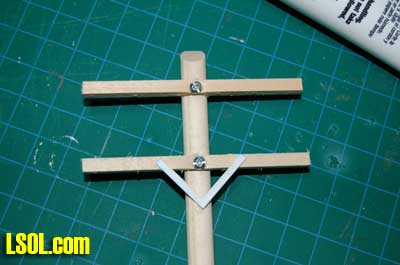
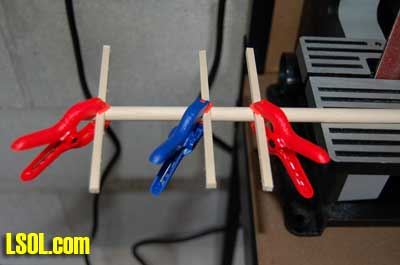
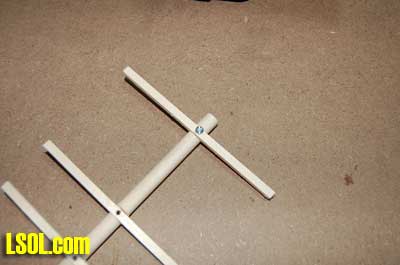
Using All-Purpose Poly Adhesive Clear Caulk, I fastened the crossarms to the poles and set them aside to dry. 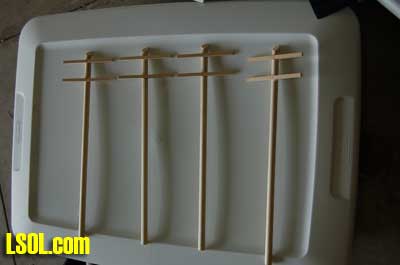
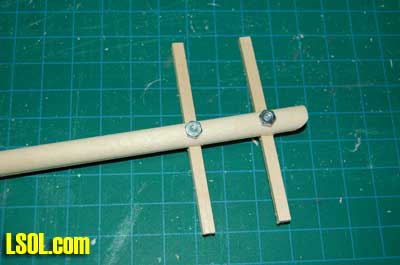
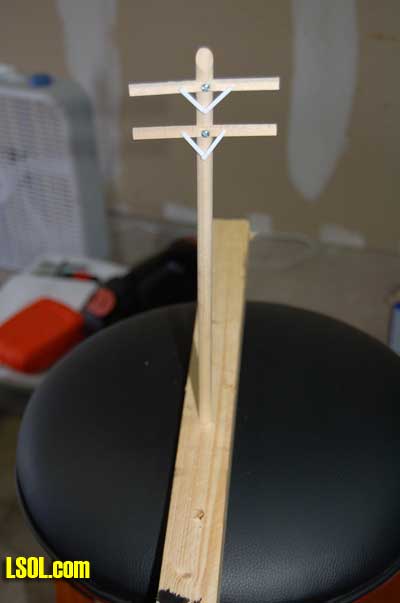
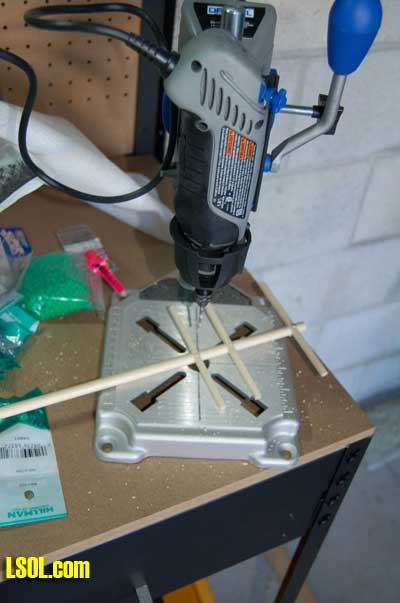
After letting the caulk dry for a couple of hours, I drilled holes in the crossarms and poles so that I could secure them with the 4-40 x 1/2 inch round headed bolts and nuts. I pushed the bolt through the hole and fastened the nut onto it. These bolts just fit through the pole and crossarm. 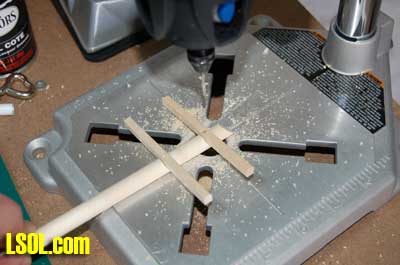
The next task was to glue the green beads that would serve as the insulators to the 1/2? brads using CA. This is a tedious and boring job. Twelve of these are required for each two-cross armed pole. If you put more crossarms on your poles the number goes up. I quickly found that the best way to do this was to dip the brad in the CA and then pick up the green bead with the brad. You need to be sure that the brad doesn?t extend beyond the top of the bead. 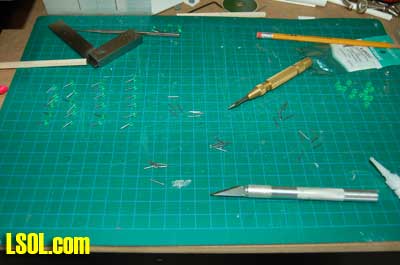
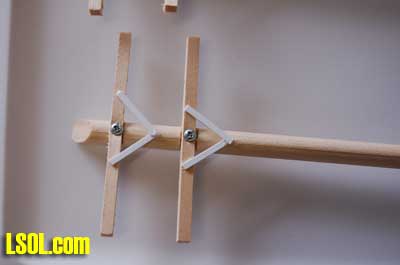
I needed to have support braces for the crossarms, so I cut some 1/32? x 3/32? styrene strips into short pieces using a hobby knife to make these braces. I glued them into place using the Clear Caulk and let them dry for a couple of hours. 
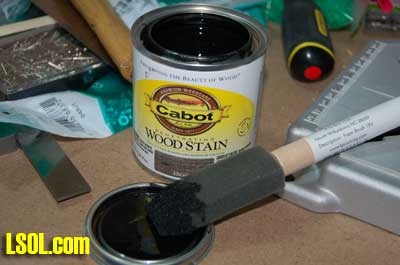
I drilled some 3/8? holes in an old scrap piece of wood to hold the poles so that I could stain them without getting my hands all messed up with the stain. I placed the poles in the holes and stained them with Cabot Wood Stain Ebony using a sponge brush. This leaves the poles with the right base color, but they are pretty shiny and need some weathering. 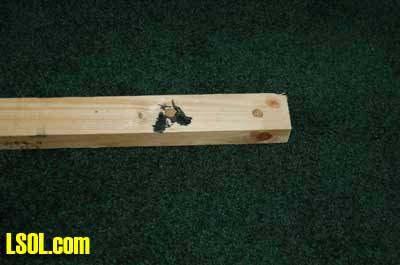
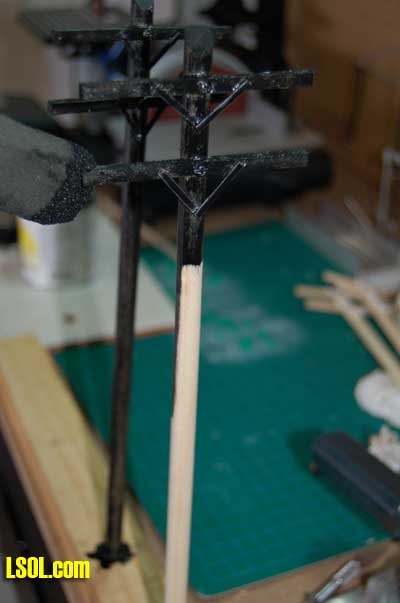
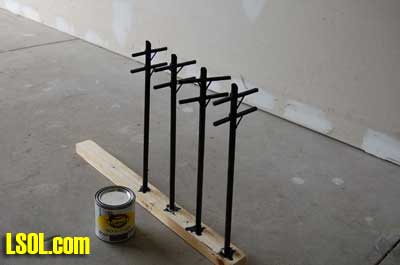
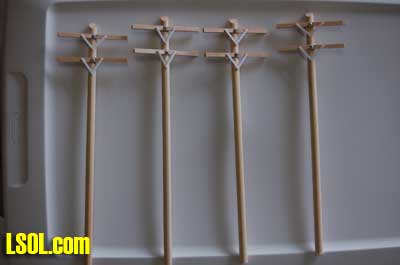
To reduce the shine and weather the poles, I sprayed them with Tester?s Concrete Grey and that made them look pretty authentic in color. I then pressed the beads on the brads (insulators) into the holes in the top of the crossarms. The brads protruded pretty far below the crossarms, so I cut them off with side cutter pliers. They are ready to be installed on my railroad. 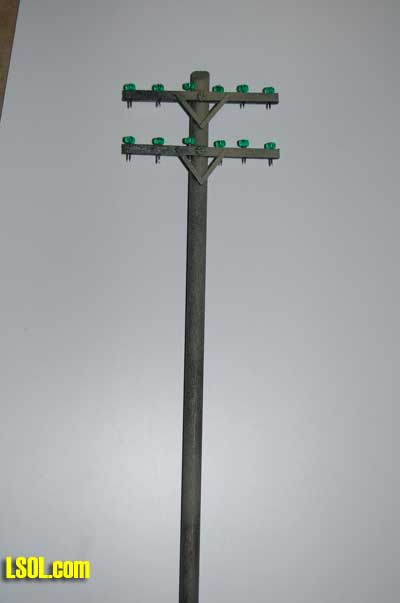

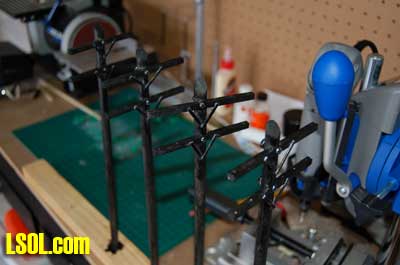
For three crossarms you just repeat the process three times instead of two and you end up with an interesting variation for a pole. On the three cross-armed pole, I used clamps to hold the crossarms to the poles during the gluing process. I also used a small hand drill to drill some of the holes. I am going to try a few four crossarmed poles because on the NYC they were found in several places. I also plan to add some transformers to a few of the poles using some styrene tubes that I have purchased for that. 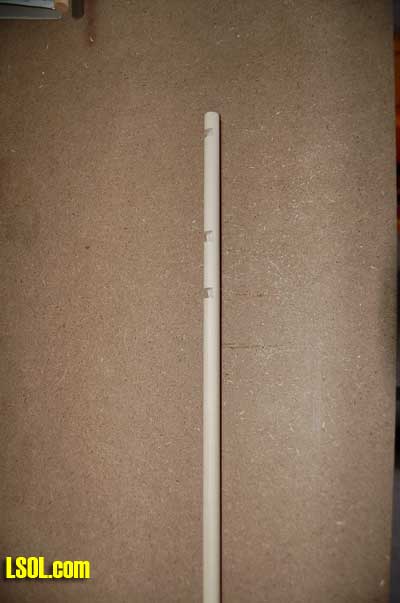
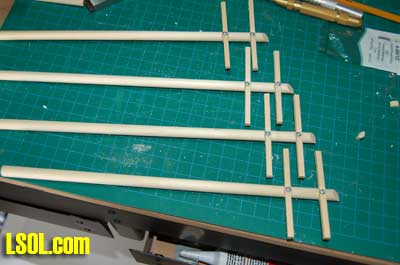
The poles look pretty authentic and now I need to start a production process to make about 40 of them for my indoor railroad and another 20 for my outdoor railroad. It takes some time to make the poles this way, but the end result is worth the effort. I have another five months down here in Florida without any trains to run, so you can see that I will stay busy for a while.
| Telephone poles |
| Noel You presented a well illustrated and a magnificent artical about poles. I plan to construct some poles in the future. Do you plan to put "WIRE" on the insulators? How are you going to construct the transformers? Thank you for the interesting reading Mike |
| Mike Gruber - 01/09/2008 - 06:11 |
| Telephone Poles |
| Noel: Very nice article. Thanks for doing it. Russ |
| Russ Palmer - 01/09/2008 - 07:41 |
| Utility Poles |
| I have installed utility poles on smaller scale railroad layouts and they were a great additional detail. The trade off was that they needed to be on the opposite side of the tracks from the aisle so people did not have to reach over the lines during work and operating. |
| Rick Henderson - 01/09/2008 - 07:45 |
| Utility Poles |
| Mike, I plan to use something called EZ Line from Berkshire Junction. It is a stretch line that is sold for O Scale power lines. I have some and will try it when I get back to my house this spring. It may be too fine, but I want to try because if it works you don't have to worry about tearing out the poles when you accidentally hit the lines with your hand while working on the railroad. The transformers are to be built out of tubing that I have, but haven't started working on yet. I want to get the large number of poles finished. I have started a production line and have ten more poles almost finished. Rick, I had that problem in HO too. I will see how it works for me in G. Russ, Thanks for the kind words. Thanks, Noel |
| Noel Widdifield - 01/09/2008 - 10:32 |
| Utility Poles |
| Great article Noel. Thanks for your effort as I know writing the article can sometimes be more work that building the item it is about. I built 1:1 power poles for eighteen years so I am not sure I want to get into production again in G scale. LOL. It sure would look cool though! What would you think of using small cotter pins in lew of the brads for the insulators? One could actually string copper conductor through the eye of the pin and when 'up to sag', 'tie it in' by spreading the bottom of the cotter pins, sucking the copper down tight against the glass bead. Keep up the good work. I always enjoy your articles. |
| Phil Benedict - 01/09/2008 - 10:43 |
| Telephone Poles |
| Noel, Love your article on telephone poles. I'm in the process of planning poles for my outdoor layout, and your pix and measurements will save me a lot of research. thanks. My plan is to use wooden dowels for the main uprights, just as you have, but I plan to drill out about an inch of the center of the base of the pole and run a rod, perhaps a copper tube or 1/8" solid steel wire, out of the base of the wooden pole and into the ground, so that when the inevitable happens (stepping over the wires) the pole won't break off where it goes into the ground, but will just bend the metal, which can then be straightened or replaced. All suggestions along these lines would be appreciated. Great idea for the insulators. I plan to actually run real wire on my poles to carry current to the lights in my buildings. Has anyone out there done that with any success? Thanks for the great article. Bob Bear Creek & Marathon RR |
| Bob Freeman - 01/09/2008 - 15:52 |
| Power Poles |
| Phil, Cotter pins would work if they are small enough. I plan to glue the "wire" to the insulators with CA. Let us know if you try your method and it works. Bob, The copper tube or wire is a good idea. I am just going to use large finishing nails in the ends of the dowels for my outdoor poles. Don't know if anyone has wired the poles to carry current for lights, the trolley and interurban guys use real wire to carry current to run their cars, so I would think your idea would work for lights. Noel |
| Noel Widdifield - 01/09/2008 - 17:42 |
| Power Poles |
| Noel, brass bullet clutch (as found on the back of earings) can be purchased from Craftetc.com and can be attached to the crossarms with 1/2" sequin pins. The look a lot like the insulators found on modern power poles. The part number is 6052. The price is about a dollar for count of 12. The sequin pins can be found at Michaels Arts and Crafts Store. |
| Ron Hill - 01/09/2008 - 19:21 |
| Power Poles |
| Noel, I have plans to do poles about like you did yours, but I planned to put a seed bead on top of the pony bead (that is if I can get both sizes in something close to the same color) to give it kind of a pyramid look, like the real thing. Great article, thanks. Bill |
| Bill Wagner - 01/09/2008 - 20:40 |
| Utility Poles |
| Ron and Bill, Good suggestions. The reason I picked the green colored beads that I used was because I felt that the color was close to the green insulators that were used on the NYC near where I grew up. One of the wonderful things about LSOL.com is that so many of the members add to the basic info found in the articles we publish. This is such a useful site for Large Scale. Thanks, Noel |
| Noel Widdifield - 01/10/2008 - 05:12 |
| Utility poles on HO on an old layout |
| Interesting, When I was in high school one HO Christmas layout we put up poles with real wires to control the switches. we used fine coil wires from an old electric motor. Since it was old, straightening the wire broke off most of the old lacquer insulation. We lit all the houses and powered the switches through the poles, it took some time to wire it all. it worked great until the cat uncharacteristically decided to chase the train one night while we were running it. Even though it was just 20 volts AC, the sparks flew (mostly metaphorically.) When the cat hit the wires she freaked out. It was easier to repair that was expected and we (my brother and I) were up and running trains again. |
| Glenn Habrial - 01/10/2008 - 19:40 |
| Good article |
| I forgot to say I did enjoy the article Thank you. |
| Glenn Habrial - 01/10/2008 - 19:41 |
| Wired Poles |
| Glenn, your cat story gave me a great idea...we live in a very rural area in the southwest. Nightly we have all sorts of critters, mainly javelina (a type of wild pig), coyotes, and domestic cats and dogs, meander through the yard. If I wire the poles with larger wire and hook it up to a transformer used to wire cattle fences, we could really see some sparks fly. They wouldn't stop runnin' until they hit the county line! Bob Bear Creek & Marathon RR |
| Bob Freeman - 01/11/2008 - 07:16 |
Top of Page
|


