Product Close-ups
Outside/In! USA Trains GP38-2
Aug 19, 2009


By Jerry Madsen |
Author
Bio
I just purchased two USA Trains BNSF GP38-2 locomotives to head up the first train in my garden. I am a veteran modeler but somewhat new to large scale and I have never written an article before. So I thought my first article could be one about assembling my new locomotives and give a brief review of what I think of the model as received from the store.
|
I just purchased two USA Trains BNSF GP38-2 locomotives to head up the first train in my garden. I am a veteran modeler but somewhat new to large scale and I have never written an article before. So I thought my first article could be one about assembling my new locomotives and give a brief review of what I think of the model as received from the store. I'm sure someone has done an article on this before but my first goal is to get my feet wet on writing an informative article. The instructions that came with the locomotive are really vague and I thought some beginners might have difficulty putting it together. Also I have a bigger project in mind and would like to get practice in writing since it's been so long since college. I have spent hours pouring over the excellent articles, pictures and videos at LSOL and I just can't get enough. The people who contribute to the Team LSOL site have taught me so much and I've only been a member a few months. All you folks make this stuff look easy so maybe even I can do it.
Most people like to have a tool list to get started so here is mine. Small Phillips screwdriver, flat modelers file, tweezers, hobby knife, hobby saw, and set of small drill bits. A motorized tool like the Dremel will make life easier but isn't necessary for this project. A little extra time with the small file is enough. The Dremel is a necessity for just about every aspect of large scale modeling from track to scenery building so you should have one anyway if you are serious about large scale.
Lets get started with the locomotive project. I started by laying a piece of cardboard down and a piece of plywood on that to protect my workbench (Dining Room Table). I took the loco and the parts bags out of the box and laid them out. 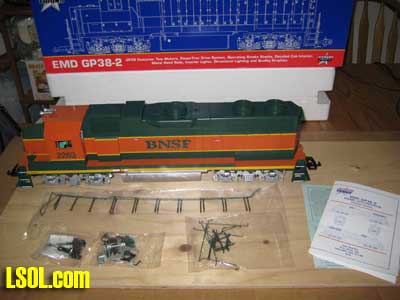 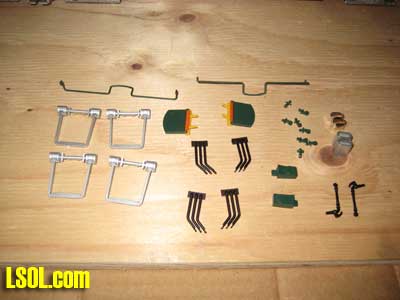  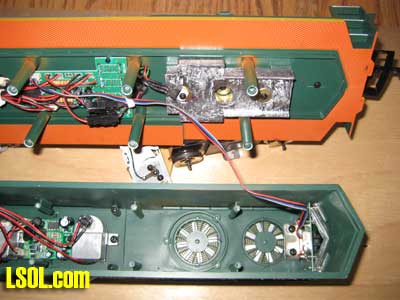
First thing I noticed was the hook & loop couplers, those will have to go, fortunately it comes with the knuckle couplers so I will start by changing those. 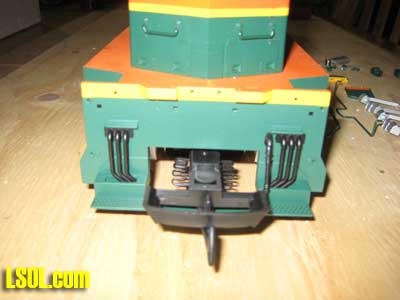 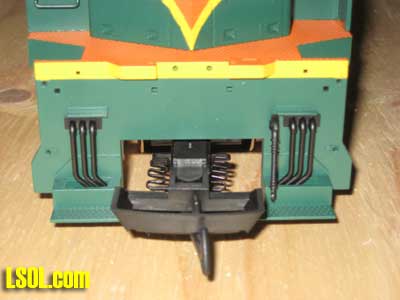
To access the couplers you have to turn the loco upside down. To protect the fragile parts on the top, I cut a couple pieces of scrap wood to support the body while its upside down. Place the scrap wood just right and you won't have to worry about damaging the fragile parts on the top of the loco. 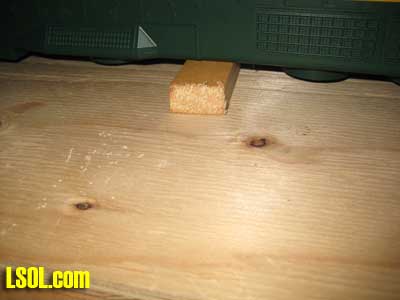 Remove the screw holding the coupler on at the pivot point. Then remove the hook and loop coupler by removing the remaining screw. You must also trim "Tab A" from the coupler pocket per the instructions. A hobby saw will work just fine for this. Clean up the cut with a small file. My coupler pocket had some plastic flash that had to be filed off so the coupler will operate smoothly. This is a good time to add some lubricant between mating surfaces like Grease'em or Graphite powder. Reattach the coupler pocket to the loco then attach the knuckle coupler to the pocket with the screws being very careful not to over tighten them. Remember it's only plastic and the parts have to pivot after assembly.
Here are a few pictures of the bottom of the Loco with the trucks removed. 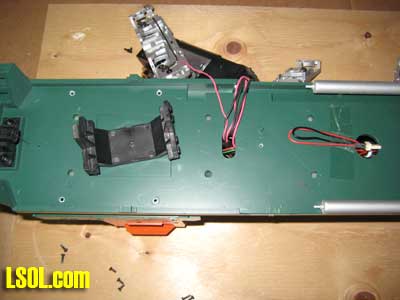 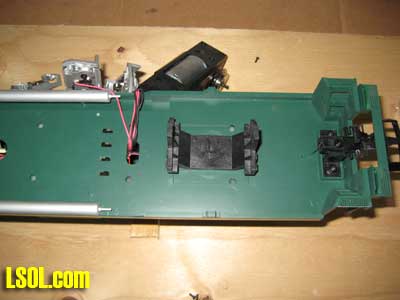 Also I took the some pictures of the inside with the tip removed for future reference for upgrading to sound and remote control. 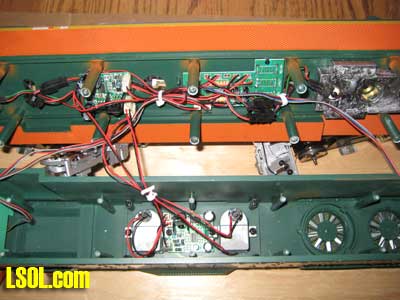
The very vague instructions tell you to add the M.U. connectors, air hoses, and the other parts but no mention if glue is required. I attached the M.U. connectors, truck sideframes, fold down step, and air hoses without glue but the coupler lift bar would not stay put so I glued it in place using model cement applied with a toothpick to the holes. Be sure the four lift bar eyebolts are installed correctly. They have a slight angle that should point down according to the drawing on the box. The fold down step would not fit in the frame without a little filing of the slot to make it a hair wider. I had to file the paint off the installation pin on the M.U. in order to get it to fit also. As for the smoke stacks I do not plan to use the smoke unit right away so I put the plastic ones on because they stay in place when you turn the unit over. If you run the smoke units you must use the metal ones per the warning on the instructions. The smoke units get very hot and will melt the plastic ones. I normally would be painting these parts as I go as well as painting and weathering the body and trucks before assembly but I wanted to keep this simple. Maybe that would be a project for another time. I did, however, do some research on the actual paint scheme for this unit #2263 and found some great pictures. At this web site, Railroad Picture Archives, you will find great pictures of the real trains depicted in your models. One detail I noticed on my engine is that the trucks and fuel tank of the model are silver but on the real thing they should be black. The location of the handrails is pretty self-explanatory with a little help from the diagram provided. The diagram does not show where to locate the long straight handrails. They should be located horizontally just above the coupler lift bar. The handrail attach pins may have excess flash or paint that should be gently filed off to make assembly easier. You should not have to apply too much force to install parts or they will break easily. If after trimming, the part is a little loose then glue it in place. I had to ream out the round holes in the body in order to get the handrails to slide in place. I used very small drill bits that I got from a hobby show but you can get them at hobby stores or online.
Now the loco is complete and is ready to test run. Here are a couple pictures of the completed GP38-2 model. 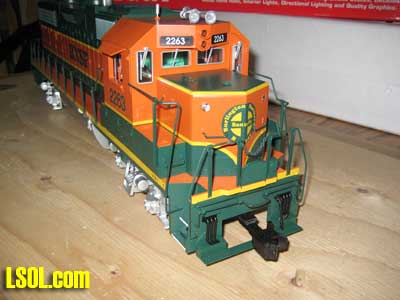 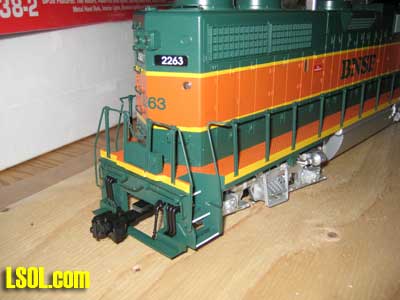 
The test run went well. This loco runs very smooth and quiet. It transitions from a dead stop to full speed nicely and does not stop to abruptly when the power is killed. There are white lights on front and two small red lights in the rear when going forward. In reverse the lights on the back of the hood turn white and the two lights on the front hood turn green.
I'm not sure if I have ever seen green lights before so I need to do a little research on that. Over all I think this model will look fantastic with just a little detailing and weathering. Since it is quite quiet there won't be much noise interference when a sound card is added.
Overall I think this is a very nice model. After comparing it to the photos of the real loco I noticed a few things that are different. Here are just a few in the interest of keeping it short. The ditch lights on the BNSF are located on the front walkway and in one photo you can actually see where the railroad patched the holes on the hood to relocate them. The horns on the model are located over the cab while the real loco has them located behind the exhaust stack.Also the handrails around the entry steps should be painted white. I have a GP-40 from Aristocraft, which has the power switches under a removable top piece that I like. This model has the switches located under the unit behind the fuel tank and they are tiny. I'm not sure I like that but we'll see during the trial run. I do like the knuckle couplers on the USA Trains model better than the Aristocraft couplers. On my HO trains I always used Kadee couplers but have not tried them on large scale yet.
In fairness to the manufacturer I know that some things were left out to keep costs down and to generalize the model to fit the majority of the railroads configuration, which in the end benefits us consumers. I would like to see a green and black BN version offered because I would like to purchase them that way instead of having to repaint a new model.
I think I will put a list together of the things I will do to upgrade and detail the model to fit my satisfaction and maybe write an article on that. Also the real purpose for these locos is to head up my scratch built plane train (aka: The Boeing Train), which is the biggest project I've ever tackled.
For the experienced modeler this is a relatively easy project but for a beginner it could be a little challenging if you do not have the right tools. That is why I decided to write this article. I hope this article will help someone out someday.
| GP 38 |
| Jerry I thought it was informative and a well written article. I am sure there will be some people that will benfit by your article.Hope to see what upgrades you make to your engine.Keep us posted. Gator (AKA The wood Butcher) |
| Bob Gentile - 08/19/2009 - 14:07 |
| LSOL blog |
| Jerry, A very good article. You were very graciuos how you approached the shortcomings of the manufacturer. USA Trains has been great in supplying certain parts for my rebuilt engines. Namely, a CONRAIL GP38-2 to a Norfolk Southern and my "Hybrid" to a brand new "Wooster,Worthington & Delaware" engine with all new GP38 electricals and a USA MAC 70 Cab and new GP trucks using an old Aristo Uboat chassis and long hood.. An article of which I hope to write someday. I've had a blast converting these two engines, so if you decide to make it more like the real one, don't be afraid to. Gary |
| Gary Condry - 08/19/2009 - 14:22 |
| GP-38 and GRBLOG |
| Jerry, A well written and informative article for those just getting started with large scale diesel locomotives. A lot of good tips on adding the factory supplied detail. Look forward to following your build of the Boeing train on your BLOG. |
| JD Miller - 08/25/2009 - 15:11 |
Top of Page
|


