See this Live Steam Track at the South East Large Scale Train Show !
In 2001 I started off in live steam with ‘IDA’ from Accucraft and was happy puttering around the tracks in the back yard. 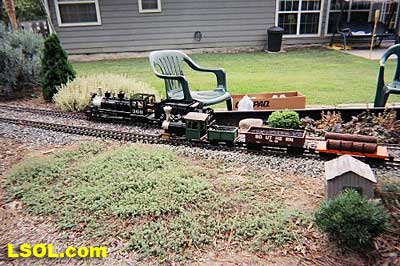
In 2002 I took IDA on the road to the 2002 Garden Railway Convention in Cincinnati, Ohio. This was the first time I ever steamed up in public so I was a bit nervous but I gave it a shot anyways. I introduced myself to Al Sadler, he was the Track Marshall and he explained to me the etiquette of steaming in public. Al and all the other live steamers gave me pointers and tips and I had a great time. I learned a lot while watching others prep their engines and seeing all different kinds of steam engines from the many different manufacturers.
In 2003 I went to the Diamondhead Steam Up for the first time and had a great time. Three double track layouts set up to run 24 hours a day for about a week. Wow, this was the place to be. Again, all different kinds of steam powered machines to be seen and a lot of people to meet and talk to.

Just about every large scale show you go to now has a live steam track. So when the call went out for clubs to display at the South East Large Scale Train Show I saw an opportunity. No club had put in that they were bringing a live steam track so I decided that I would bring one. But there was a problem, I did not own one nor did I know where to get one.
I had ideas in my head of what I wanted in a steam track as well as what I did not want so I came up with a few plans. I worked the plans out on paper and in my head trying to get it right before I even thought of cutting one piece of wood or metal.
I had talked to my friend Ted in the past about my idea for a steam track. Then one day I received an email from Ted with some information about a metal shop class in the school district he works in that does projects for people out side the school. Great! So I gave the instructor a call and made plans to meet with him to go over the plans I had drawn up.
With the plans in my hands as well as a few pictures of portable steam tracks and a section of ‘G’ gauge track I met with the instructor. We go over my ideas and we make a few changes here and there which I expected since he knows more about metal than I do. I felt good leaving this in the hands of the school students after meeting with the metal shop instructor.
I have seen live steam portable layouts made out of wood and metal as well as a combination of both. Here is a list of things that helped me make my decision. I have added a new Aristo-Craft live steam Mikado to my collection, a collection of two that is. Well, if I was going to go steaming I wanted to be able to run my Mikado.
Ok so that means I need to have a 5 foot radius so that leaves me with a circle that can be no smaller than 11 feet in diameter. Remember that 10 foot diameter track is measured from the center of the rails so having a few extra inches on the edge can save a train from hitting the floor. I just did not want a loop of track so I decided on having eight sections made that were 5 feet long and 2 feet wide. Why 5 feet long? Because I was planning on using 5 foot long sections of straight track. Turns out I ended up using 4.5 foot sections of straight track.
I also wanted to be able to run more than one train so the sections were made to be 2 feet wide. This left me enough room to put a siding on each loop of track. This is not a common thing in portable layouts of this size but I wanted to be able to have a train steaming up or cooling down on the siding off of the main line where someone could be running. A portable layout made of metal you ask? Yep, metal because after you brace a wood frame and put a sheet of plywood on it, it starts to get heavy.
But that is not the main reason I choose metal over wood. I chose metal over wood for size reasons. For every 2 pieces of wooden bench work I can fit at least 3 sections of metal bench work due to the fact that you can use smaller dimensions with metal. Is it that important to save space? For me it was, I wanted to be able to use this portable unit with out having to go thru any extra hurdles or expense in transportation.
In other words I did not want to rent a trailer every time I needed to set it up somewhere, I also did not need the burden of buying a trailer and trying to store it since I would use it only occasionally. This had to fit in back of my pickup truck with a 6.5 foot bed, no exceptions. 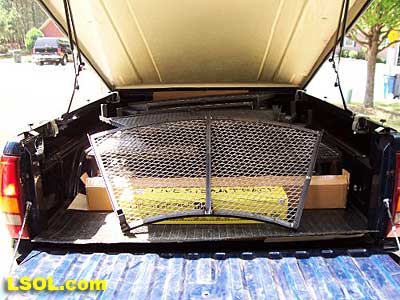
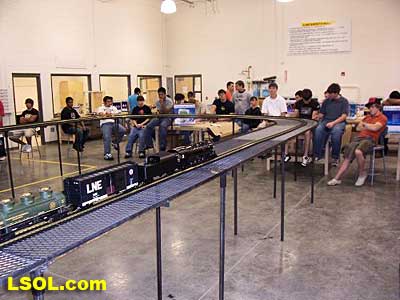
The metal bench work was built and assembled at the school and ready for me to come and inspect. I brought along enough track to make a loop so I could run my live steamer for the kids. I had a few of them hang out with me while I was firing up the engine to run. Maybe one of them may become a live steamer after this experience.
We had a good run and I was pleased with the setup so it was now time to disassemble it and get it in the truck. The instructor had some doubts that I would be able to get it in the truck.
It took me a few minutes to figure it out but I was able to do it. When I got home I drew up a diagram so I would know what piece went where when I had to load it again.
The metal was cleaned and a coat of gloss black paint was applied.
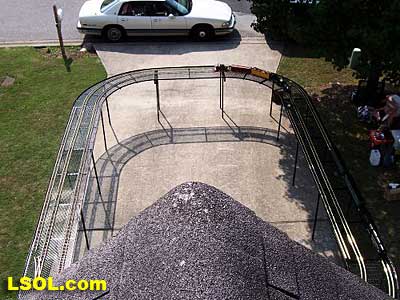 On Memorial Day, Chris Wolcott and I set the track up in the driveway so the two mainlines and siding could be laid out. Once we figured out the spacing of the two main lines and the sidings I was able to cut the few pieces that were needed to make it work. We use the plastic zip ties to hold the track to the bench work. Not only does this keep the track from moving around but it also keeps the rail joints butted up against each other so the track does not separate.
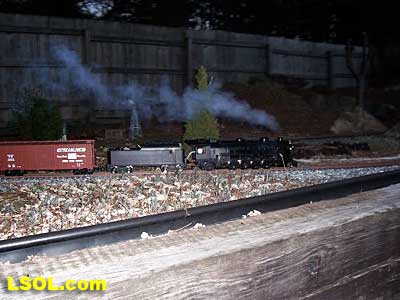
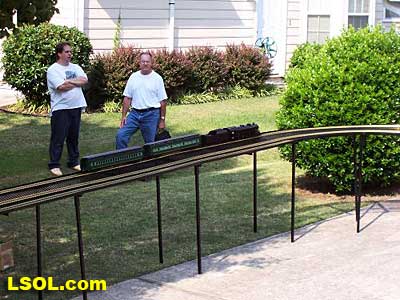
Then we fired up the steam engines. Chris was running an Accucraft C-16 pulling AMS freight cars on the inside track, while I was running an Aristo-Craft Mikado pulling Aristo-Craft heavyweight passenger cars on the outside track. The test of the track went fine. We had more then enough room in the curves to pass each other.
The track was then disassembled and is now waiting for its big debut in Perry, Georgia at the South East Large Scale Train Show.
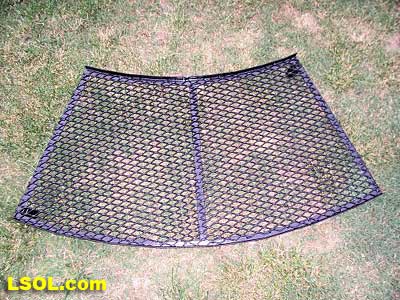
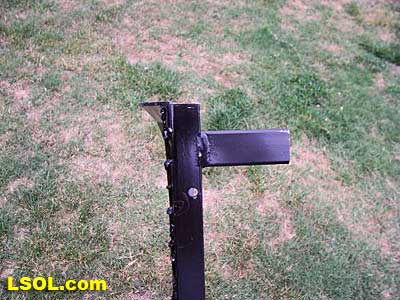
The bench work is made out of one inch angle and expanded metal with some square tubing for legs and leg sockets. Relief cuts were made in the angle so they could bend it to form the curves. Four inch sections of square tubing were welded to the bottom side of the bench work, this gives the smaller diameter square tubing legs a place to slide in to.
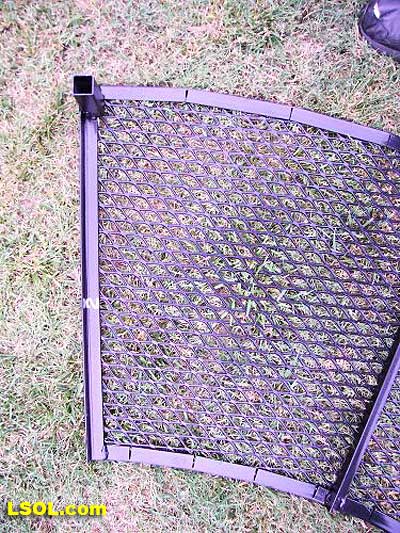
Two holes are drilled in the end of each piece so that they can get bolted together.
The design is simple and should be easy to do if you have all the right tools. I do not own a welder or have any experience with a welder so that is what kept me from making my decision to go metal sooner. The local metal supply company may be able to save you some steps if they will cut the metal to the size you need.
This would work fine for all the straight sections of metal but you would be on your own when it came to trimming up your curves after they were bent. Since all of the sections are two feet wide you can set a drill press up to drill hole after hole. This would give you the accuracy you need with out having to worry if the next section will match up with the next one when trying to bolt them together.
Do I like what I have? Yes. Would you do anything differently if you were to do it over again? Yes. I would mount the legs to the bench work differently. The legs are in a staggered pattern, two legs per table mounted in opposite corners from each other. I would mount the legs at one end of the table.
This would make it easier to set up since you would be holding the other end while bolting it to the previous piece. Due to the restriction I placed on myself by making this fit in my 6.5 foot long truck bed with the top cover closed the curves were made in eight 45 degree sections instead of four 90 degree sections. The less pieces the better as long as it is not too big or too heavy. The last thing I would change would be the size. I would go for curves that are twice the size of the ones I have now. That would allow me to have an outside track with a diameter of 20 foot instead of the 10 foot diameter I have now. Don’t get me wrong I like what I have and it does the job well but with every thing there usually is room for improvement.
I would like to dedicate this to Al Sadler who died in 2005. If it were not for such a nice guy like him I do not think I would be this far along in live steam. In a way Al may be the reason I built this portable layout. A layout that welcomes the experienced as well as the beginner live steamer to get together and run trains. Thanks Al and I hope that someday I will be able to inspire someone like you did me. Al was a member of the Cincinnati Garden Railway Society.
Thanks go out to:
Aristo-Craft Trains
The Metal Working Instructor David Bolt and his students at the Career Academy in Dalton, Georgia
Ted Yarbrough
Chris Wolcott
My wife Debbie
Top of Page