Power, Sound, R/C
:
Lights / LED
Make your Headlights Shine
Jul 20, 2005

By Jim Kottkamp |
Author
Bio
A good reflector is essential for a realistic look to your headlights. Learn how to make yours better for only a dollar.
|
Engine headlights serve a double function; they provide the engine crew with nighttime visibility of the track ahead and provide a warning for anyone near the train's path. Crews placed great importance on the headlights of their locomotives. It was not unusual to see a steam engine covered in cinders and dirt except for the headlight, which was clean as a whistle. A good reflector is essential for a realistic look to your headlights. It concentrates the beam of light to provide good illumination for night running and provides a convincingly bright light when running in daylight. When the locomotive is not in use, a headlight with a real reflector provides a very realistic appearance. I found three excellent sources for small Maglite reflectors using a Google search. For G gauge you will be interested in either the AA or AAA reflectors, which sell for about $1.00 each! The AA reflectors work best for Accucraft D&RGW locomotives. Also note that the Accucraft light bulbs are 1.5 volts and reflect nicely in the reflectors. 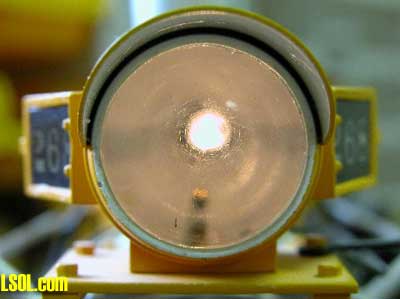
Before installation. 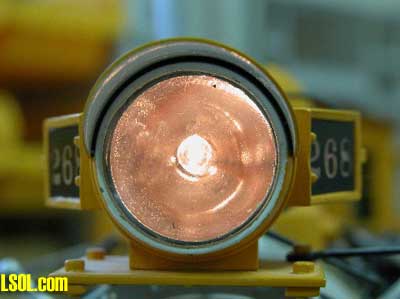
After installation.
The most difficult part of adding reflectors to your headlights is removing the headlight lens that is pressed into the housing. The best way I have found to get the lens off is to use a small screwdriver on the edge of the lens. Hold the headlight housing securely, press inward and forward at the same time. If there is no movement, change locations until the lens pops out. You may want to place a few layers of adhesive tape on the front of the lens to protect it from being scratched if the screwdriver slips. If you do scratch the lens, you can use some 400-grit sandpaper to VERY lightly remove the scratch and then use a paper towel to buff the lens surface. Once you get the reflector out, take a few minutes to gently sand the edges to make it easier to put back in place and remove later. The AA reflector will have to be reduced in size to fit into the headlight housing. Cut off the front flange with a sharp pair of scissors. 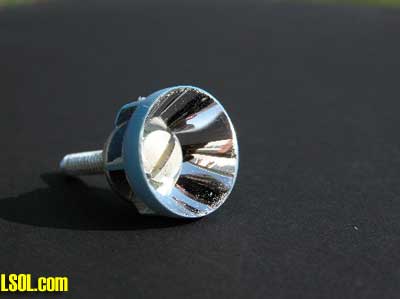
#2-56 counter sunk bolt screwed in place. Then screw a counter sunk head # 2-56 bolt into the hole in the center of the reflector, and place a nut on the backside to hold it firmly. The counter sunk head will not scratch the reflector's surface.
Place the end of the bolt in a drill press and sand the reflector down to the right size. 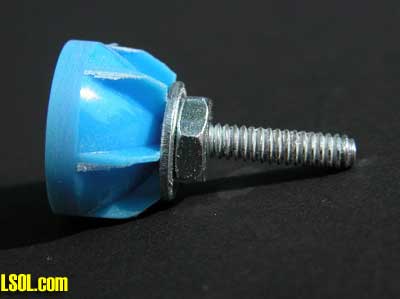
Retainer washer and bolt installed on reflector. The bolt shaft goes into the drill chuck for sanding. I used 150-grit sandpaper. Whatever method you use be sure to take it slow!!! Too much pressure, or heat will cause the reflective surface to crack and pop off, then you get to start over! Test the reflector periodically by holding it by the bolt and checking to see if it will slide into the headlight housing. You want it to slide in easily...so it will slide out easily to change bulbs. Then fabricate a backing for the headlight to keep it lined up properly once in the housing and provide support for the bulbs that will illuminate the number boards on the sides of the headlight. 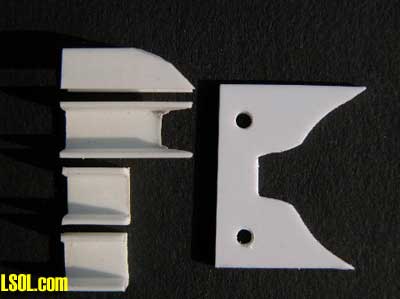
Parts needed to install number board lights. I cut a piece of .040 plastic sheet as shown in the photo to fit vertically inside the housing and glued it to the back ribs of the reflector.
Note that I also drilled and tapped the plastic sheet to accept two 0-80 round head bolts to use as terminals for the wires in that little bitty space. Cut pieces of 1/8-inch plastic channel to create a structure to hold the two side bulbs. 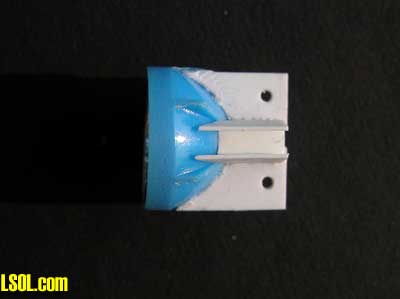
Side view of assembled supports. Note the drilled and tapped holes for 0-80 terminal bolts. I found that if I "pinched" the two outside channel walls the bulbs snap in place and stay there. Before adding the bulbs, slide the assemblage into the housing to check for fit. Its much easier to bend a piece of wire, stick it through the reflector's hole and pull the assembly out for adjustments without the bulb in the way! Make final adjustments, recheck the fit and then install the bulbs. A few notes of caution. First, the plastic sheet you glued to the back of the reflector will be a bit off-center because it is glued to the side of one of the reflector's rear fins. This means one side of the U-shape channels needs to be trimmed down so the assembly will be centered inside the headlight housing. 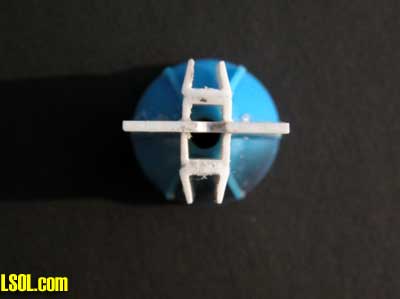
Rear view of assembled parts. The part of the center support (right behind the hole in the reflector will need to be removed. I used a drill bit.
Also, the number board bulbs MUST face forward (wires to the rear) for the number boards to be properly lighted. Last, remove the center of the plastic sheet right behind the hole for the bulb with a drill once the assembly is completed to allow room to move the headlight back and forth into the reflector to properly adjust the focus of the light once in the housing. Once the bulbs are in place, cut and strip the wires, secure them and the headlight leads to the 0-80 bolts. Then slide the assembly into the headlight housing. The final adjustment is getting the bulb positioned properly in the reflector. 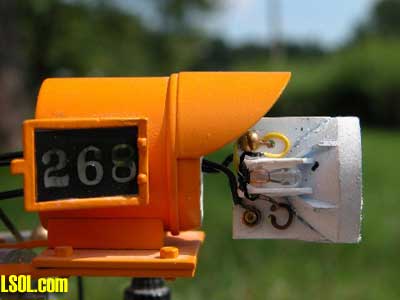
Completed assembly, ready to slide in place. To do this you will need to carefully push the bulb back into the hole in the reflector until the desired focus is obtained. Then clean the headlight lens and pop it back into position. The result is very realistic, lights off or lights on and will provide enhanced illumination for night running sessions...not bad for a $5.00 fix! Top of Page
|


