Layouts
Bill Builds a Bigger Better Bobber Barn
Apr 25, 2007


By Bill Dressler |
Author
Bio
In a previous LSOL online article, I described the construction of a full-size bobber caboose built to store and dispatch my garden trains. Even as construction progressed, my inventory of motive power and rolling stock grew. It soon became obvious I was rapidly running out of storage tracks.
|
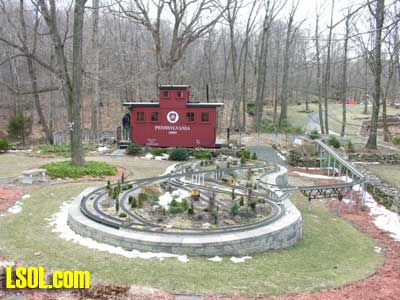
In a previous LSOL online article, I described the construction of a full-size bobber caboose built to store and dispatch my garden trains (A Bobber Caboose Replica as a Train Storage/Operations Center ) Even as construction progressed, my inventory of motive power and rolling stock grew. It soon became obvious I was rapidly running out of storage tracks. This update describes the construction of the addition to the caboose I alluded to in that article. The caboose itself and a photo providing perspective on the main layout are shown. Trains, stored on sidings within the caboose, exit and traverse an elevated connection (made with PVC conduit supports and Trex(tm) decking) to the raised layout. From there they can travel through varied routes on the main section and, when desired, return to the caboose. Returning trains continue through the caboose exiting the opposite end (left side in photo) to an elevated turnaround before reentering on a parallel track. 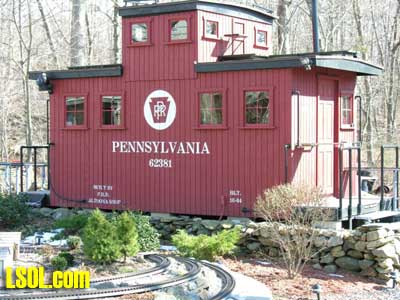
 For possible solutions to help alleviate the crowded conditions, I consulted with my engineers, Click and Clack and L'il Toot. There was unanimity on the need for "more trains, more trains!!", but the Jr. crew offered little input on budgetary and design considerations. 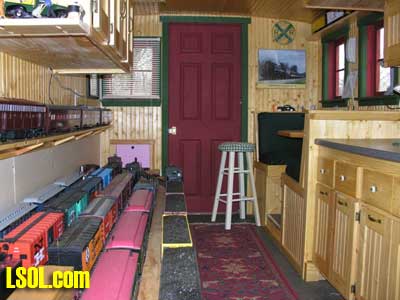 
 To achieve my goal of providing added storage without having an adverse effect on the aesthetics of the caboose itself, we agreed to bump out the rear wall with a lean-to addition. This would be slightly offset to the length of the structure so, at least from the front, this would give the allusion of a building behind the caboose. I drew up plans and constructed the addition in a modular fashion over the winter months in my heated workshop. In the spring I began the "Surgery" on the caboose at the first bit of warm (i.e., not-so-cold) weather. The back of the caboose faced the woods and so I left it undecorated except for the paint. 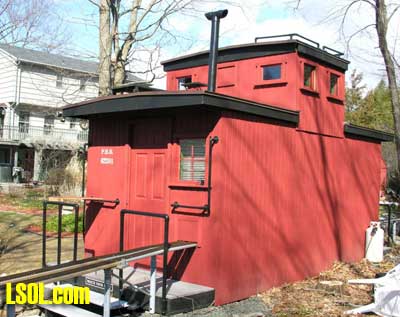
My first task was to remove the T1-11 siding at the level of the inside tracks. Next, I covered the two 4' x 8' platform modules with plywood on the top and insulated them underneath. I attached them to the side of the caboose with supports, consisting of 4" x 4" posts anchored to prefab concrete piers and a beam. These were used to bear the weight of the addition. 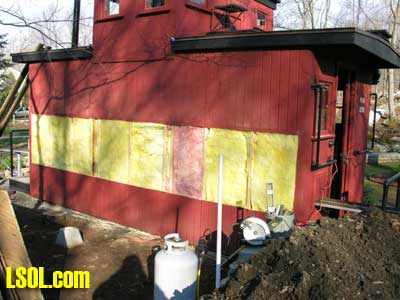 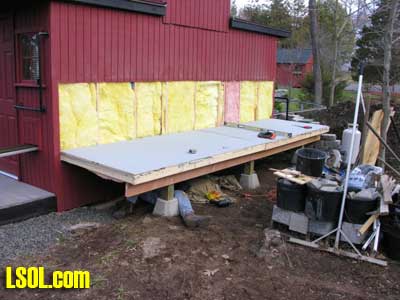
Next, I framed and insulated the sidewalls and attached gable ends to the platform. I covered the inside surfaces of these modules with the same T&G pine paneling used for the caboose interior and finished them with stain and a polyacrylic topcoat. The second photo illustrates this more clearly. The structure in the middle of the platform is a garage door style opening mechanism that I didn't use in the final version. I made this door with hinged sections of T&G fir flooring. However it tended to "rack" on the homemade tracking/pulley mechanism. Perhaps this would have worked with a little fiddling (or for a shorter length door), but I opted for the out- swinging door shown later on the completed addition. I used a lift- up mechanism assisted by a pulley and spring on the smaller door at the other end of the extension. 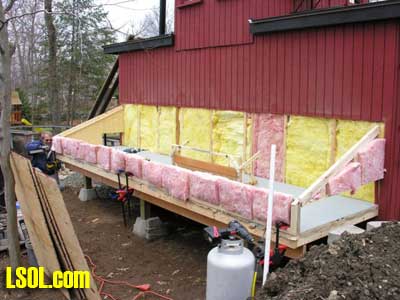 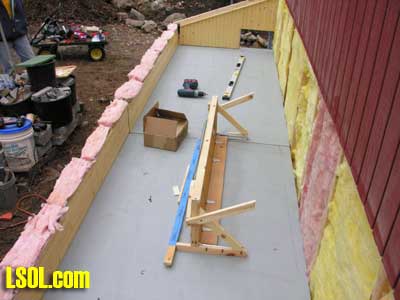
I added the roof sections, each with a large, piano-hinged access door framed in and covered with plywood.  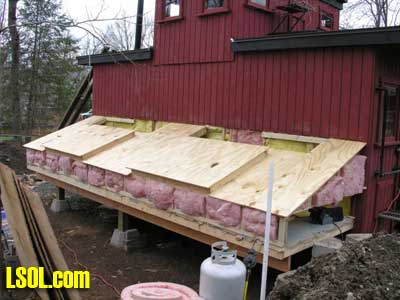
I made a second cut in the caboose sheathing to accommodate the cupola for the shed addition. 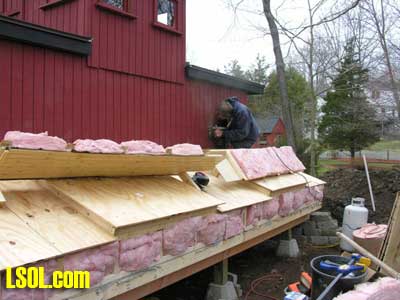 Serendipity prevailed for my window selection. While visiting my son's house I spied two unused exterior door sidelight panels that had been left over after being replaced by more decorative glass versions. These were heavy, double -insulated glass and I simply milled pieces of 2" x 2" and attached them to the existing frame. I attached the windows and the frames and covered them with sheathing. 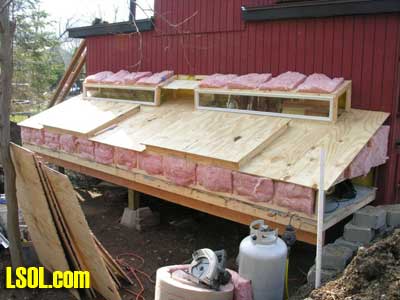
I reused the T1-11 cut from the caboose on the exterior walls of the addition. I then covered the entire roof structure with felt cloth as a temporary measure awaiting the application of flashings and the same roll rubber roofing I used for the caboose. 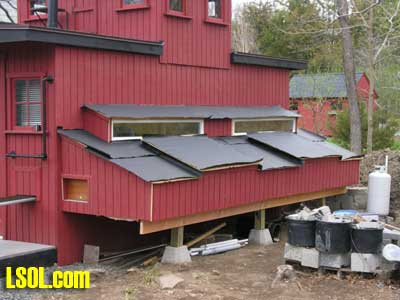 I did make divided light insets to break up the expanses of glass, but I wasn't quite satisfied with the spacing, so these will be redone. I installed the rubber roofing and added the PVC lattice as a skirt below the addition. 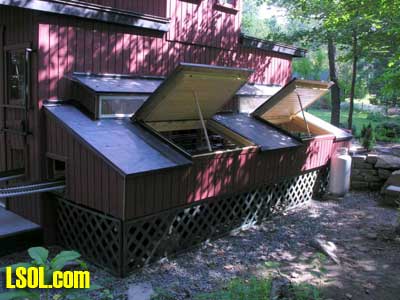
With the exterior now weather-tight, I turned my attention to the interior. My first task was to remove the drywall that had been left intact between the caboose and the addition. With this and the cleanup accomplished, it was now time for me to begin laying track. 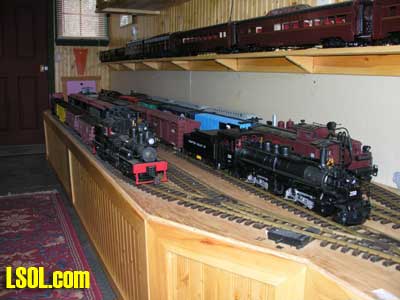 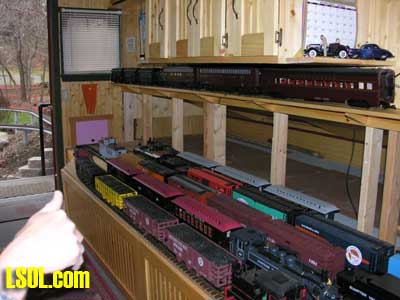
I first installed the yard tree switches outdoors at the turn-around end over a cellular PVC roadbed made from Tuff-Board(tm) available from Home Depot 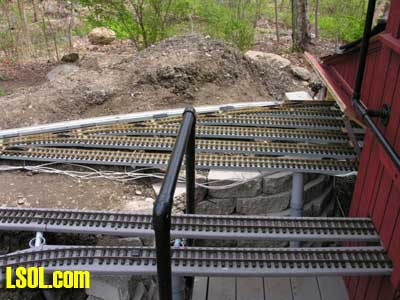 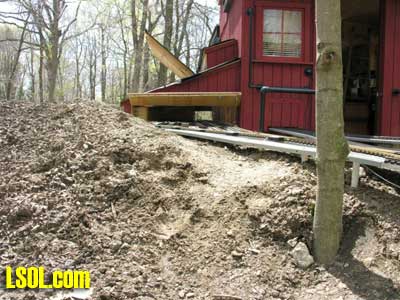
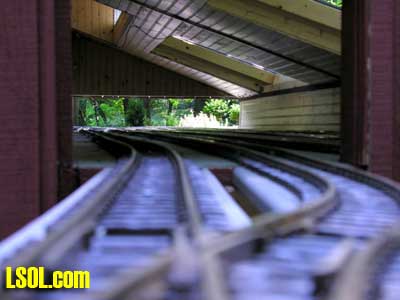
I then laid track in the extension using LGB 3- meter rail lengths and ties. I installed switches in the mainline at the caboose entrance to allow two of the additional sidings to serve as both arrival and departure tracks. The third picture of a front-to-back view through the addition illustrates this. 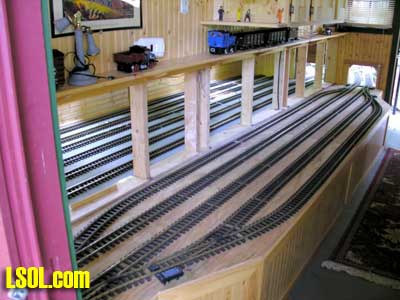 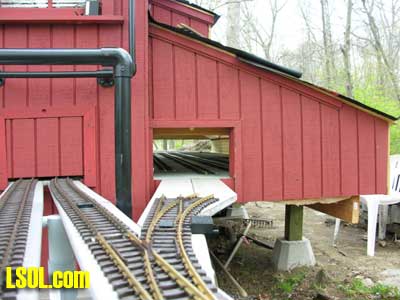
 As the final step of the caboose project was for me to replace the PVC conduit circle, which had merely rested on top of the ledge below (my Rock Ridge Rd. address is aptly named!). This replacement requirement led me to my second project of the winter that was to build a wooden trestle in my shop.  A double version of the trestle appeared to add interest and versatility without much additional work. I cut stripwood from 4" x 8' or 12" clear cedar. This material was the leftover ends from a massive cedar pergola a friend had installed at her house. Many sticks and bags of sawdust later, I assembled the trestle bents using Garden Texture templates. They were interconnected on a jig to facilitate spacing. I first assembled them in banks of 7 bents and joined two banks outdoors and braced them for stability in transit. 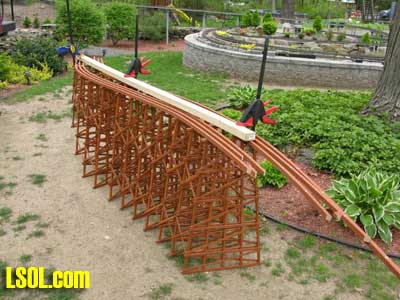
I used strips of 1/2"x3/4" Tuff-Board(tm) paint- matched to the cedar stain for the top trestle stringers. These stringers were quite flexible and this approach avoided the laborious task of laminating very thin strips of wood and bending the stringers on a jig. I was greatly relieved that my math was reasonably correct as the last few sections were placed and meet their intended destination with only minor tweaking. 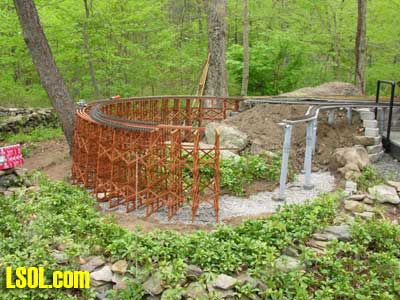 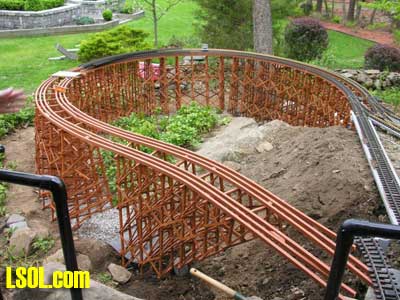 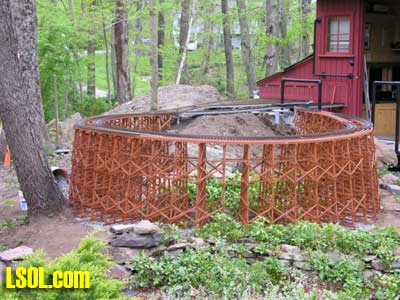
Now all that I needed to do was to install the trains that had been anxiously awaiting a siding they could call home and to make a test run over the new trestle. 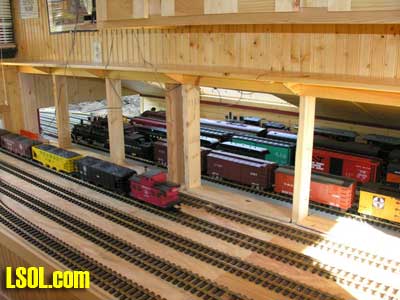 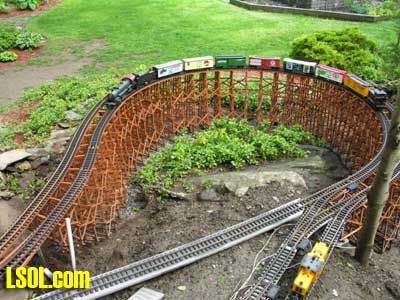 Somewhat to my chagrin, I discovered I still had a full house after all the locomotives and rolling stock were placed in the new addition. 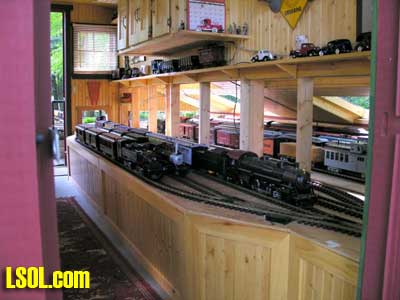
Everybody was anxiously waiting his or her turn for a run on the layout. This was accomplished successfully, but before I programmed switch routes it was a bit cumbersome to insure each turnout was set properly to accommodate the selected loco from its siding. 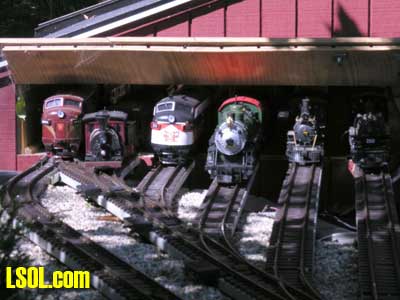 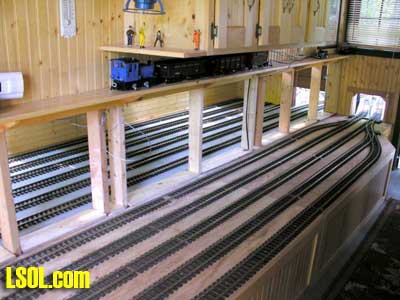
To celebrate the completion of this phase of the railroad we invited neighboring clubs from New York and New Jersey to join our monthly CT G-Scalers meeting. We had a great turnout and an opportunity to meet and mix with an array of garden railroaders with diversified experience and interests. 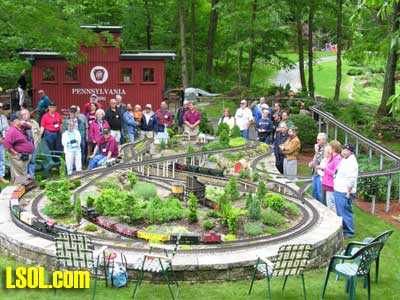 Even as of this writing I've already made extensions to the extension by installing brackets to the side of the shed and adding two additional arrival/departure tracks. 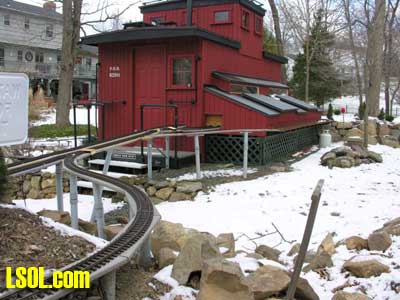
In that way, through trains have the option of traveling outside rather than through the caboose on their return leg. I have added wiring to separate the mainline into blocks and to place track contacts for automated control (collision avoidance, I hope) using BitSwitch(tm) technology. This will hopefully allow me to "fiddle" in the yard...constructing consists, managing arrivals, departures etc. while trains run trouble- free on the mainline (don't I wish!!!). My intention is to use LGB MTS on the PC to manage the yard as an independent block. Completion of the wiring awaits spring weather, as does my ballasting of the roadbed. In the interim, I have replaced the PVC roadbed supports on the mainline with bridges and, just as the leaves started falling, I installed a water feature with a stream running through the layout to a waterfall and pond at ground level. 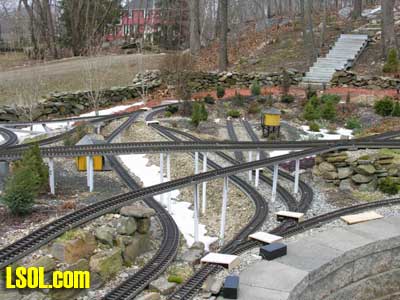 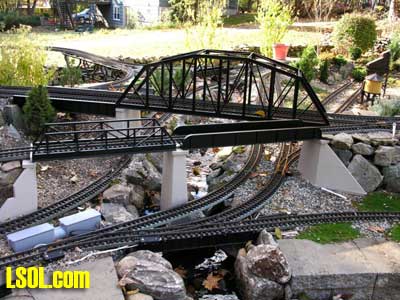
Oh yes, then there's the matter of the surplus "Railroad Crossing" sign I picked up at the local train show. No "real" caboose should be without a full size-crossing gate, now should it? But that's another story, perhaps at this point I should.............. 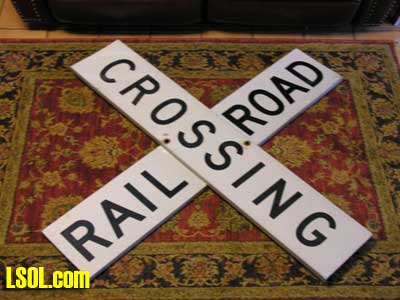  CT G-Scalers, Mark Paskus and Steve Brickel throughout various phases of this project. Mark was also the photographer. Thanks guys!!! Top of Page
|


