Layouts
An English Garden Railroad - Part 1
Aug 25, 2010


By David Howarth |
Author
Bio
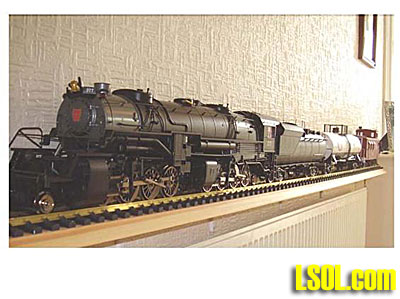
I've finally joined the ranks of "G Madders". I got the "bug" after winning a loco + stock (an Aristocraft model Mallet 2-8-8-2 ART-21600-01) and some mixed rolling stock whilst staying in Las Vegas for an extended vacation in December 2008.
|
The Railroad Diary of a Novice G Scale enthusiast located in England. In this two part article David Howarth introduces us to his Garden Railroad located in Sale, Cheshire, England. David started out in garden railroading after winning some Aristocraft items in Las Vegas. Thank goodness it didn't stay in Vegas. Come see how this English backyard was transformed. This is an abridged account of the construction of my first G scale layout, which first appeared on the 'G Scale Mad' website in the UK, in August 2009. It is an ongoing project, and I hope to add more material and photographs as the layout progresses. "Hi" to all.
My name is David "Dave" Howarth; I'm 65 years of age and live in Sale, Cheshire, England. I've finally joined the ranks of "G Madders". I got the "bug" after winning a loco + stock (an 'Aristocraft' model 'Mallet' 2-8-8-2 ART-21600-01) and some mixed rolling stock whilst staying in Las Vegas for an extended vacation in December 2008. As a new member of LSOL.com I thought you might be interested in what I am doing over here in the UK.
 Never even thought about this hobby until my winning ticket; but now everything else (golf, the gym, flying light aircraft, food etc) has bit the dust, and I'm consumed with plans and ideas.
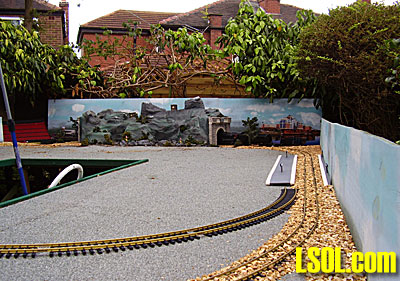
Well, here is the progress so far: And so, I then looked at my rear garden, and drew up plans for a simple layout - up came the plants, the gnomes, and the neighbours cat's favourite toilet space, and this started to be constructed.
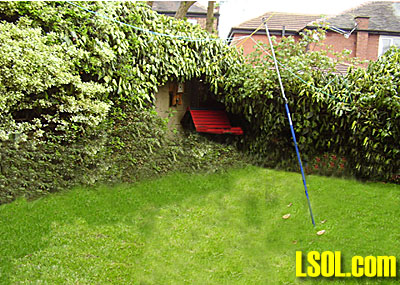
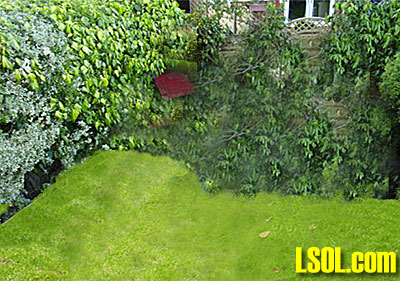
I commenced this in February of 2009, and now I've laid the basic oval of track, built a tunnel based on a mountain, and a fishing pond with a metal bridge. I've taken lots of photographs from the early construction of the layout support table (I had to opt for this as a ground level layout might have caused me to spill my drink when bending down to reach the track and trains.) This is the original plan for the layout - as you might have expected, the current track layout is slightly different consisting of a 10 feet diameter oval, with an inner 8 feet oval. The remainder of the layout (so far!) is as per my original plan.
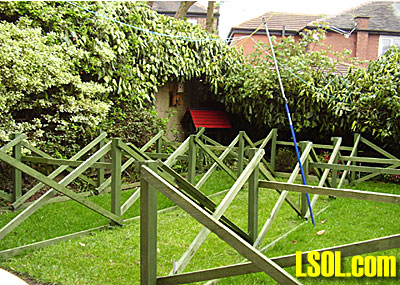
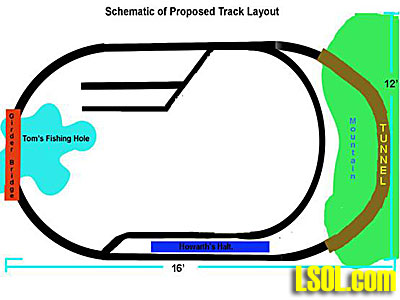 The total garden area I have to work only allows an area of 16 feet by 12 feet to work with, and the framework for the table was constructed using 3" x 2" hardwood for the table legs and support braces, and 8' x 4' exterior plywood sheets for the top. The table surface is 3' 5" above ground level.
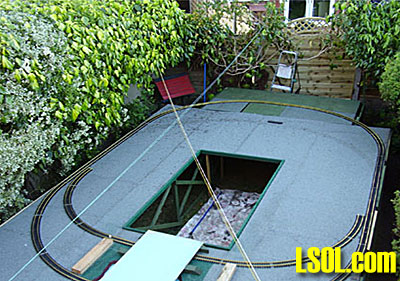
The 'pond' was constructed by cutting out an irregular shape from the plywood sheeting, with the edge cut at a 45% angle to simulate the pond banking, then a piece of clear plastic was added to the cut-out section, to represent water.
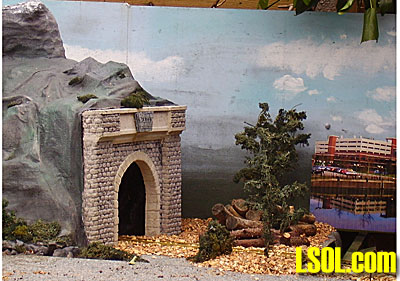
 Mountain Construction
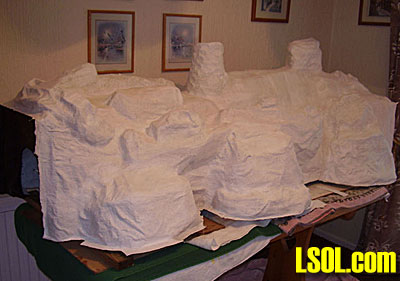
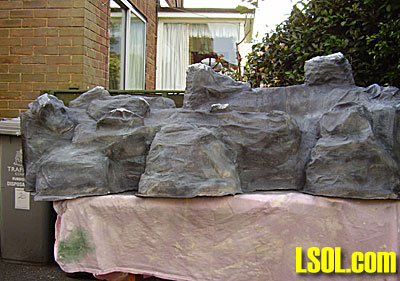
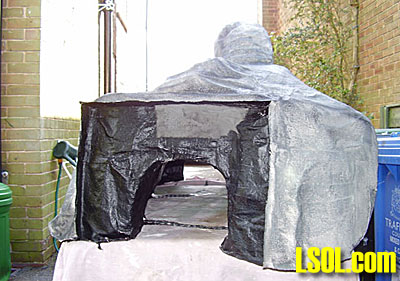
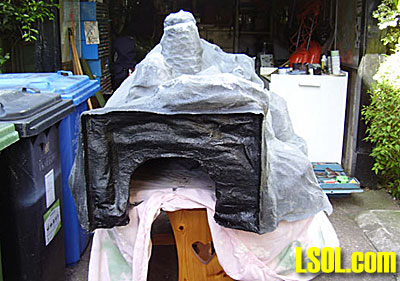
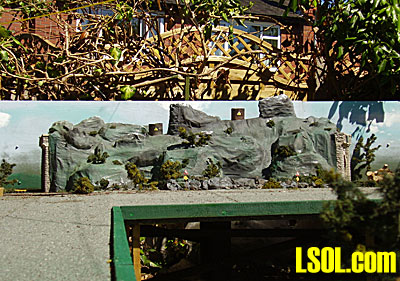
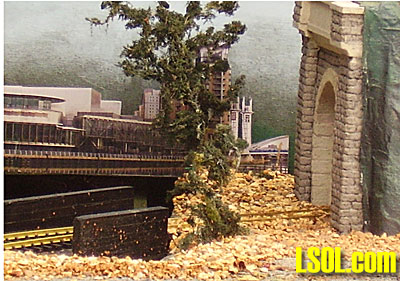
I then set about constructing the mountain (tunnel) which is 5' in length, 3' wide, and 3'6" in height. It is curved to accommodate the track layout. There is an 'escape hatch' in the rear section, (rather like my late Dad's "Long Johns") to enable access for derailments. It is constructed of a chicken wire frame, onto which I applied several layers of 'Modroc' plaster bandage, before finishing off with various cans of spray paint, and then varnished some of the more exposed areas. Here are some 'piccy's' of the construction process.
Tom's Pond
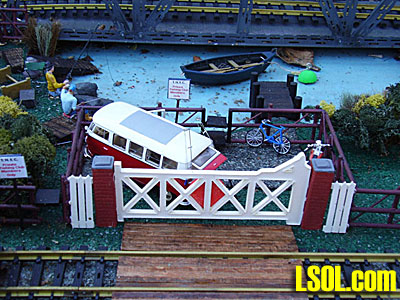
I then commenced work on the first feature area, the fishing pond my brother in law is as obsessed with fishing as I am now with this hobby, so I thought this would be an interesting feature. I've named it "Tom's Pond".

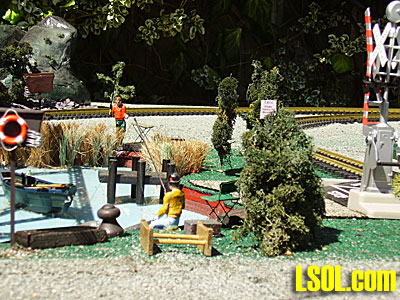

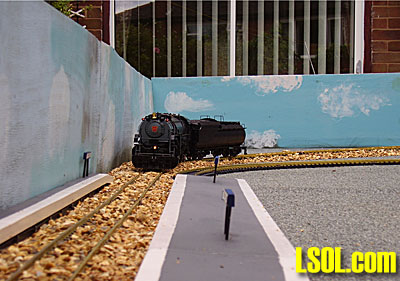
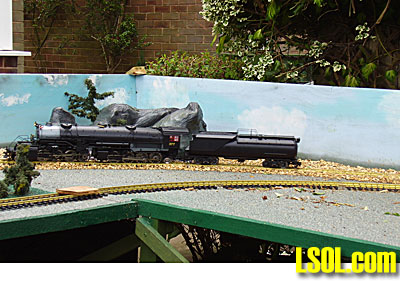
Now I've got this far, I ran my first train, and guess what; No derailments!! Ballasting
So now it's onto the ballasting. I spent ages trying to decide on the colour and type of ballast, before picking some from 'Homebase'. It's now down, but whilst it's the right size, I'm not too happy with the colour, but I'm sure it will fade once it begins to weather. Here are some pictures of the first train running, followed by some shots of the newly ballasted areas.

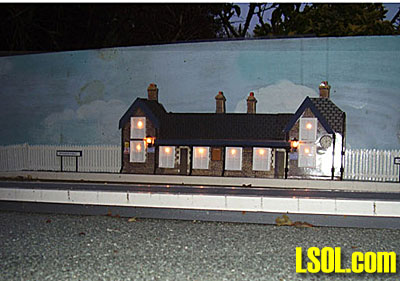
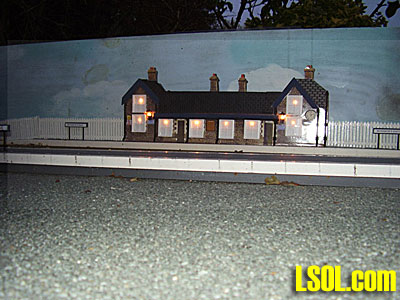
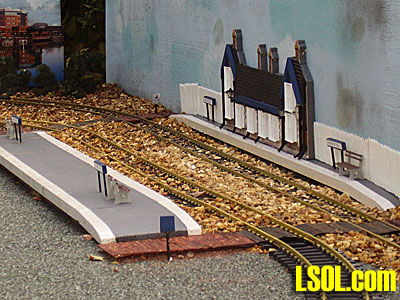
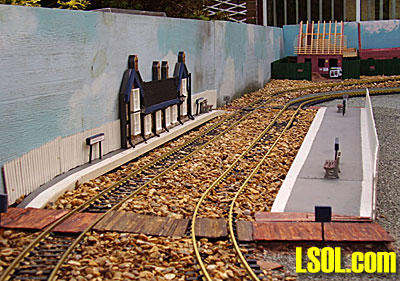
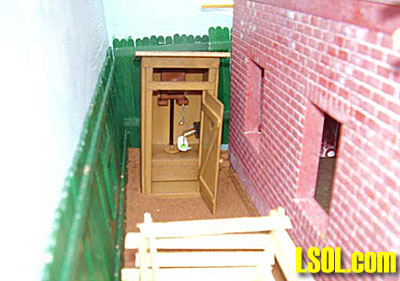
Train Station
The next project was the construction of a station. The platforms were simply made from wood, and then painted. The main station building, which was in reduced relief format, due to the shortage of space in the area for a full scale size building, was based on a picture from a suppliers catalogue, which was then 'fettled' using Abode 'Photoshop' software. Lighting was added in each of the individual windows, connected to a 12v battery, with a small solar panel (On special offer at 'Maplins' $8.00GBP ($12.50USD) to provide a trickle charge to the battery.
House Under Construction
Having reached this stage, I got slightly sidetracked, and rather than finish the station platform, I did some shopping and was fortunate enough to purchase a "Pola House Under Construction" kit for approximately $30GBP ($46.75USD) below the list price. I decide to incorporate this into a scene of a building construction site of residential houses, and this is the result.
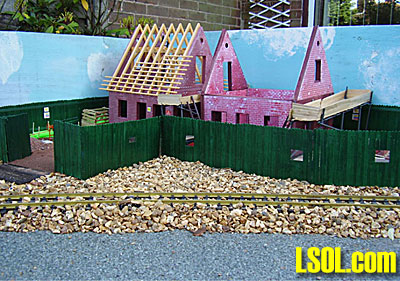
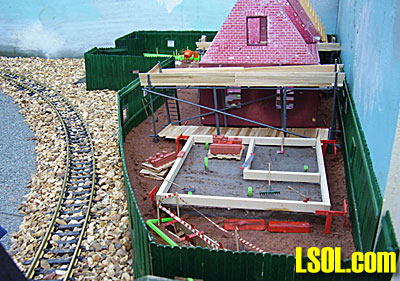
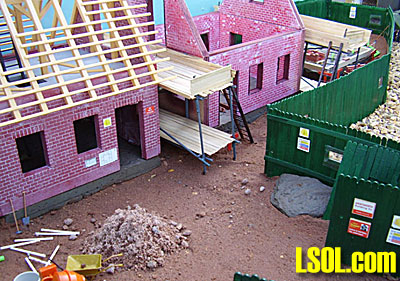
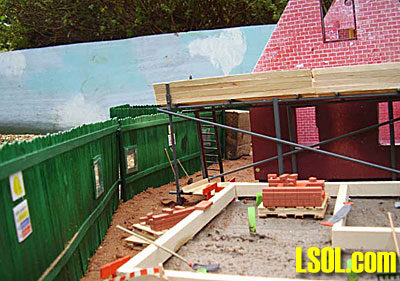
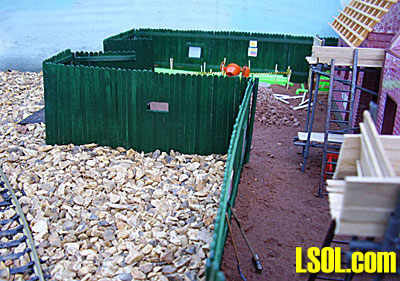
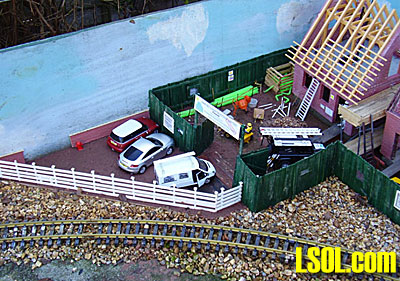
I was lucky to pick up some very cheap vehicle kits (courtesy of a fellow "G" scalers tip on a previous forum, and these were added to the building site car park for effect). I still have to add an office or cabin to the site, but for the time being, that can wait, as I'm moving onto another project, involving the construction of a scrap yard/car wreckers site, the building of a wooden cabin from a kit that I purchased on a recent stay in the States, and then starting a road network for the main site areas. Scrap yard / Car Wreckers Site
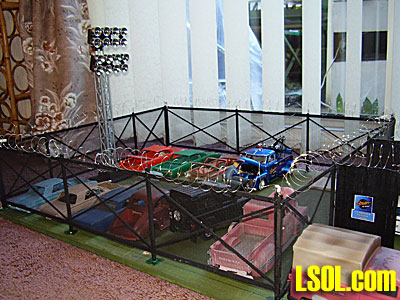
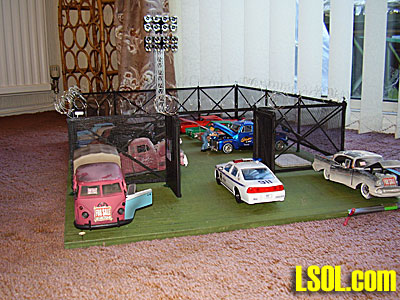
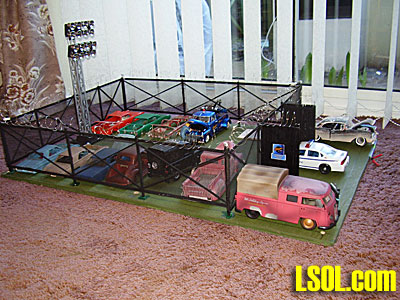
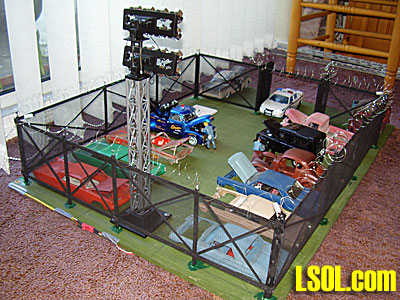
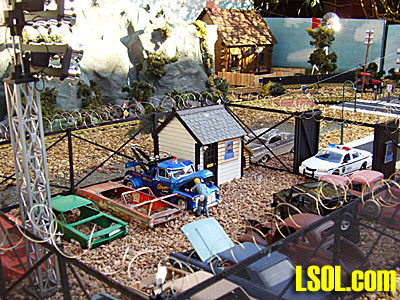
On to the scrap yard scene. I based this around a baseboard measuring 3' by 2' so that I could construct it indoors during the winter months. The fencing is made from balsa wood strips covered with pool screen netting (from supplies I had in Florida). The site office is from T&M Models, with certain additions such as a chimney and internal lighting. The floodlight tower is a "Lionel" product I purchased whilst in Florida, connected to a 12v transformer power supply. Similarly, the model cars, both complete models and bodies only, were purchased in the States via EBay. The dog kennel is from "Hobbycraft"- I'm still looking for a Guard Dog!! So, here is the finished area, complete with Mechanics, but still awaiting the addition of the company Guard Dog.
In part two next week, David shows off the rest of the work he has accomplished. There is a lot more to come.
| English Garden |
| Great looking railway. Looks like you've gotten lots of work done on it. Can't wait for part 2 of this saga. Gary |
| Gary Condry - 08/25/2010 - 03:53 |
| An English Garden Railroad - Part 1 |
| David, you have achieved quite a lot in such a short time. Well done. I will look forward to reading your 2nd installment next week. Dave |
| Dave Clarke - 08/25/2010 - 04:25 |
| English Garden Railway |
| Good looking railroad. Well thought out plan. Look forward to next installment. Oh, where is the English Pub? There should always be time for a pint or two! |
| JD Miller - 08/25/2010 - 06:02 |
| English Garden Railroad |
| David, I am new at this and have had a hard time figering out how to build my garden railroad. With this part one you have given me some great ideas. If part two is as good I will be well on my way. Thanks, you have been a great help. |
| Paul R Newhouse - 08/25/2010 - 12:49 |
| English Garden Railroad Part 1 |
| Great looking layout. I liked your wrecking yard,it look's so real. Looking forward to part 2. If you go on facebook you can see my garden railroad. Thank you for sharing. Stay on track, Douglas from Salem, Oregon |
| Douglas Wilken - 08/25/2010 - 16:14 |
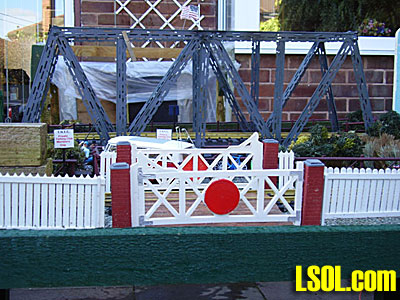
| Bridge |
| Nice very nice just looking at the pictures makes me want to race out into the backyard and get to work. What I would like to know is what is the Bridge made out of . Is it a kit or was it made by you ? if it was made by you what was it made with ? Keep up the great work you are doing . Looking forward to part 2 |
| Dean Sleeper - 08/25/2010 - 17:43 |
| Bridge. |
| Hi Dean. Thanks for your kind comments. The bridge was constructed from lengths of aluminium called Angle Beading in the UK. (It is what Plasterers use to make sharp corners when plastering walls etc). They were cut to length, then bolted together and a piece of wood added to make the floor and base for the track bed. I think there may be some more information in Part 2 of the article. |
| David Howarth - 08/26/2010 - 04:00 |
| English Railroad in the Garden |
| Hi Dave, What a wonderful railroad garden you have erected. I especially love "Tom's Pond" (it will prove very helpful in my newest Lionel layout, which notoriously no one can add water features to, due to the same raised flat platforms), what did you use for the tall grasses that surround it? All of the new buildings are wonderful, as well. What did you use for the green fencing? It is so realistic-looking.. Can't wait to see more. Thanks so much for sharing... Elaine |
| Elaine Haggenbottom - 08/26/2010 - 09:57 |
| Tom's Pond - Features. |
| Hi Elaine. Thanks for your comments - as a real novice to Garden Railways, it's great to hear positive feedback. I think the grass and fencing are featured in Part 2 of the article, but briefly - the grass was cut from the bristles on an old yard brush, and the fencing is made from wooden coffee stirrers. They are a brilliant material for making fencing, and replicating such things as wooden floors, doors etc. Hope you find these 'tips' of use. |
| David Howarth - 08/27/2010 - 12:55 |
Top of Page
|


