Scratch & Bash
:
How-to's
Scratching Buildings With Foamboard And Plastic Sheeting
Aug 27, 2008


By Randy Mower |
Author
Bio
I have been scratch building structures for my Greenbriar Cheat & Elk garden railroad since 1993. I wanted to have buildings that were not available, so I began building them myself. I also found this alternative to be more economical in most cases.
|
I have been scratch building structures for my Greenbriar Cheat & Elk garden railroad since 1993. While I have commercial plastic structures on my layout, I wanted to have buildings that were not available, so I began building them myself. I also found this alternative to be more economical in most cases. Learning from mistakes The first buildings I made were built using a plywood shell with dollhouse (basswood) siding and precision products or Grandt Line windows and doors. While I expected basswood would not hold up to the weather, I theorized that if I sealed it up real well the basswood would not rot. This proved to be an incorrect theory. After about 5 years or so the basswood rotted out under the paint and in some cases the paint was floating over a hollow gap where the siding had disappeared. I also had a few cases where the plywood rotted out as well, due to contact with the ground moisture or insects. The other problem that developed over the years was the 1/4" plywood I used for the roofs would delaminate and fall apart. More recently I started using precision products plastic sheeting or cedar wood strips instead of the dollhouse siding, which eliminated the rotting out basswood problem. However, the same problem with the plywood rotting or de-laminating out was still occurring. A revised method About five years ago I built a building out of blue foam insulation board 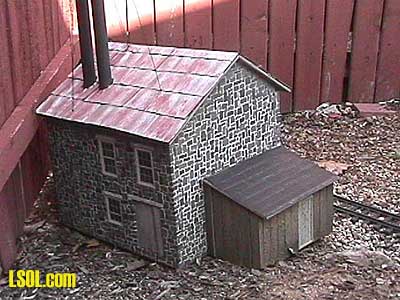
I made this building to represent a stone structure by carving out a stone pattern on the foam board using a soldering pencil and a variable power control to reduce the temperature. This building has been outside for years and the only part of it that I've had any problems with is the plywood roof starting to come apart.
Last spring while getting ready for our East Coast Large Scale Train Show open house I realized I needed to rebuild a number of my buildings as they had deteriorated pretty badly. Since I've had good success with the foam board building I made before, I decided to try rebuilding some structures using precision products siding over a foam board shell. This first building I rebuilt was the barn for my farm. 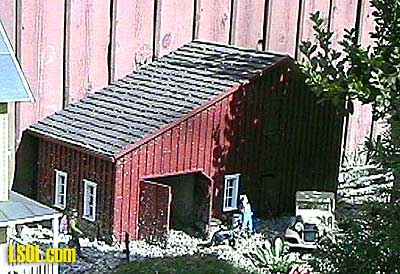
Encouraged by this initial success I decided to try a few more complicated projects. John A. Mower's Garage My original version of this building had been made out of plywood and dollhouse siding about 5 or 6 years ago. The siding and roof had gotten pretty bad and the opening garage bay doors had gotten warped. This building I designed using a general representation of old garages I had either seen in my travels or in photos. I called it John A. Mower's garage in honor of my grandfather who was an automobile mechanic for 35 years. This building has a peaked roof with a small addition on one side, and a front fa?ade squaring out the visible roofline. I made the building with operating swing doors into the work bay so I could add some interior details and I lighted the building so the details could be viewed at night. I use a drafting program to make scale drawings of my buildings before I start them so I have idea how they will look before I put them together to see if the proportions look right. Plastic foam board is pretty easy to work with, you can either cut the foam with a sharp utility knife and a straight edge, or you can cut it on a table saw. The blue foam board I use has a thin plastic vapor barrier on both sides, which I pealed off before assembly. The windows can be easily cut out with a knife and you can test mockup the building using finish nails to hold it together (just press them in with your fingers.
I used liquid nails for outdoor projects in a caulking gun to put my building together and to glue on the siding material. You cannot use quick-grab with foam board, as it will dissolve it. I found it worked best to lay out zigzags of glue with the caulking gun then spread out the glue with a piece of scrap wood or plastic. Next put down the siding material, I used lap siding but you could use brick, board and batten or whatever you like. If you are using Precision Products windows or doors you will want to cut the openings in the foam and the siding before glue it down 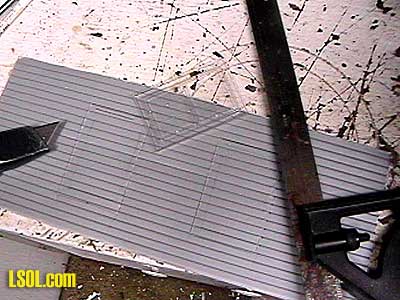
If you are using plastic windows with a flange like Grandt Line, you could actually wait to cut out the doors and windows until after you have glued the siding down if you want to. The key thing to keep in mind is to either clamp down the siding to the foam or use weights (like bricks) to hold down the siding until the glue dries (a day or two is best) if you don't do this the plastic sheeting will warp, especially if it is a large piece. I decided to add a base out of foam that extended beyond the walls in the front to give the structure a place to add some additional details and a gas pump. The assembled walls are shown in 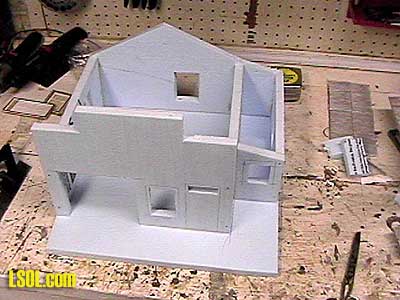
After I got the siding glued to the foam 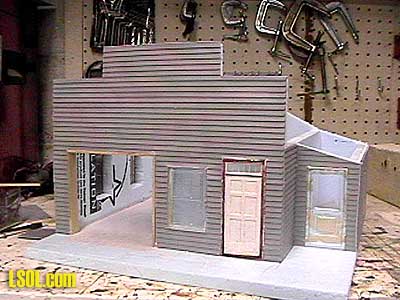
I installed an interior partition as seen in 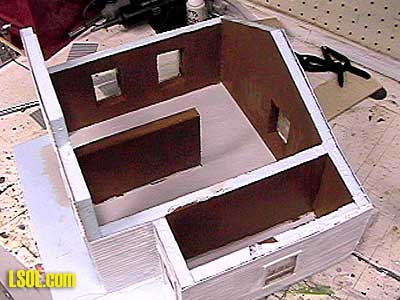
I also cut a doorway into the side addition to allow light from the interior light I planned to install in the main building shine into the addition as well. I painted the interior brown, gave the exterior walls a primer coat of white, and painted the floor light gray to represent concrete 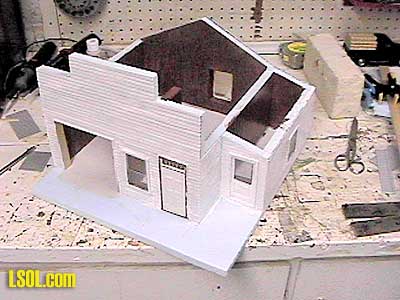
I use acrylic paint for all my garden railroad building painting and have found it to work very well. Since this building was going to have a large open door in the front I decided to reinstall the interior details I salvaged from my original garage. The details consisted of a couple of wooden workbenches and a bunch of leftover model car parts and tires including two engines. I also added an interior light on the upper part of the front wall below the roofline to illuminate the interior of the building. The next step was to cut out and glue down the roof to the walls. If you have a table saw it makes a pretty easy job of it if you can cut the ends at the angles needed to match the peak angles. I glued in the roof pieces so that they were 1/8" higher than tops of the walls. I then took some cedar strips approximately 7/8" wide and 1/8" thick and after cutting them to length I glued them to the tops of the walls. This way they were flush with the top of the roof pieces and gave me an overhang of approximately 3/8" past the walls. I also glued several pieces together to make the little porch in front of the addition on the side of the main building (see 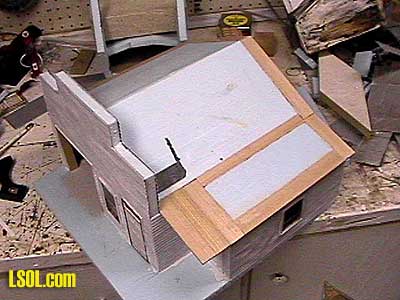
After the roof was installed I glued a piece of siding to the back of the front wall down to the top of the roofline and then I glued down the roofing. I used corrugated roofing for my building but you could use shingles, tin, tarpaper or anything you like. Next I cut out pieces of 1/8" thick cedar strips and used them to make the caps on the top of the front wall. The last step was to make two door panels for the front wall. I used approximately 3/8" wide pieces of my cedar strips and assembled the doors with a backer strip and glued it together with quick-grab glue and estrunion pins. I used model airplane hinges to fasten the doors to a frame I made out of 1/8" thick cedar strips I glued around the sides and top of the doorway. I used quick-grab and estrunion pins to fasten the hinges to the doors and frame. The final step was to finish painting the building. I gave the walls and roof three coats of white paint and then painted the trim and window frames red. I used stick-on vinyl letters to add the "Repairs, Gas, Tires" signage to the front wall. All that was left to do was place the completed building along the road into my town, wire up the lights, and add the details like a gas pump, a tow truck and some people and details. 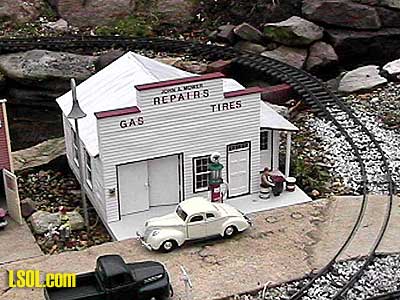
shows the completed building in its installed location. One final consideration when making foam board buildings is weight. Unless the structure is very large or sheathed with wood strips, it will be very light compared to its surface area. This could be a major problem if your layout is unprotected from the wind. My layout is protected on three sides so I have never had a problem, however, depending on your situation you may want to devise a means to pour a concrete floor or interior weight out of cement to give the building more weight or come up with a way to pin the building down to the ground.
Texaco Gas Station My Texaco gas station was built using the same principles outlined above for the garage. I started with a shell of foam 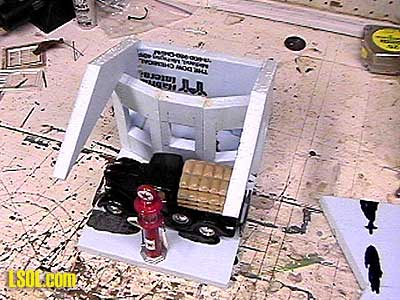
added siding and windows 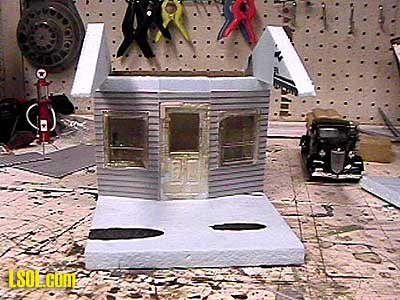
added the roof 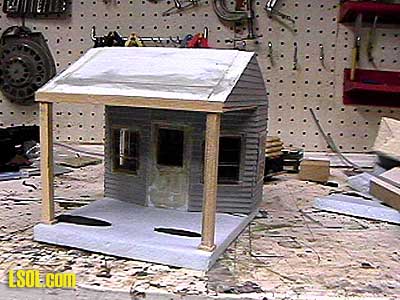
and installed 3/8" x 3/8" cedar supports to the front section. I used tissue paper laid into wet black acrylic paint, with additional paint slopped on top to simulate a tar roof. I've also used strips of super fine grit wet/dry sandpaper with paint on it to simulate tarpaper with good success, or you could use any of the number of precision products roofing materials available. I painted "gas" in white paint on the roof. Finally after painting I added vinyl lettering 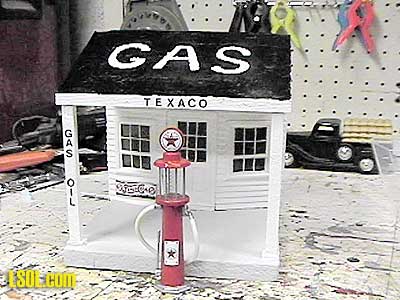
The completed structure was installed in the roadway of one of my towns and a fuel pump was added to gas up the cars of our towns little inhabitants 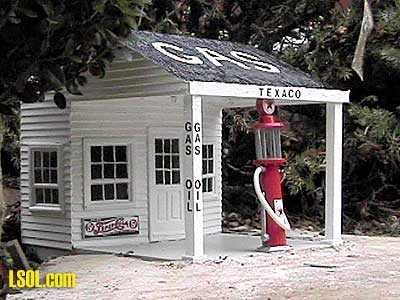
There you have it, I hope you get some foam board and siding material and try making some of these versatile structures yourself.
| My wife & I are always looking for ideas for structures |
| This is a great article and given the current economic situation you can have your cake and eat it to. Use inexpensive materials to build very nice looking structures and burn less gas by staying at home and building them. A win, win situation. Thanks for sharing this. I have always thought it would take a model railroader to put this country back on track. |
| Ben Jackson - 08/27/2008 - 05:26 |
| Foam Insulation Buildings: Great Idea |
| GREAT article. I am just now designing my outdoor layout and planning buildings. I wanted to do scratch-build buildings and this article sure gave me some great ideas. Well done. Thanks! |
| Tom Knight - 08/27/2008 - 16:32 |
| Your building ideas.. |
| Hi Randy, Excellent job. The garage is very unique and well done. Only question I have is "corners".. How do you finish the Precision Products when they round the corners? Did I understand you used cedar strips for the tops of the roof extensions? Great concept for people trying to get started on a nominal budget. Thanks for sharing.. Elaine |
| Elaine Haggenbottom - 08/31/2008 - 12:48 |
Top of Page
|


