Scratch & Bash
:
Engines / Rolling Stock
Making a Interurban - Part 1
Dec 17, 2003


By Noel Widdifield
LSOL.com Managing Editor |
Author
Bio
For many years I have been fascinated with the concept of the interurban. It was a very big item in my home state of Indiana in the early part of the 20th century. Learn how to modified a Interurban Street Car and one of the Rail Motor Cars to replicate Indiana Railroad interurbans found in the mid-1930s.
|
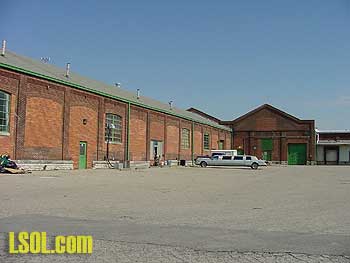
For many years I have been fascinated with the concept of the interurban. It was a very big item in my home state of Indiana in the early part of the 20th century. The interurban provided dependable, quick and cheap transportation. Interurbans were capable of traveling up to 80 mph compared to 8 - 10 mph by horse and buggy. My hometown, Anderson, Indiana was on what was first called the Union Traction system, which then became part of the Indiana Railroad as the interurban lines consolidated in the 1920's and 1930's. The major interurban car maintenance facility for the Union Traction was in Anderson and still stands. 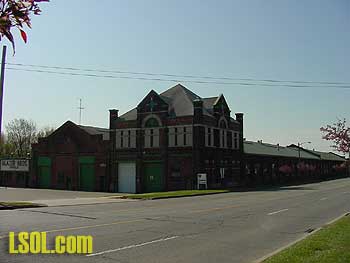
 This consolidation was driven by the fact that most of the systems began to lose money with the advent of the automobile. Many of the original companies were in receiverships and all had been losing money. This made it possible for the consolidation of sixteen electric and transportation companies to merge into the Indiana Electric Corporation in mid-1930, with the Indiana Railroad becoming the major traction company in Indiana. The company bought up all of the traction lines in the state, reduced track miles, consolidated power supplies and attempted to modernize and standardize the fleet of cars owned by the many systems they had purchased.
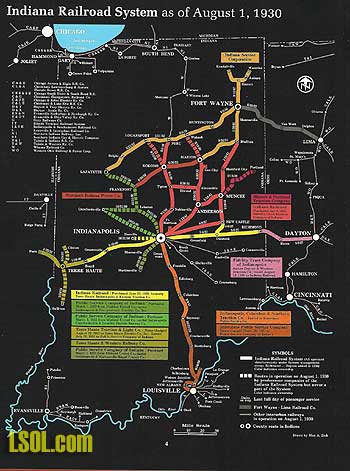
The map from Indiana Railroad, The Magic Interurban by George K. Bradley illustrates the consolidation and the expanse of the Indiana Railroad systems. It also shows that this system allowed a rider, with some car changes, to take an interurban from Chicago to Louisville or from Dayton, Ohio to Paris, Illinois. My mother rode the Union Traction interurban to and from High School every day and my father courted Mom by riding the interurban from Anderson to her parents' home in the country north of Anderson. If fact, he rode it almost every day for a couple of years. There are many books on the IRR and its predecessors 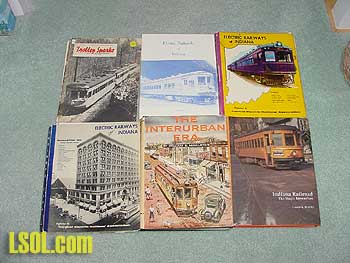
and they allow a modeler to recreate the Interurban system that spanned Indiana in 1930. There are not many interurban modelers and there are very few who model in large scale. Some bulletin boards that support the interurban hobbyist and the modelers on those boards have been a tremendous help to me in the interurban part of my large-scale hobby. Suppliers of large-scale interurbans are almost non-existent. Bachmann has made some trolleys in large-scale as has LGB, but today the manufacturer that has the greatest selection is Hartland Locomotive Works of LaPorte, Indiana. They offer the Interurban Street Car, the Rail Motor Car, the Line Car and Sparky Switcher that can all be used to model an interurban system.
This article is about how I modified two of the Interurban Street Cars and one of the Rail Motor Cars. 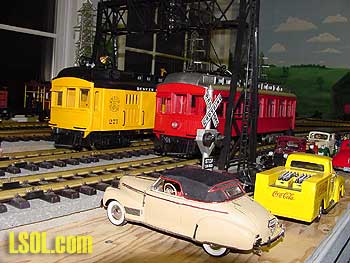
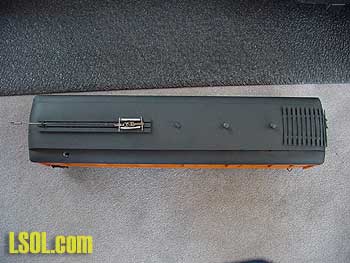
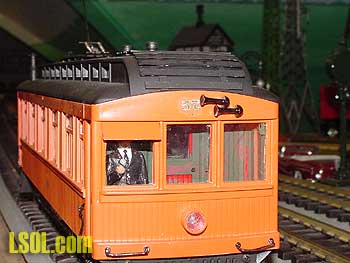
to replicate Indiana Railroad interurbans found in the mid-1930s. As you can see, the Hartland Interurban Street Car is molded in bright red plastic and the Rail Motor Car is molded in bright yellow plastic. The IRR cars were all painted in an orange color that my friends in the interurban modeling world say is closely matched with Milwaukee Road orange. This color is made in acrylic by both Badger Model flex and Polly Scale. Since neither comes in spray cans, I had to break out my airbrush to paint the cars, but I am getting ahead of my story. I started with the Interurban Street Car. 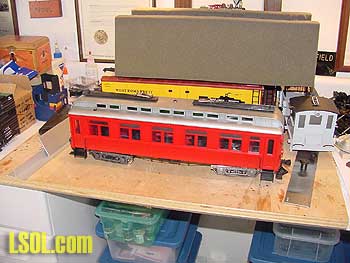
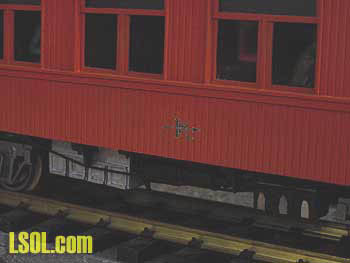
As you can see, it is bright red, has a silver roof, has two trolley poles and the underbody details are not what you would find on an interurban. The interior walls and floor are also red 
The first job was to remove all of the grab-irons, windows and trolley poles 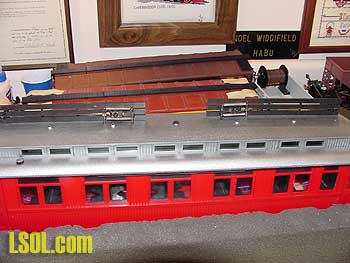
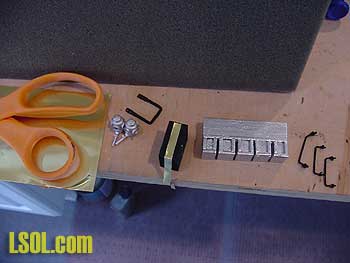
I put everything I take off of any model into an old cigar box 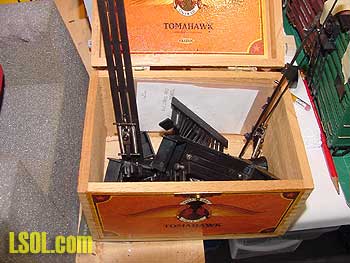
that I keep handy for this purpose. It is very easy to lose a part on the workbench when I spend more than a day on a model. The next task was to glue ventilators and a stove vent from Ozark Miniatures onto the roof with White Lightning adhesive caulk 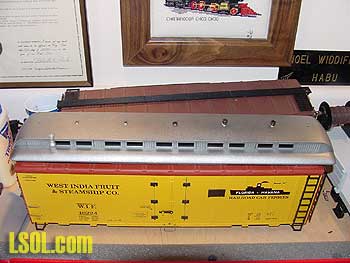
I removed the trucks from the under side of the car 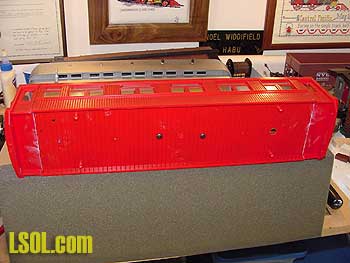
The car body has to be masked with tape and paper 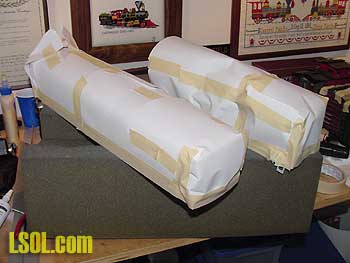
so that the underbody could be spray-painted. I used Floquil Grimy Black spray cans for the underbody color 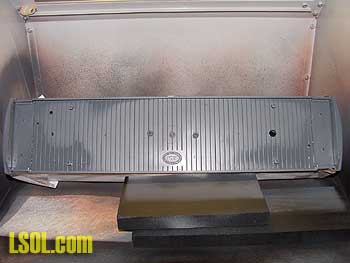
I painted the roof with Krylon flat black 
making sure that the roof vents and the stove vent were well covered. All of the painting was done in my spray booth that is ventilated and has a good light mounted on it 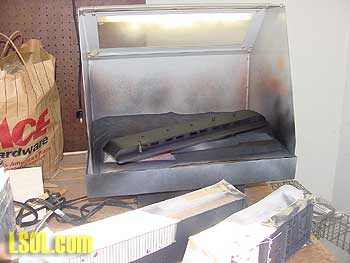
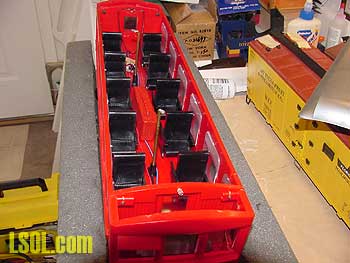
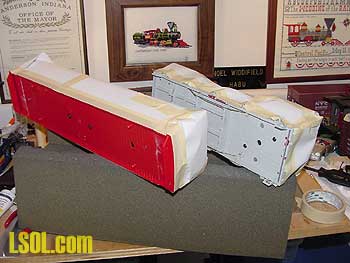
Removing the tape and paper masking from the body, I turned my attention to the interior. I brush-painted the walls with Testors Flat Beret Green and the floor with Testors Flat Wood 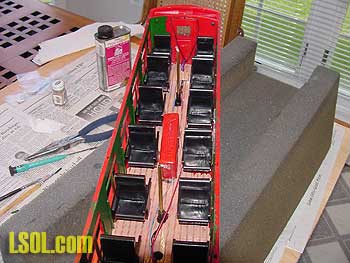
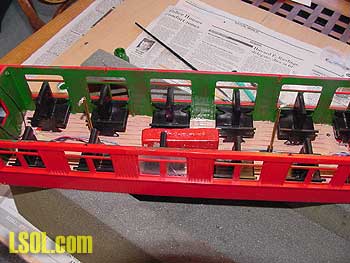
The pictures show only the first coat. It takes two coats and a lot of patience because the paint does not cover well on the type of plastic used for the cars. In addition, the seats are glued in securely and cannot be removed without causing damage to the floor. Since the interior will only be viewed through the windows, the final finish on the interior was not a major consideration. Once the roof goes back on it is difficult to see the walls and floor even with the interior lighting. In order to paint the exterior, I used masking tape inside the car to cover the windows and masking tape and paper to mask the underbody. I used my airbrush with the Polly Scale Milwaukee orange to spray the car bodies 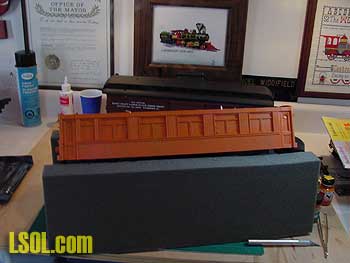

and then brought the cars back into the shop and removed the tape 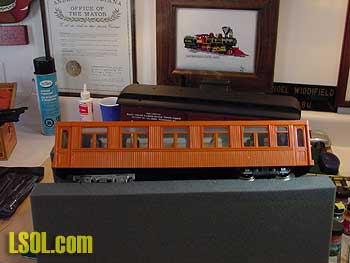
For the interiors to look authentic 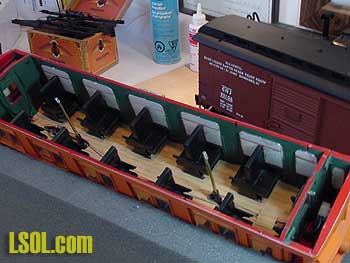
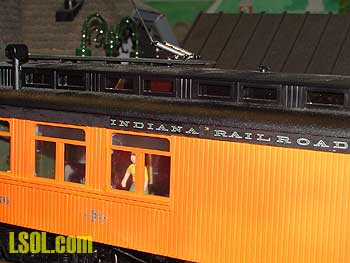
I glued some ARISTO and other passengers into the seats 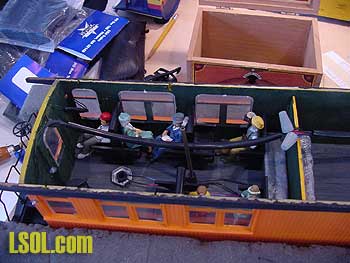
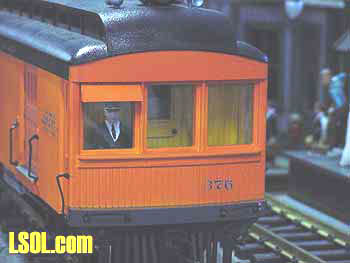
and put an ARISTO conductor 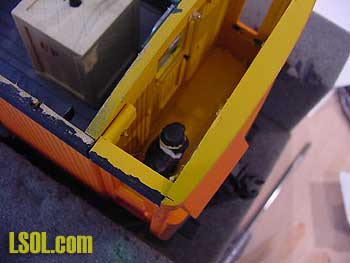
into the operator's compartment. (The men who ran the interurbans were called operators, not engineers.) This required major surgery on the conductor's legs to allow him to fit into the operator's compartment.
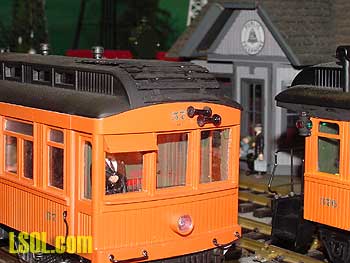
Detailing the outside of the car I used grab irons and strap steps from Ozark Miniatures 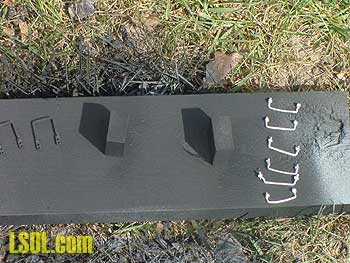
These were spray grimy black and I began the task of constructing the appliances found under the car on an interurban. I replaced the trucks 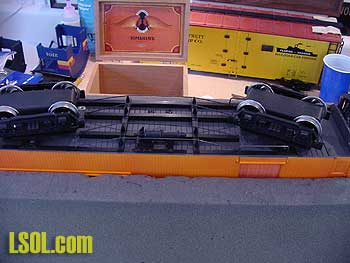
and then started on the appliances. This was done by referring to drawings found on the Internet and in some of my books. I constructed a "generic" set of battery boxes and electrical appliances 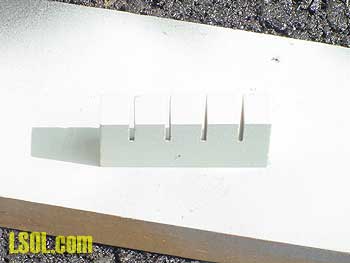
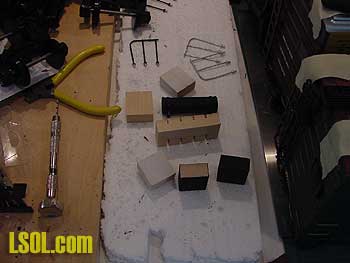
I constructed hinges for the battery boxes from strip brass and painted them silver. I also painted parts of the electrical appliances silver. I put a water tank from Ozark Miniatures on the underside as well 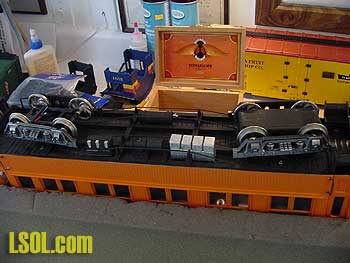
so the final look was fairly authentic 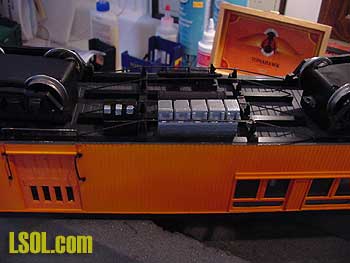
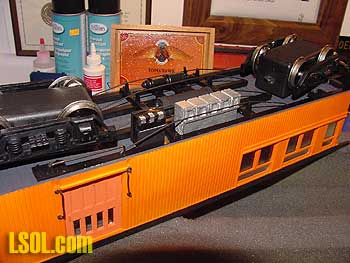
I put a trolley pole retractor coil on the back of each of the cars 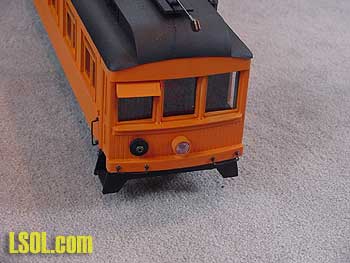
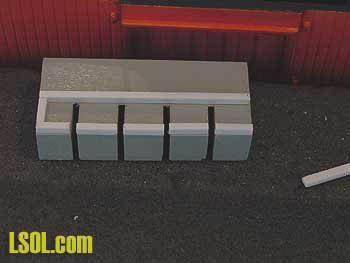
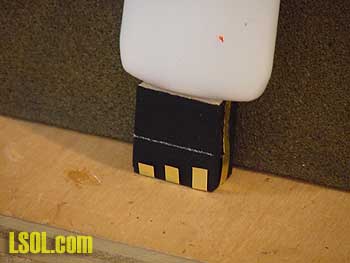
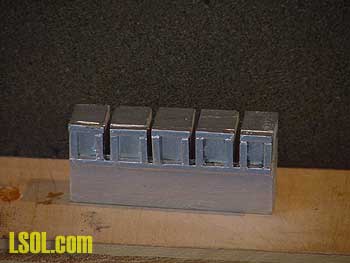
Spraying flat black on an "O" gauge part that I found at a train show fabricated the coil. I had some stretch line that I glued to the pole and the coil. This allows the trolley pole to remain at the correct height for the trolley wire. I also constructed a roof mat or ladder using strip styrene 
and glued two Ozark Miniature horns on the front of the car. These were also painted flat black. 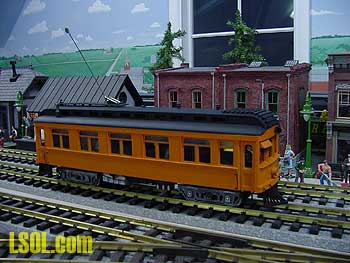
I turned my attention to the Rail Motor Car, which I was converting into an interurban combine for the IRR. The steps for finishing this car were basically the same as for the other interurbans with the following exceptions. The interior was finished the same way, but I place an ARISTO figure in the baggage compartment 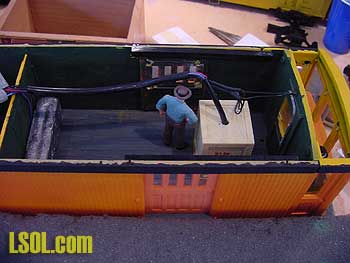
The exterior was finished the same as the other cars, but there was no roof mat for the combine. I removed the air/fuel tanks from the roof and finished it smooth 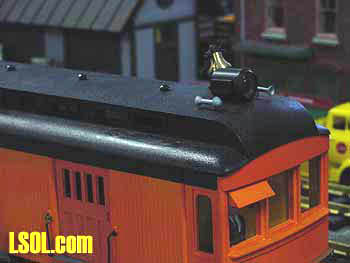
I left the headlight and horns in place
I replaced the plastic marker lights that came with the car with soft metal ones from Ozark Miniatures. 
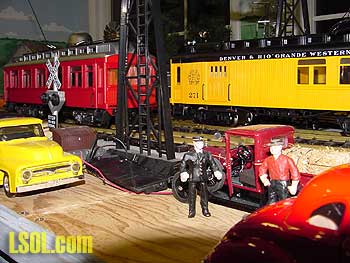
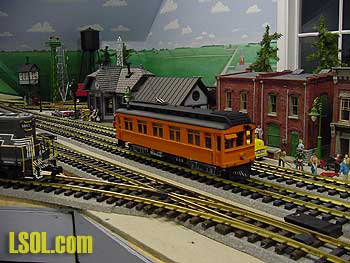
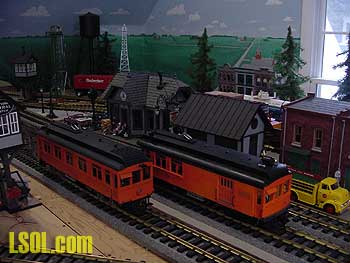
I placed the interurban and the combine next to each other 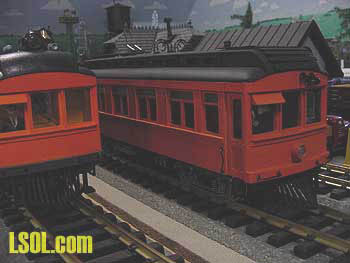
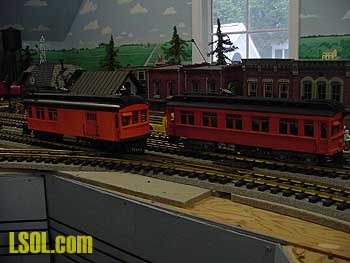
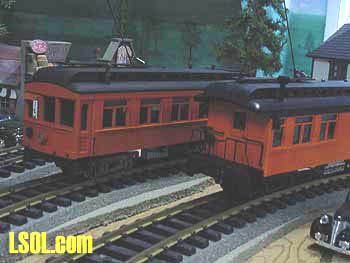
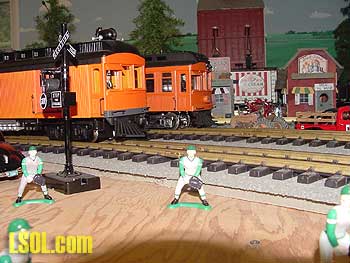
and tried them out on my indoor railroad. Now all I needed was some IRR lettering. I could not find any decals or press on lettering in G, so I contacted Bronze Key Models and purchased some in "O". I put them on the cars and they looked acceptable 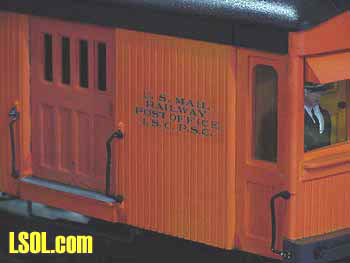
My next interurban project is to kitbash the Line Car and to convert one of the Interurban Street Cars to a steel sided car. I have purchased the tool to put rivets in the styrene "steel" sides and am beginning work on both projects. In fact, if you look closely in a couple of the photos included in this article you can see the Line Car in the early stages of modification. Top of Page
|


