Scratch & Bash
:
Engines / Rolling Stock
LGB Forney Coal Bunker Modification
Mar 14, 2007


By Jim O'Connor |
Author
Bio
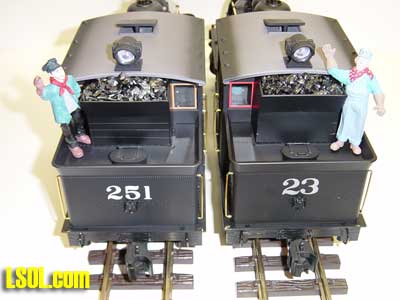
After receiving my fourth LGB Forney on the property, I decided that something had to be done with the coal bunker. The original bunker is unrealistically too small to provide an adequate coal supply to the locomotive, unless maybe the engine is assigned as a yard goat.
|
After receiving my fourth LGB Forney on the property, I decided that something had to be done with the coal bunker. The original bunker is unrealistically too small to provide an adequate coal supply to the locomotive, unless maybe the engine is assigned as a yard goat. This article will apply to all the LGB Forney's except for the wood burning D.SP&P Ry. and the new Wild West models. The new bunker will increase the coal load by about 50%. This article will try to give you a general idea how to go about the modification. I have provided some of the measurements that I used: however, you should do your own measuring for your particular locomotive and double check your figures to avoid errors. A bill of materials is listed at the end of the article for your use. Keep in mind that this modification can be reversed by simply removing the new coal bunker and your engine is back to its original configuration. Let's do it! BEFORE AND AFTER 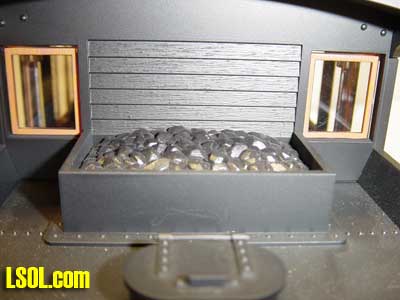
After deciding on the height and width of the new bunker, I made a cardboard template to ensure that both sides of the bunker were exactly the same. The following photo shows the template with the dimensions that I used. 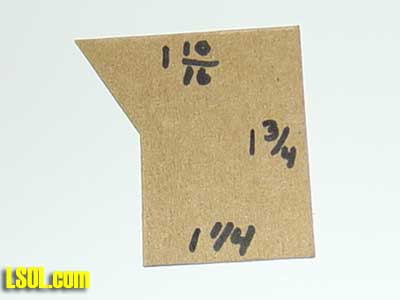
Place the template on a precut (for height) piece of sheet styrene .060" and cut out both sides of the bunker per the following photos. 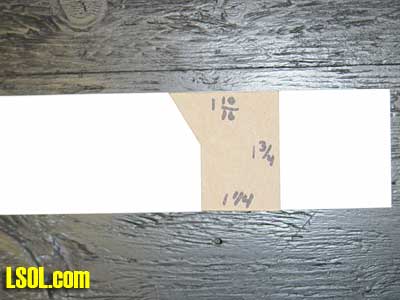

Before proceeding further, check the fit of both sides on your engine per the following photo. Keep in mind that the bunker, when assembled, has to slide in under the cab roof overhang. Also check to be sure you have .060" overhang on the back of the bunker for mounting the bottom and top pieces of the bunker. 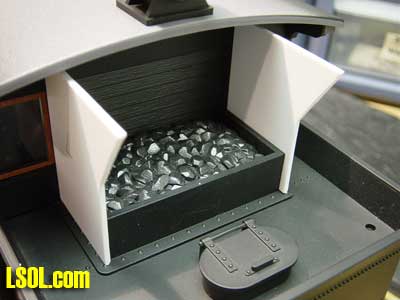
We are now ready to make the side and back support pieces. Using strip styrene .125 X .188 cut two pieces 7/16" and two pieces 1/2" long. The top support is placed down from the top of the bunker, so that, it will not be seen when completed. The bottom brace is placed at least 5/8" from the bottom of the piece to allow for clearance above the LGB bunker. Being an old guy, I marked my pieces to make sure I assembled them properly. Cement on the supports per the following photo, making sure that you leave .060" clearance on the ends where the back two ends of the bunker will be applied. 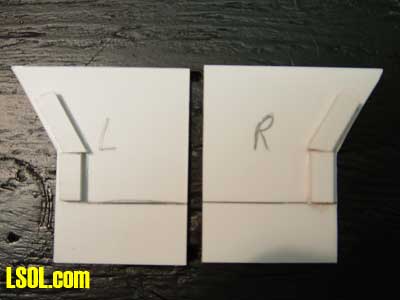
We are now ready to make the back top and bottom end pieces for the bunker. Using .060" sheet styrene cut the top 2-9/32"L X 1-7/8"H and the bottom 2-9/32"L X 1"H. Again, I labeled my pieces top and bottom as illustrated below. 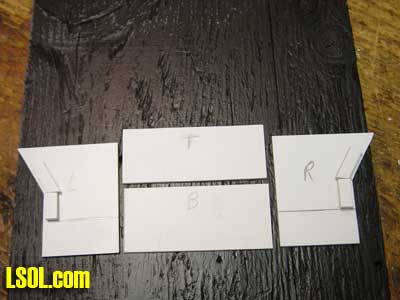
Before we begin to assemble the bunker, give thought to the idea of using simulated wood planking vs. steel for the bunker. I wanted to give the impression that the bunker was made of wood planking. To do this, layout the side and end pieces per the following photos and mark pencil lines about every 1/4" to represent the planking. You need to be careful to match up lines for the sides and back pieces. After checking your lines, scribe the lines with a dull pointed object, I used an old solder probe. Put the scribing on fairly heavy, since the primer and final paint will tend to fill-in some of the scribing. If you want to age your planking, put on a few extra scratches with your scribe or use a wire brush to obtain the weathered finish you desire. I am not too sure how you would put rivets on the styrene for a steel bunker look.  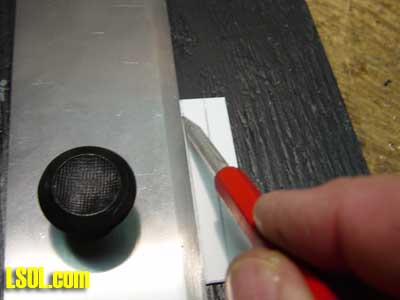
We are now ready to cement the sides to the ends. I used the adjustable end off a square to ensure that the ends and sides were cemented together properly as shown below. Make sure that you use plenty of cement along the entire seam to be set and just not on the supports. You will probably have to push the seams together with your fingers while the cement cures. 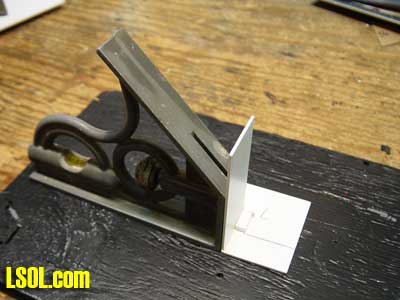
AND 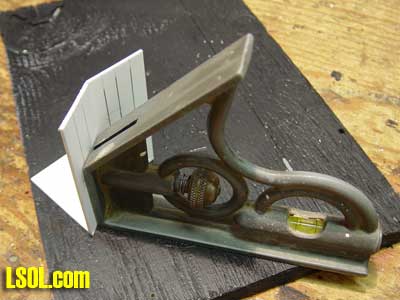 After the cement sets up, the internal bracing, front and bottom pieces can be cut and installed. I have not provided dimensions since you can get these by simply measuring your work. The following photos provide you with the needed placement of the items. One note of caution on the inside bottom and top bracing, (bottom - make sure it is at least 5/8" from the bottom to clear the LGB bunker and top - is at least 1/4" down from the top to clear the Styrofoam load we will make next). Make sure that the bunker fits on the engine before cementing the bracing. You want the bunker to just barely slip over the existing bunker.
Place the back of the bunker just in front of the water tank hatch cover and pivot it forward to sit down on the tender, the front of the bunker will just barely clear the cab roof over hang. Slide the bunker forward, up against the back of the cab. If the bunker touches the roof, simply trim a little off the bunker until it fits properly. 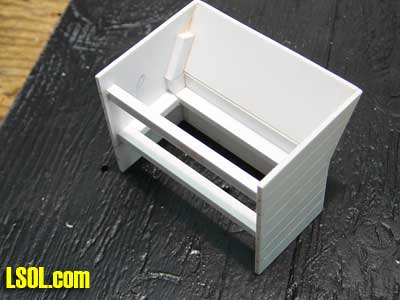 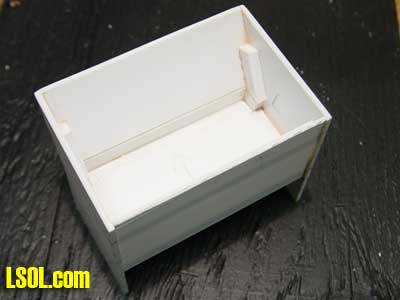
Making the Styrofoam coal load is next. I used Styrofoam from an old frozen food shipping container. Just saw out the general size and shape you what based on your bunker and fit to looks. No two (2) bunkers are ever the same. Found that a fine jewelers or razor saw works pretty good on the foam. A hot wire knife may also work. After a general fitting, I used a sharp knife to shape the load. Make sure that the Styrofoam sets down into the bunker on all sides so that the coal has a place to pile up against the sides of the bunker. Be careful not to make the load too high on the front 1/2 of the load since it must fit under the cab roof over hang when we install the bunker. When you think you have it about right, place the Styrofoam in the bunker and try the fit on the engine. The Styrofoam does not have to be tight against the sides of the bunker, since the coal placement, in the final step will cover any gaps on the sides. The following photos show how to shape the load. 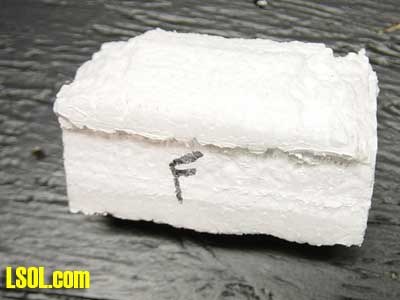 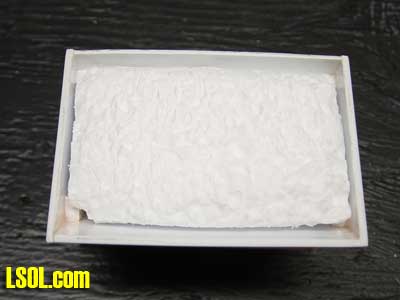
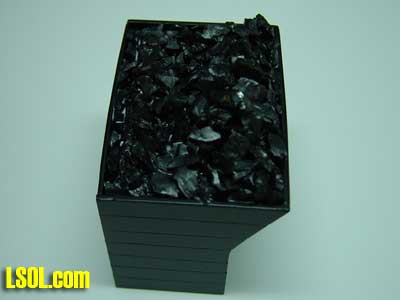
The bunker and Styrofoam base are now ready to be painted. I used Krylon dark primer and Semi-Flat Black (Interior/Exterior) for the bunker. Do not, repeat do not, use Krylon or any solvent based paint on the Styrofoam, it will dissolve it in a flash. I painted my Styrofoam with a water based engine black (Polly-scale). Following photo shows the paint job completed. 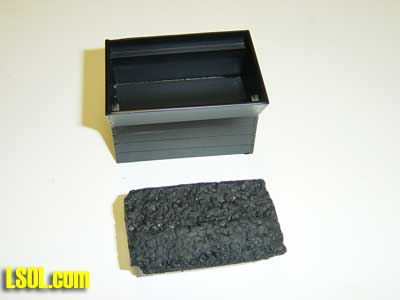
The Styrofoam base is now ready to receive its first coating of coal. I used home made crushed anthracite coal dust for the first coating per the following photo. Apply a coat of Elmer's White Glue-All (thinned at about 30% water) with a brush then sprinkle the coal dust over the base. Let the dust dry over night. We don't want to rush this part. 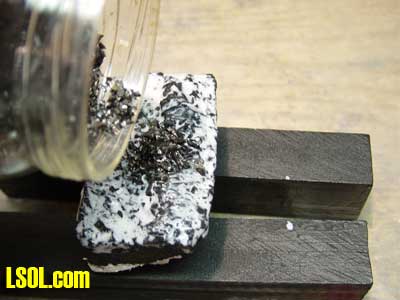
Larger pieces of coal (1/8" - 1/4") are next glued on the load using a mixture of 50/50 water and Elmer's White Glue-All per the following photo. The mixture can be sprayed on using a hand sprayer and the coal sprinkled on the load. Since this was a very small job, I individually dipped each piece of coal into the mixture and placed it where I wanted it. Be careful not to pile the coal too high on the front 1/2 of the load, since this is the part that has to go under the cab roof overhang. Also you don't want to pile the coal too high in front of the backup light. Don't be concerned if the glue runs down the load and the coal is not up to the edges of the load. The glue will dry just fine and we will place individual pieces of coal in the final step. Let the load dry over night. Don't worry it will look great! 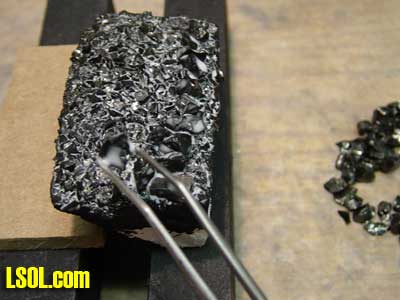
The load is now ready to be inserted into the bunker for the final time. Gently insert the load, not pressing too hard on the coal. Make sure the load is down in the bunker nice and tight. You do not need to glue in the load. Again try the bunker onto the engine for a final fit before we place the coal around the edges. If everything fits fine, go ahead and place the larger pieces of your coal, individually, dipped into the glue around the edges. The glue will hold the load into the bunker. Be careful not to drip any glue onto the outside of the bunker. If you accidentally get some glue on the bunker finish, wipe if off right away with a damp paper towel.
UNNUMBERED (FINISHED COAL BUNKER) 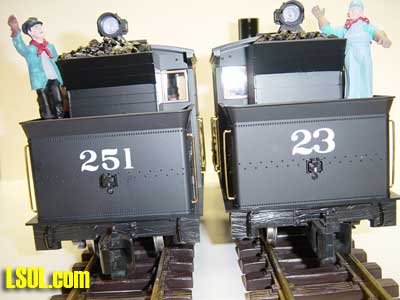
There you have it, a coal bunker modification for the LGB Forney. It is totally reversible for those of us who may want to convert their engine back to its original configuration. This is my second bunker modification.
I may try a bunker to look like steel siding with rivets for another Forney.
BILL OF MATERIAL: Sheet Styrene .060" Strip Styrene, .125 X .188 Plastic Solvent Weld Krylon, Primer, Dark (Black or Gray) Krylon, Semi-Flat Black (Interior/Exterior) Coal, Crushed dust and 1/8" - 1/4" chips (Anthracite) Elmer's White Glue-All Top of Page
|


