Scratch & Bash
:
Engines / Rolling Stock
Building a Large Scale Locomotive Kit
Dec 14, 2012


By Noel Widifield |
Author
Bio
This loco was a real challenge to assemble. It is not a kit for the amateur modeler or the fainthearted. The entire project probably took almost 100 man hours to complete.
|
When I modeled in HO scale, I spent a lot of my time building kits for my rolling stock and locomotives, but since I moved into 1:29 scale, I haven't built many of them. I have built a couple of 1:20.3 cars and kitbashed some 1:24 interurbans, but nothing in 1:29.
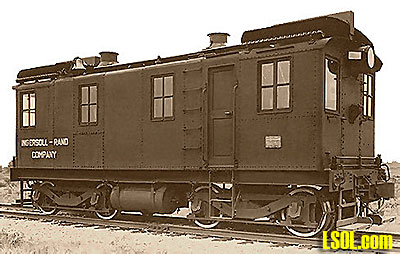
Last year I was searching the web for things and came across a website called the Great American Locomotion and found a locomotive kit for sale. It was in 1:29 and caught my eye because I hadn't seen it anywhere before. The kit was for an ALCO/General Electric and Ingersoll-Rand (AGEIR) diesel-electric locomotive that was rolled out in the spring of 1925. I knew that there had been a diesel-electric in that time frame and had even seen pictures of that loco, but had no idea that there was a model in Large Scale.
This locomotive began with an order from ALCO to construct the loco at its Schenectady, New York manufacturing plant. After construction, it was shipped to General Electric's Erie, Pennsylvania works where Ingersoll-Rand diesel engines were installed. The assembly was complete and the loco was rolled out in July 1925. It was assigned the builders plate number 9681 and was delivered to begin demonstrations at the Ingersoll-Rand plant in Phillipsburg, New Jersey. It began operating on the East Erie Test Track and was then delivered to Ingersoll-Rand.
Original overall length measured inside the knuckles - 32 feet,8 inches
(Note: Some reports indicate 32 feet,6 inches over the knuckles. Chicago & North Western Railroad indicates 33 feet,2-1/4 inches over the knuckles for all three of their 300 horsepower units. These differences might reflect different designs in draft gear, buffers, and knuckle coupler designs employed)
Length over the end sills - 29 feet,3 inches
Car body (cab) length - 28 feet,0 inches
Overall height on the first eight 60 ton units measured from top of track to top of radiator center section cap - 13 feet,10-7/8 inches(when 38 inch diameter wheels were used)
Car body (cab) width - 9 feet,4 inches
Overall width of locomotive... 10 feet - 0 inches
Trucks: Fabricated 7 foot,2 inch Wheelbase. 2-axel swivel type with drop side equalizers designated B-B as all axels were poweredInitial specifications for the first 60 ton units indicates 38 inch diameter wheels, but 36 inch diameter wheels are indicated in subsequent railroad reports and builders records
Gearing: 14-tooth pinion, 82 tooth gear (82:14)
Top speed: Ingersoll-Rand records suggest 30 miles per hour (30 mph). They marketed it as a Road Service with a changed gear ratio and a suggested top speed of 55 mph.
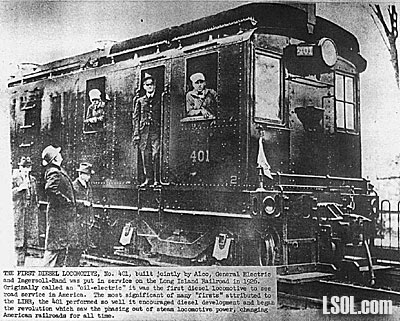
This first AGEIR loco was sold to the Long Island Railroad. Others were sold to the B&O and LV. A history of the development of these locos can be found at: Rail Fan.net
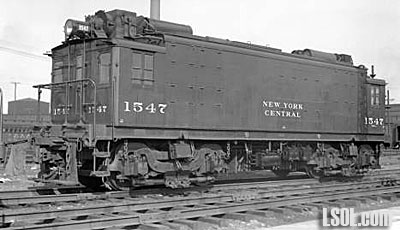
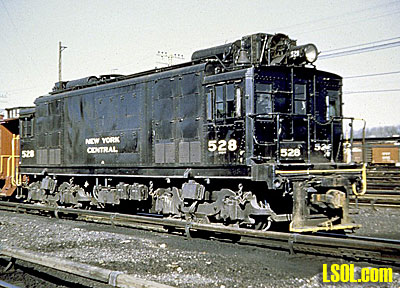
I was interested because this loco was demonstrated and successfully tested on the New York Central and that led to the NYC acquiring diesel locos in the 1930's.
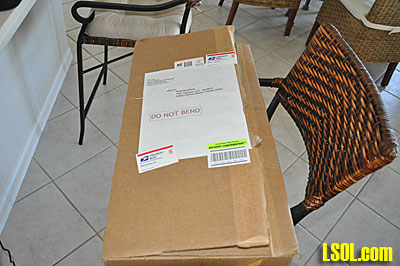
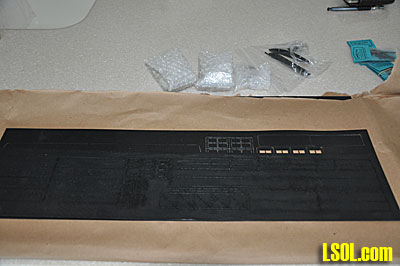
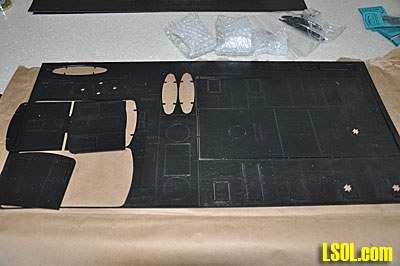
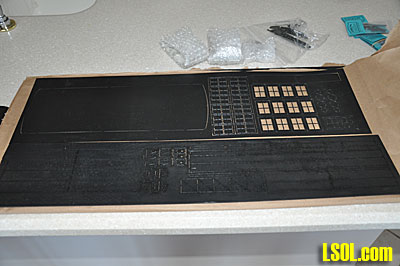
After finding the website and ordering the kit, I received a large box from GAL and opened it to find a large amount of black styrene parts, some castings and a few pages of instructions.
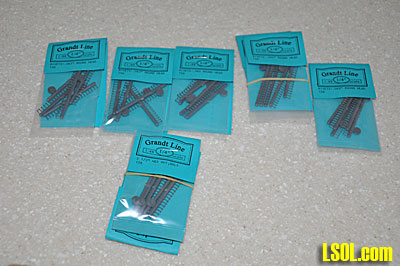
At this point I realized that I needed more information about the kit and what else was needed so I emailed Alan Friedland, the owner, and obtained some additional instructions and photos of the locomotive that Alan had assembled. I also discovered that I needed to order some rivets and bolt heads from Grandt Line.
These are 1/48 scale but look good on the loco. (Item #'s 0156 & 0128) I ordered several hundred of each since there are a large number of rivet and bolt holes on the model.
The instructions with the kit are very minimal and require a considerable amount of studying in order to understand what needs to be done and the diagram of the parts is different than the actual parts in some areas.

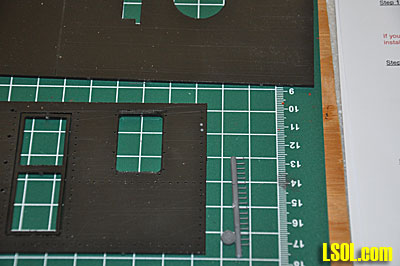
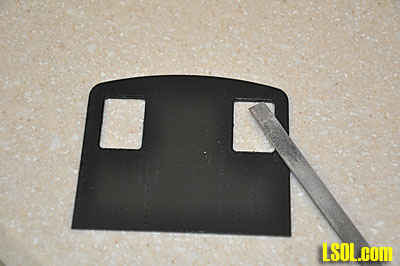
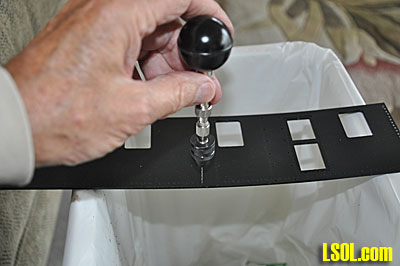
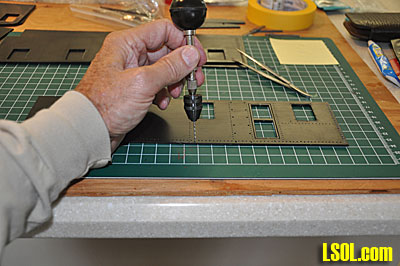
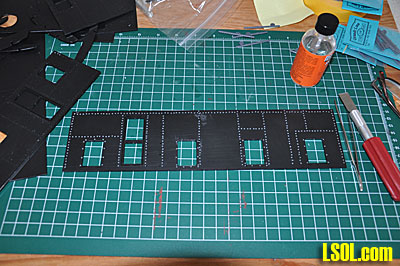
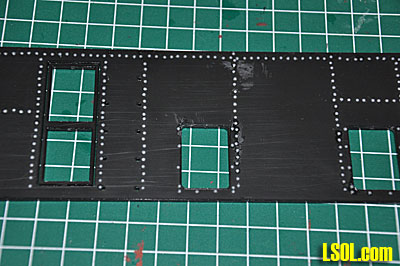
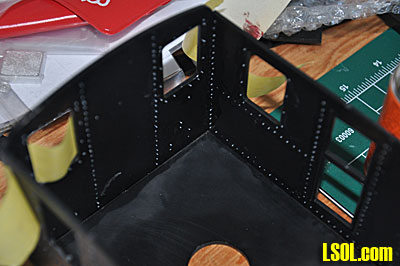
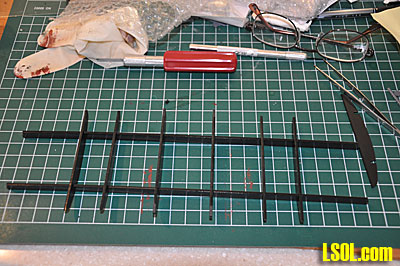
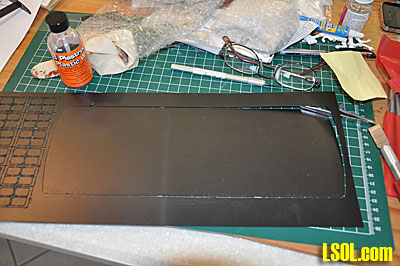
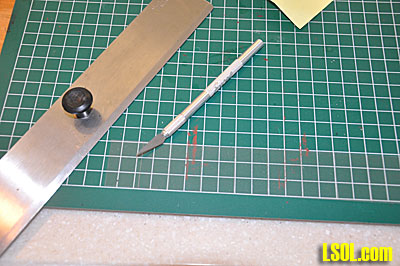
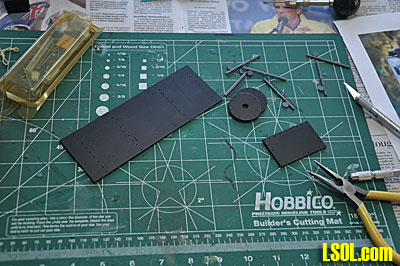
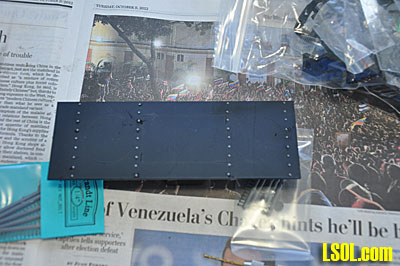
I began by breaking out the sides and ends of the loco and filing off the little tabs that held the parts to the black styrene sheet. I then began the long process of drilling out the rivet holes. They are pre-drilled, but the Grandt Line rivets are slightly too large to insert. Although I didn't count them, there must be between 700 - 800 rivets in the loco. After pre-drilling the holes, I began installing the rivets into the holes. This was done by cutting the rivets off the sprue, picking them up with tweezers, dipping each one in glue and inserting them into the drilled holes. This is a very time consuming process. The rivets are very small and hard to grasp with the tweezers and even with magnifiers, it is very difficult to get the rivet in the hole.
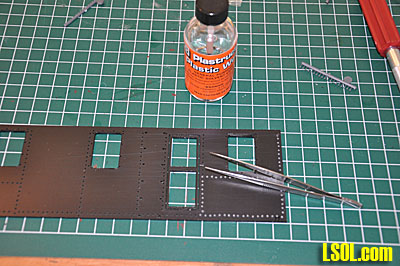
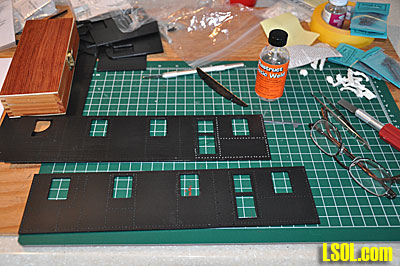
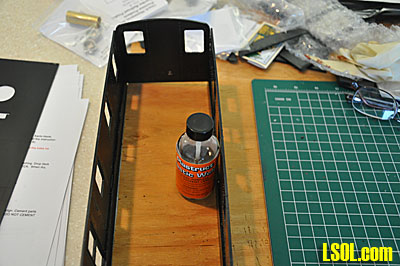
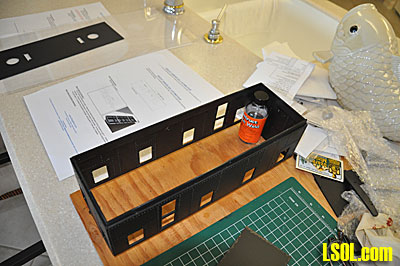
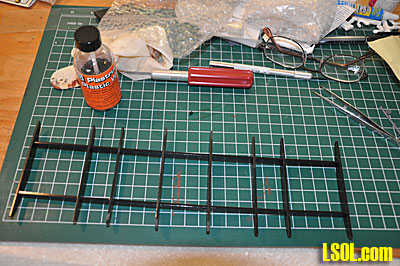
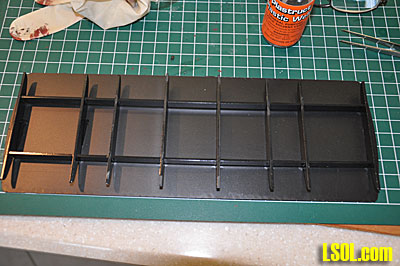
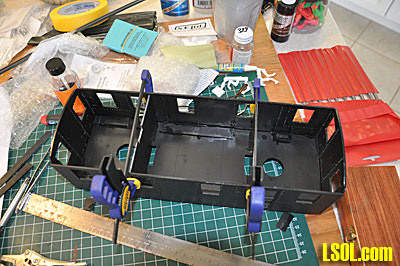
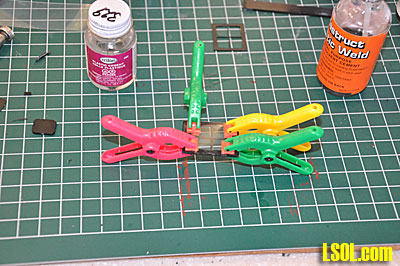
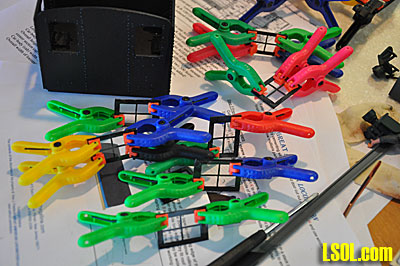
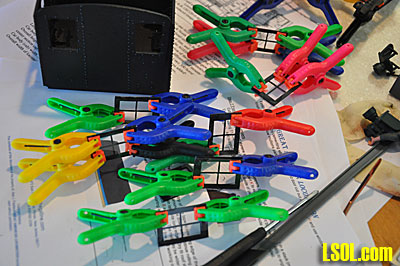
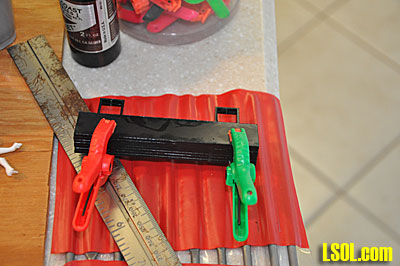
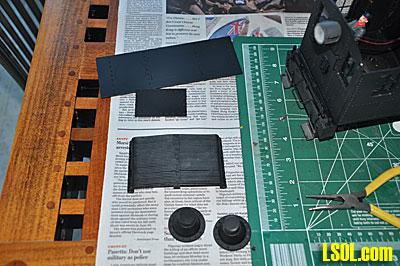
After putting all of the rivets in the sides and ends, I assembled the sides and ends around the floor, but did not glue the assembly to the floor. I used masking tape to hold the sides together as I placed them around to floor panel and then used Plastruct Plastic Weld to glue the sides together. I then glued the triangular shaped braces in place to provide strength to the assembly. I used several clamps to hold the whole thing together as the glue dried.
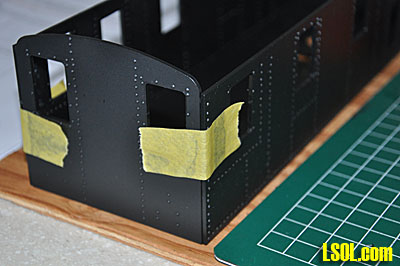
I cut out the deck support skirts, marked them to show where the rivets in the loco body would impact on them and then cut groves where the rivets would touch. Gluing the skirts to the body sides was difficult since they need to be aligned perfectly with the sides and all had to extend to the same length beneath the sides. I couldn't figure a way to clamp them so it was necessary to hold each skirt in place as the glue dried and at the same time make sure that the skirt was positioned correctly to extend to the correct length and match the other skirts.
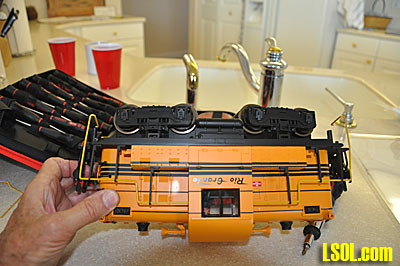
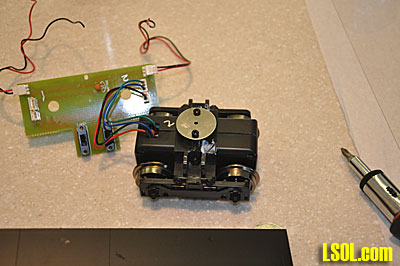
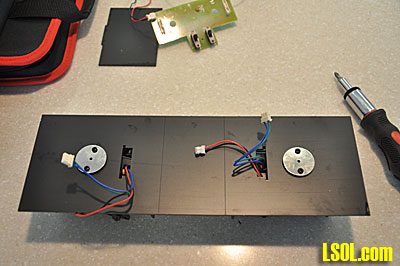
While I was working on the model, I went online and found an Aristo Craft center cab switcher to purchase for the power trucks. I might have been able to buy those trucks from Aristo Craft but decided that the easiest way was to just buy the whole locomotive and remove the trucks. After receiving the loco, I disassembled it and removed the trucks. It came apart very easily. I am sure that the various parts from the loco will come in handy for something in the future.
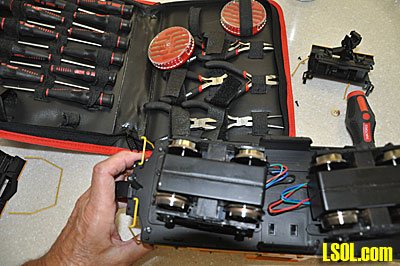
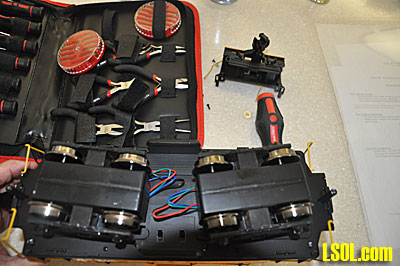
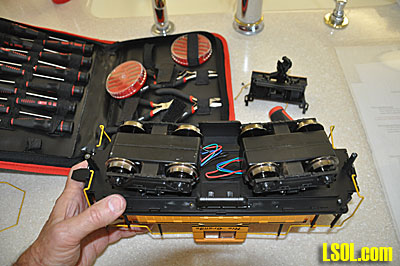
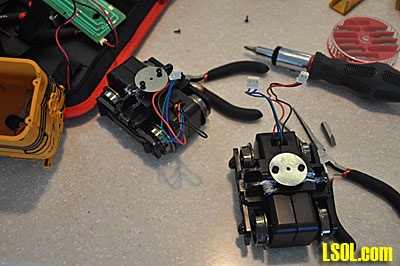
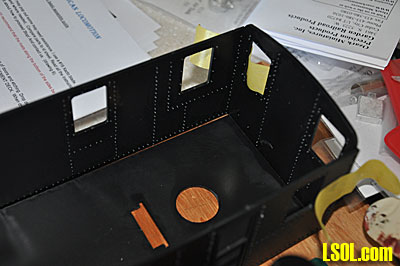
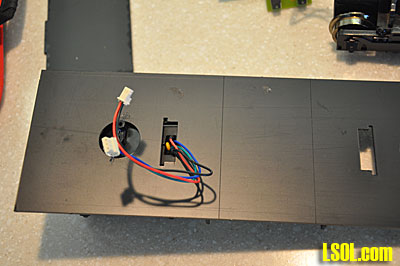
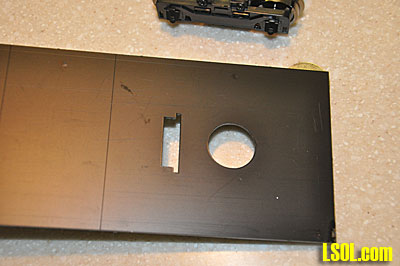
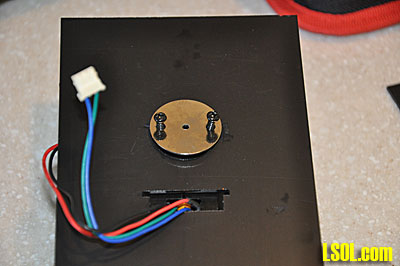
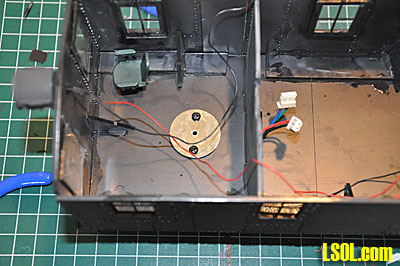
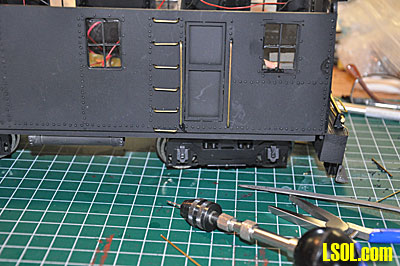
The next part of the job was done pretty much by intuition since there was nothing in the plans that discussed anything about assembling the power trucks into the floor. The only instruction said, "Cement remaining parts to the support deck. Check truck swing before cementing permanently." So, I assembled the trucks into the floor and then fastened the floor braces called by the instructions "remaining parts" into place. I received a single page from the manufacturer that showed how to fasten the trucks through the floor after I emailed them for more info.

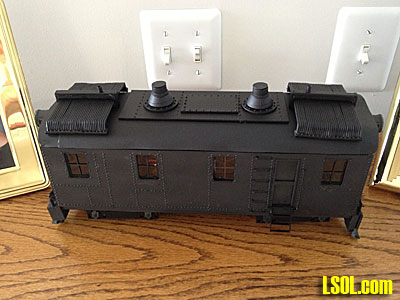
The next task was to build up the roof framework and glue all of the parts together. Here again the instructions were non-existent, but there was a good drawing of how the parts went together. The actual roof would be added later and that is a story in itself.
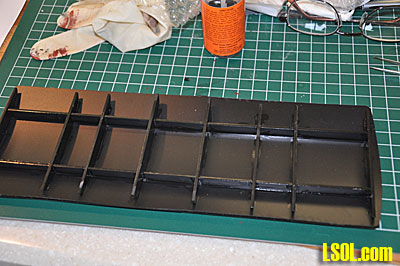
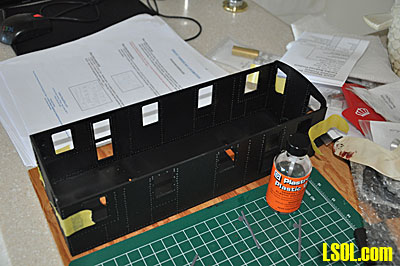
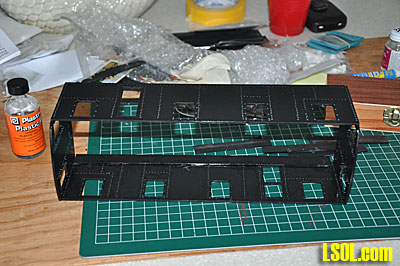
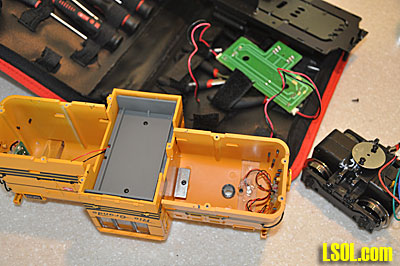
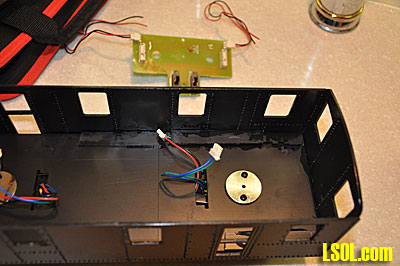
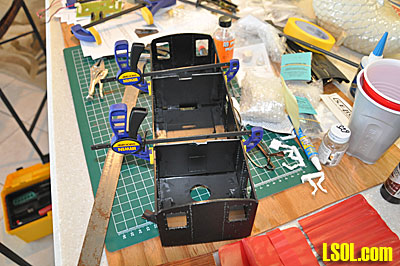
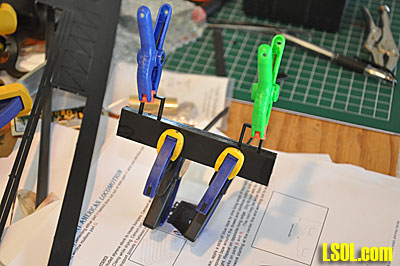
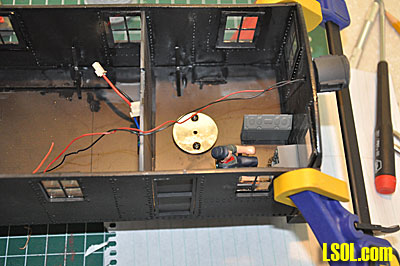
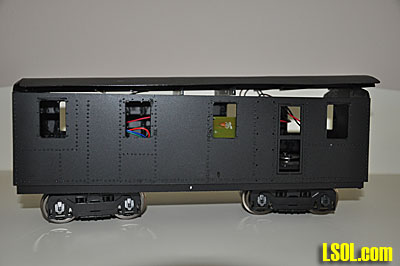
There were two internal bulkheads that needed to be fitted into the body of the loco. There was a diagram in the instructions that showed the approximate location of these, but I did some experimenting to find where they best fit. After determining the location for the bulkheads I glued the floor to the assembled walls and glued the bulkheads in place. I clamped the sides against the bulkheads until the glue dried. I glued the remaining triangular shaped gussets in place to add more strength and rigidity. I installed the electronics from the center cab and confirmed that the truck motors worked. 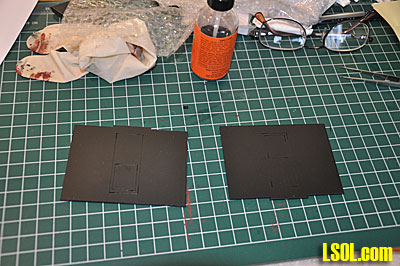
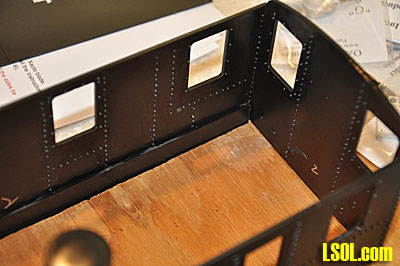
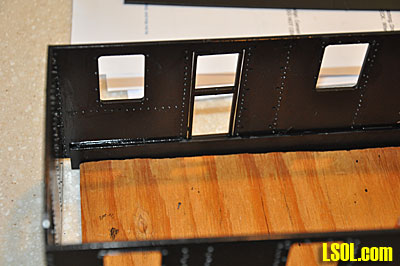
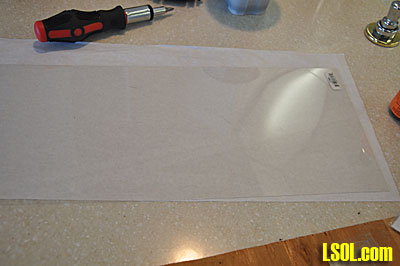
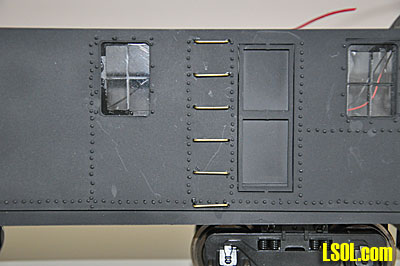
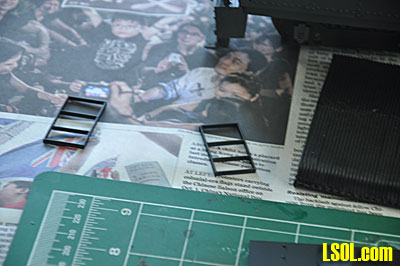
 Although there was no mention of windows and no material included to make the windows, I cut windows out of clear styrene and glued them in place on the inside of the mullions. I glued the mullions into the cab walls from the outside. I also glued the door frames and the doors into the cab.
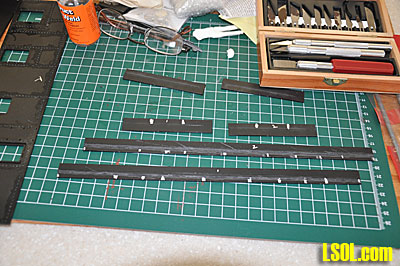
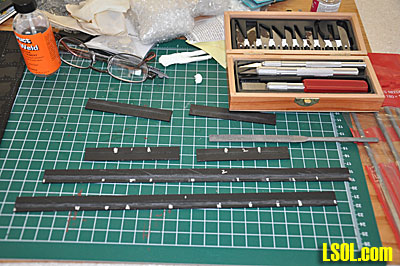
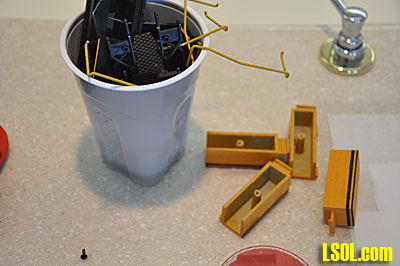
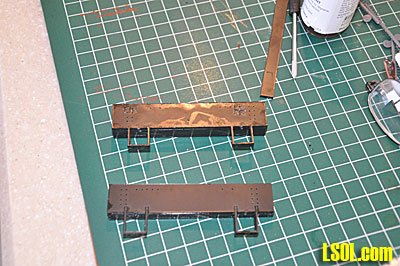
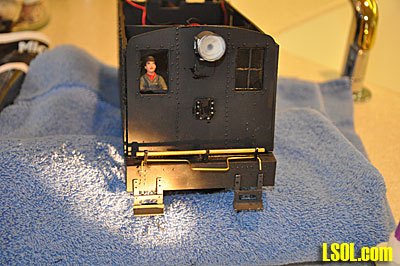
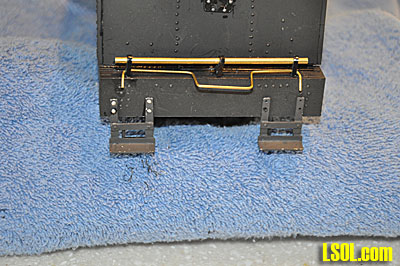
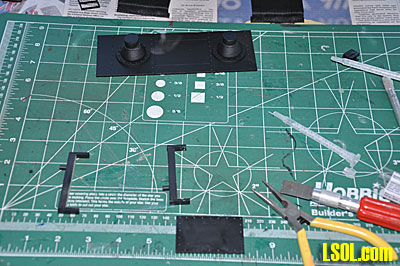
The front and rear bumpers were cut out and assembled by gluing the six supplied strips of styrene stock together in a stack. I made two of these. Then I glued a separate similarly shaped piece with footrests attached to the top of each stack. Each of these two assemblies were than glued to the front of the locomotive and gussets were glued to the back of the assembly and the bottom of the floor to add strength.
At this point the instructions stopped. From here on, I relied on the photos from the company website to continue the assembly and detailing.
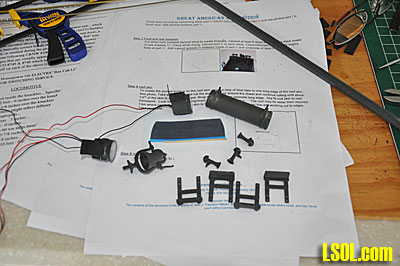
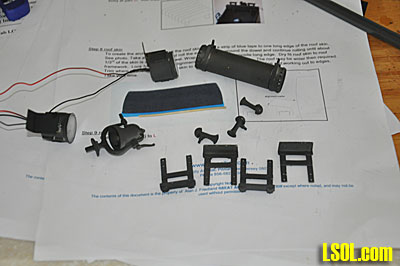
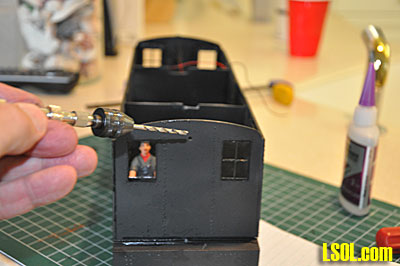
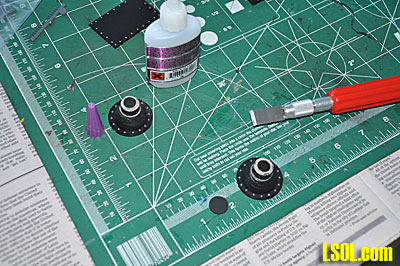
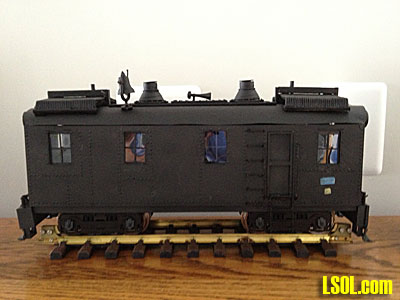
I gathered a headlight, air tank, bell, diesel horns and step castings from my spare parts box and spray painted them flat black. I attached the air tank to the loco. I drilled the headlights, inserted a grain-of-wheat bulb and glued the lens in place. I inserted the wires from the bulbs through the holes and glued the headlights in place after drilling a small hole in the front and back of the cab. I attached all of the proper wires and confirmed that the lights worked in the proper direction.

For the grab irons and coupler lift levers I used brass wire from my supply and cut and bent the wire into the shapes needed. I then attached the cast steps to the bumpers. 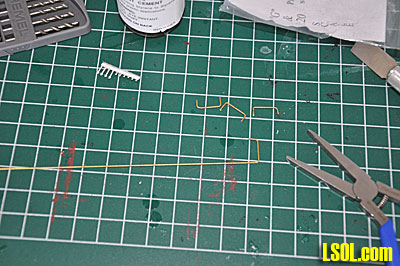
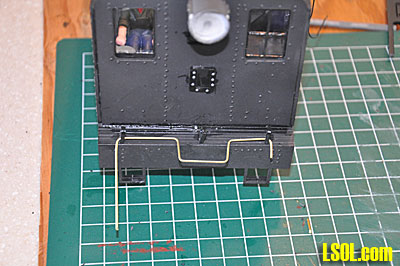
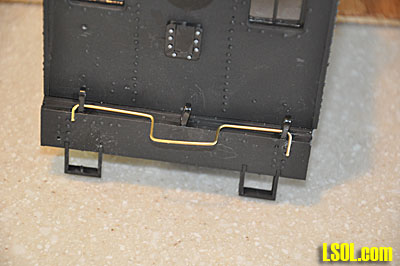

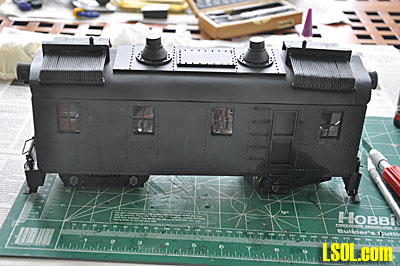
Finishing bending the grab irons and handrails, I inserted them into the body at the appropriate places and glued them in place and then sprayed the entire assembly with flat black paint.
At this point, I went back to the roof assembly and determined that the roof supplied with the kit was too inflexible to bend to the shape needed for the roof. The instructions tell you that you can shape the roof by taking a thin dowel and roll a strip of blue masking tape around the dowel and roof material to cause the roof part to conform to the shape needed to fit on the roof frame. I am sure that it could be done, but I couldn't make it work.
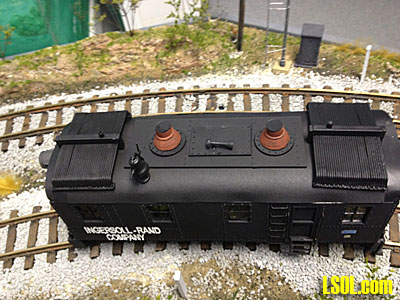
The roof would not stay in a shape that would allow the glue to hold it to the frame. So I used the supplied roof as a pattern to cut another roof from very thin styrene. I was able to glue that roof to the frame and the glue held. I cut a piece of fine grain sandpaper to the shape of the roof and glued it to the top of the roof to add strength and make the roof appear to be textured. This worked. I then painted the rest of the roof castings supplied with the kit and glued the heat radiators to the assembled roof structure.
I added rivets and bolts to the assembly for the roof and then assembled the stack parts. I glued all of these in place on the roof using the photos to show me where they went.
I fabricated two sets of steps from styrene to put under the doors on the loco, then sprayed them flat black and glued them in place on the loco.
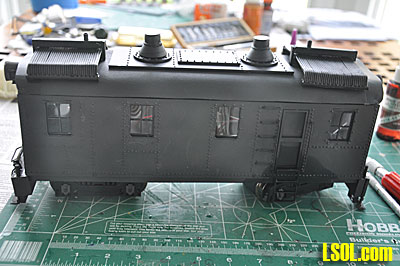
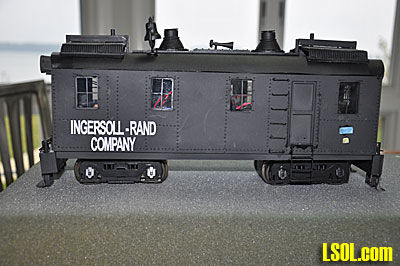
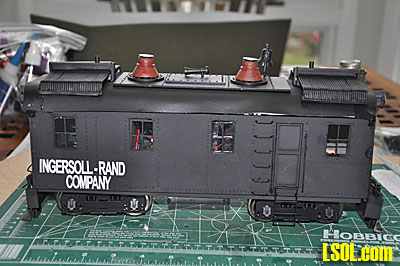
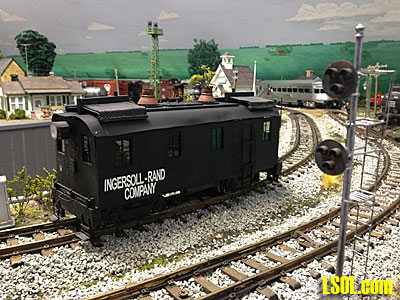
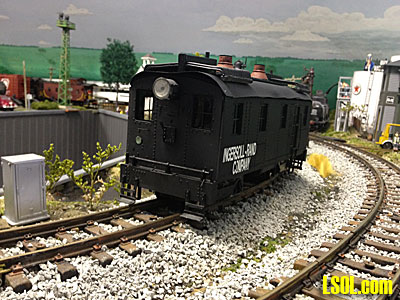
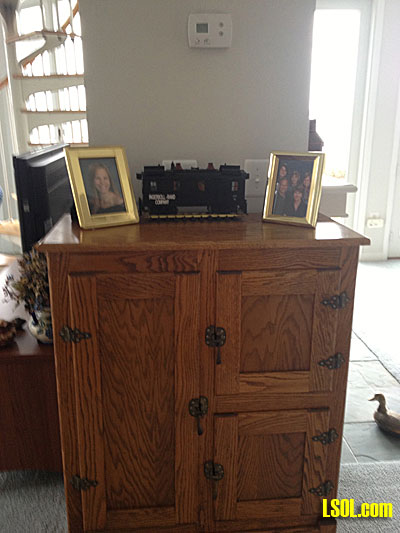
I wanted to letter the loco for the Ingersoll-Rand Company so that it appeared as it did when the company sent it out as a demonstrator. Since there were no decals for that, I went to my local boat sign maker and had him cut the letters from vinyl. He made me two sets for $10 and I fastened them to the sides of the loco. They work pretty much the same as dry transfers and the only problem I had was getting them to conform to some of the rivets on the sides. I think they turned out pretty well.

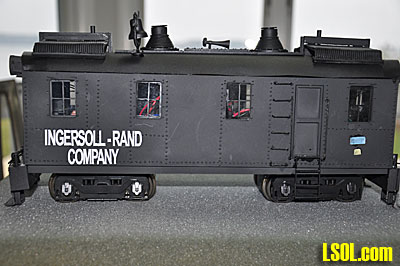
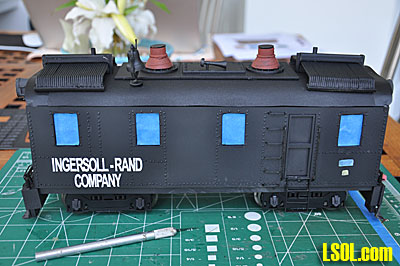
I used a small brush to paint the stacks with an oxide red and the loco was pretty much complete. I masked the windows and sprayed the whole loco with a matte clear coat. I still need to add couplers, but will wait until the Accucraft ones come in the mail. I will need to cut into the bumpers and insert the couplers, but that should be pretty easy.
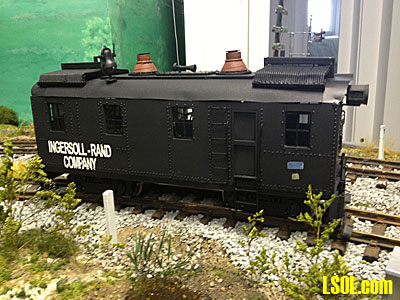
I moved the loco up to my layout and ran it around a couple of times. I will not be running it often since it was not really used much on the NYC and because it was long gone at the time setting for my layout. It will occupy an honored place in my living room.
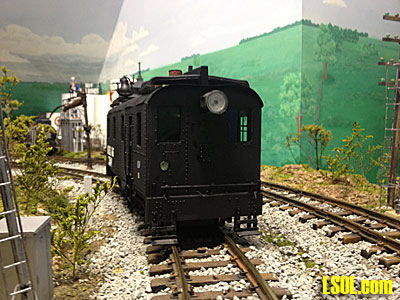
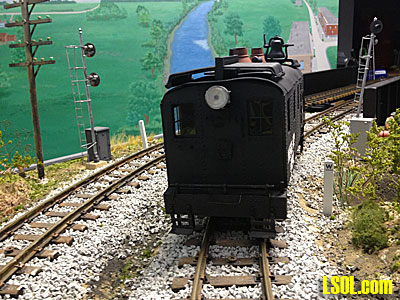
This loco was a real challenge to assemble. It is not a kit for the amateur modeler or the fainthearted. The entire project probably took almost 100 man hours to complete. I am very pleased with the final result but it required a lot of time and required considerable skill and patience to complete.
| Nice model |
| Very nice Noel But to tell you the truth I was suprised to see that it was not marked for the NYC ! Ingerso rand ! But I forgive ya a really nice model well done . I hope you bring it to the East coast show Dean |
| Dean Sleeper - 12/14/2012 - 13:32 |
| Rivets |
| You didn't count the rivets? ;) Nice Noel, and its something that won't be seen on other large scale railroads. Thanks for sharing, and boy does it look cool. |
| David A. Maynard - 12/14/2012 - 14:56 |
| Model |
| Dean, The NYC tested it but did not buy one of them and did not letter it for the NYC. They designed their own and had it built. It looked somewhat like this one but they never had one of these. So I lettered if for Ingersoll-Rand like the prototype. It is a neat model, but was a bear to build. I am starting on a scratchbuilt FM H-10-44 using some USA Trains components. This one should be interesting and even more challenging. David, No more rivets like this one. Now that you can buy rivet decals this whole thing would have been a lot easier. They are offering them in G-scale now. Thanks,Noel Thanks, noel |
| Noel Widdifield - 12/14/2012 - 15:09 |
| large scale kit |
| Building a Large Scale Locomotive Kit Dec 14, 2012 By Noel Widifield |
| boyd hanby - 12/14/2012 - 18:44 |
| Large Scale AGEIR Kit |
| Noel, That is a work of art! Looks like it also has the amount of interior space that begs for a battery/RC/sound installation. Thanks so much for sharing your experience building the AGEIR. |
| Dennis Olsen - 12/16/2012 - 05:57 |
| Ingersol Rand Phillipsburg NJ |
| This looks like a must have for the Bel Del as the Bel Del ran through Phillipsburg NJ where the locomotiive was originally built. |
| Glenn - 12/17/2012 - 06:06 |
| Ingersoll Rand Phillipsburg plant |
| Looking at old maps I see the DL&W had the track past the Ingersoll Rand plant. However there was an interchange track (1939) running down to the freight yard on the Bel Del. so the prototype could have easily been on the Bel Del during testing. |
| Glenn Habrial - 12/19/2012 - 13:38 |
| AGEIR Locomotive |
| Great Job Noel! My planned point to point large scale pike on my balcony (apartment is too small for an indoor layout) will call for small power. Hartland is releasing their 4-wheel Mack switcher in beautiful Model-T black which will serve as my roads first motive power. Didn't several roads in the Northeast roster AGEIR boxcabs? Jersey Central #1000 comes to mind as well as Erie. |
| Joseph Toth, Jr. - 12/21/2012 - 09:59 |
| 1000 history |
| The Jersey Central 1000 is considered the first successful Diesel locomotive. Showed it was viable. Long before the FT came along. |
| Shane - 12/25/2012 - 19:16 |
| 1000 |
| Joseph/Shane, This loco is the same loco as the Jersey Central 1000. I just wish that the NYC have purchased one exactly like this one rather than the one they bought so that I could have lettered it for the NYC. Thanks, Noel |
| Noel Widdifield - 12/26/2012 - 03:05 |
| AGEIR Locomotive |
| Noel, I agree that the NYC should have purchased this model as well. It would be interesting to know why management decided against it. I have always thought that lettering diesels in demonstrator color schemes can be a blessing in disguise in that I can run any caboose of any railroad of my choice on a freight and not be required to purchase a specific railroad's locomotives. On the other hand, I did consider purchasing the USA Trains model of their NW2 diesel switcher in the beautiful NYC two tone gray and subletter it for a "subsidiary" that never existed. In my case it was going to be the New York Harbor RR. This is what makes model railroading fun to me. I can rewrite railroad history to suit my personal taste and still capture the spirit of a favorite line. Joe Toth |
| Joseph Toth, Jr. - 12/28/2012 - 13:17 |
| AGEIR Loco |
| Joe, The NYC decided to come up with their own specs and ordered a their own. "The Kaufman Act in New York City translated into extensive changes for the New York Central. Their interest is evident in the fact that NYC used the first GE-IR demonstrator locomotive longer than any other railroad. However, since the Kaufman Act called for the elimination of all steam locomotives in and around New York City, NYC was interested in more than just switch engines; but, the locomotive builders were not producing any diesels besides switchers at the time. So, in 1925, the NYC drew up specifications for four prototype locomotives, three diesel units and a hybrid-battery unit. The diesels were to be a road passenger locomotive, a road freight locomotive and a heavy duty switcher. The railroad negotiated with diesel engine manufacturers directly for the engines that would power the prototypes. Alco would supply the mechanical portions, while GE would provide the electrical components. NYC was able to enforce a system of common standards that provided extensive interchangeability of parts between its straight electric and diesel electric locomotives. Work was begun on the switcher, but the project was terminated halfway through construction. The hybrid-battery locomotive was completed early in 1928. This locomotive could operate as a straight electric or as a battery locomotive. The locomotive used an on board diesel generator to charge the batteries. The freight locomotive was the second unit to be delivered. It was powered by an Ingersol-Rand diesel engine. It was assigned to freight service on the Putnam Division in June 1928. This engine was the first successful diesel electric road freight unit in America. The body was a simple double ended box cab. The locomotive was equipped for multiple unit operation. The final locomotive, the passenger design, was delivered early in the following year. It had a McIntosh & Seymour power plant. The design called for extensive use of aluminum in the mechanical components to counteract the heavy weight and low power of the diesel engine. The body looked similar to the freight unit. The passenger engine was also equipped for MU operation. Like the freight unit, this engine was assigned to the Putnam Division. The Putnam Division was selected as the testing grounds for both engines for several reasons. The line was close to the railroad's division shops." From the website cited in article URL. Thanks, Noel |
| Noel Widdifield - 12/28/2012 - 14:28 |
| ALEIR Loco |
| The USA trains NW-2 was painted in Lightning Stripes but the real NYC NW-2's were painted in solid black. As a modeler you can do whatever you want and that is one of the things about our hobby. Each of us can pursue it in the way we wish. Happy Large Scaling, Noel |
| Noel Widdifield - 12/28/2012 - 14:30 |
| AGEIR Locomotive |
| Indeed, NYC's diesel switchers were painted black. The USA Trains model is quite spiffy though. It would have been a great color scheme for the NY Cross Harbor switchers! My Hartland Mack will now get Hunters Green and Orange, simular to the New Haven's scheme. Playmobil is releasing a neat RC centercab diesel switcher which will be rostered on my point to point as well as the NW2. Playmobil products aren't prototypical as such but I am in my second childhood so quality to roster the locomotive anyway. They will also have a neat container crane in the product line and like the switcher, is affordable. I don't have the skills to scratchbuild but will be just as happy to operate the large scale trains right out of the box but I do envy your boxcab diesel just the same. A Clean Machine! Thank you for the additional information on the early NYC switchers. Very informative. I am a fan of the NYC's Manhattan elevated highline, part of which is now preserved. I would love to be able to visit it and walk the line. Joe |
| Joe Toth - 01/09/2013 - 03:33 |
| Your interest in the NYC |
| Joe, If you like the NYC, check out the e-zine that I edit each quarter for the New York Central System Historical Society(NYCSHS). We have had several articles on railroad's activities in New York City. Go to www.nycshs.org and then click on the "For The Modeler" button on the left side of the screen. Follow the instructions there to download any or all of the magazines. They are free for members and non-members. If you find other things on the website that are useful, you might want to join us as a member. The details for that are also on the website. Thanks and enjoy Large Scale anyway you want. That is the wonderful thing about this hobby. There are no right or wrong ways to enjoy it. Thanks, Noel |
| Noel Widdifield - 01/09/2013 - 03:40 |
| Your interest in the NYC |
| Noel, Thanks for the info. I will certainly follow up. My interest in the NYC is indeed the operations in New York and New England and the beautiful Hudsons! There was one featured in a children's book I had when I was around 5 that my mother gave me. I would love to find it again. I have a new copy of the Golden Book "Tootle" which brings back memories of my early interest in trains. The book with the streamlined Hudson involved a boy and his sister taking a trip to the West I believe. They leave New York City behind an NYC boxcab electric and change to steam in which they get the Hudson. I think they end up riding on the Santa Fe behind some Warbonnet diesels. Gads, this was back around 1951 and my memory derails at times. Joe |
| Joe Toth - 01/12/2013 - 04:31 |
Top of Page
|


