Scratch & Bash
:
Engines / Rolling Stock
Aristo Dash-9 & Kadee Couplers
Jan 28, 2009


By Jon C.A. DeKeles
LSOL.com Editor in Chief |
Author
Bio
One thing I love about Large Scale Trains is that there are at least two ways to do something.
|
One thing I love about Large Scale Trains is that there are at least two ways to do something. On my new Arist-Craft Dash-9 I wanted to change to Kadee couplers, but I really don't like cutting and drilling my equipment. Why? Not very good at it, and I don't have time to learn complicated procedures. 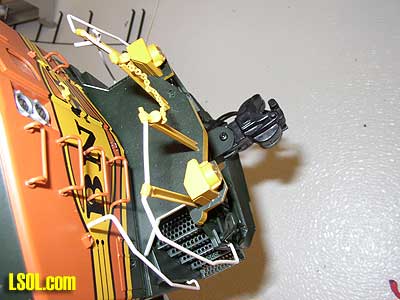
I took a look at the Kadee coupler site for a conversion option. I found that they had one option for using a Kadee #789/#1789 that would still allow the Dash-9 locomotive to negotiate 8 foot diameter curves. I looked through the instructions and found a couple things. 1) I did not happen to have a #789 coupler in my parts drawer. 2) Oops. Looked like there was some cutting and drilling. Don't get me wrong. Kadee instructions are well written, as always, but this one just had too many steps for me. So... I started looking around to see what Kadee couplers I did have. I tried several options and found that the #787 looked like it could work with no real work.
The Aristo-Craft coupler is held on with a plastic shaft. There is one screw holding on the shaft to the unit. One screw holding on the knuckle coupler and there is a tension wire that is used to center the coupler. We do not have to touch the wire or the screw that holds on the shaft to the unit. All we have to do is remove the screw that holds on the actual coupler to the shaft. Remove this screw and save it, we will use it to attach the Kadee coupler. 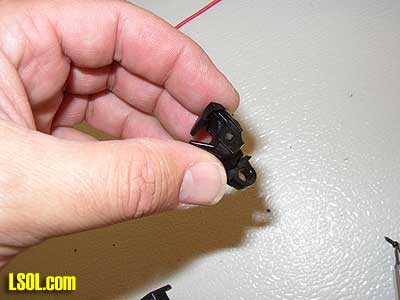
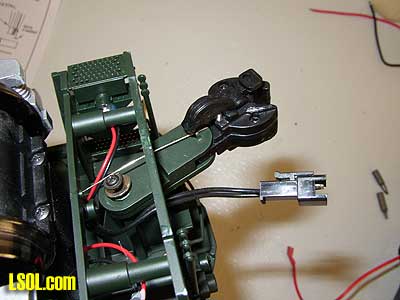
The only part of the Kadee coupler we are going to use is the knuckle coupler. It will fit right in where we removed the Aristo-Craft knuckle coupler. You will not used the centering springs, or draft gear box, as the coupler will be center using the Aristo-Craft wire already install on the coupler shaft. 
The Kadee coupler will fit a little tighter than the Aristo-Craft did. Gently insert the Kadee knuckle coupler between the two parts of the shaft attached to the unit. Once the Kadee coupler is in place you can replace the same screw that your removed earlier. Do not over tighten this screw, but it should be tight enough that the Kadee coupler does not move. Do this on the other end of the unit and you are done. 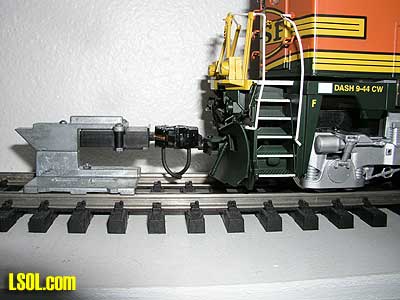
When I set the engine on the track I needed to see if the vertical height should be adjusted. I got out my handy Kadee Coupler Height Gauge and found... perfect. 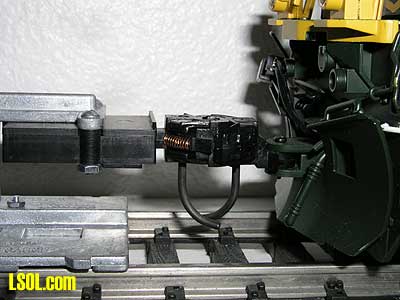
I spoke with Kadee technical support about this modification and we agreed that it would work and could provide a stronger mount for people pulling longer loads. Kadee was going to fiddle with it themselves to check for any additional options on using the #787. We will keep you informed.
| kadees on dash-9 |
| Very good to see another way to mount kadees on a Dash - 9 |
| Carl Lammlein - 01/28/2009 - 06:06 |
| Good Idea |
| More than one way to skin a cat! Good procedure for those that want to make a quick installation that works. Sam can add this to their bag of tricks. |
| JD Miller - 01/28/2009 - 06:09 |
| Kadees on Dash-9 |
| Kadees are hard to beat. Great article on the conversion. |
| Jim O'Connor - 01/28/2009 - 10:26 |
| Kadee Couplers |
| Will this also work for other Kadee Couplers for say USA Trains MAC SD-70, USA Trains GP-7/9 etc.? |
| Gerry - 01/30/2009 - 13:23 |
Top of Page
|


