Scratch & Bash
:
Buildings
Simple Ways to Making Buildings "Real"
Dec 31, 2008


By Noel Widdifield
LSOL.com Managing Editor |
Author
Bio
Have you ever had a building that you purchased for your railroad and once placing it on the railroad deciding it didn't really look right?
|
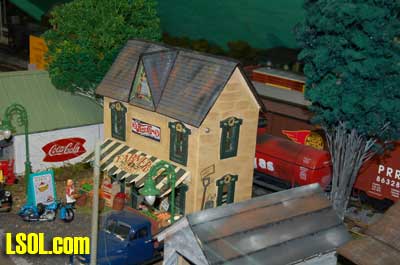
Have you ever had a building that you purchased for your railroad and once placing it on the railroad deciding it didn't really look right? I found a Farmer's Market building in a gift shop several years ago and knew it would be perfect for my railroad. It reminded me of a similar place in my hometown on State Road 32 on the way from my house in the country to Anderson, Indiana. It was called "G.M. Feed", and it sold garden supplies, plants, feed and in the warmer months vegetables and fruits. That G.M. Feed Store was painted with pictures of flowers, fruits and vegetables on the outside very much like the building in the gift shop. I bought it, took it home and placed it on my railroad but later realized that it looked like something from a gift shop and not in a real town. It needed some work to make it look "real". 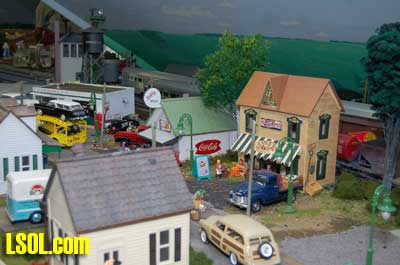
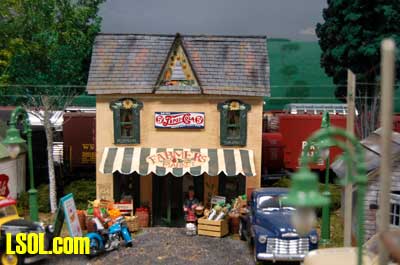
When I finished the scenery on the first section of my railroad I decided that I really needed to do some things to make that Farmer's Market look more authentic. The first thing that needed work was the roof. It was just painted wood and detracted from the authenticity of the building. While looking at pictures on LSOL.com, I noticed a building that Ron Hill had built with what looked like real shingles for the roof.
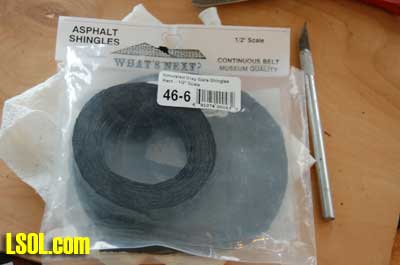
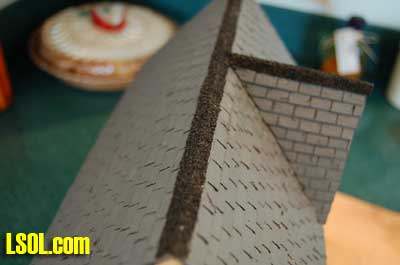
I contacted Ron who told me about some dollhouse shingles that he had found and used. Going on line I found the shingles Ron had used. They were sold under the brand name of "What's Next?" and came in a several colors and sizes. I ordered two rolls each of the 1/2" scale Black Textured Rectangular and Simulated Grey Slate. They come in rolls that are about 20 feet in length. 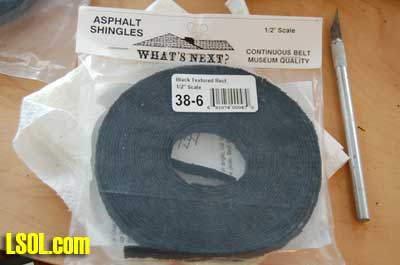
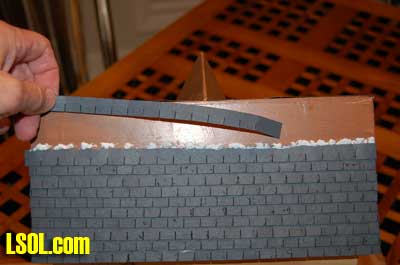
Putting the shingles on the building was fairly easy. I unrolled the shingles and cut them to the length of the roof using my hobby knife. I made them about 1/32 inch longer than the roof. Applying clear Acrylic adhesive caulk (White Lightning 3006), I glued the shingle strips to the backside of the roof, making sure that there was a 1/64" overhang at each end. The first strip was aligned with a 1/64" overhang along the bottom edge of the roof.
After the first line of shingles was glued in place, I overlapped each next row using the White Lightning 3006 to attach the new row to the last row and to the wooden roof. The backside of the roof was the place to start because there was no obstruction on that side of the roof. That allowed me to gain confidence gluing the shingles in place. I was careful to be sure that the rows were aligned evenly as I glued them in place. 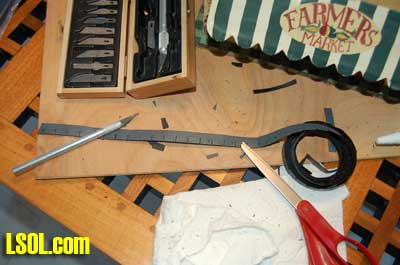
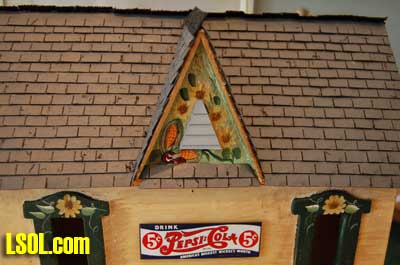
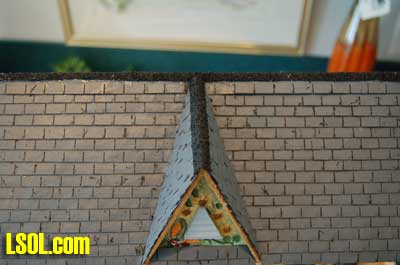
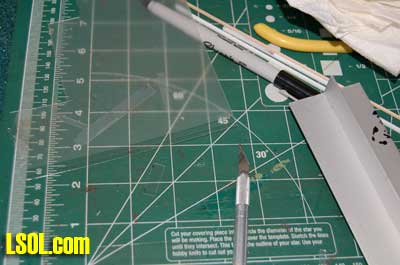
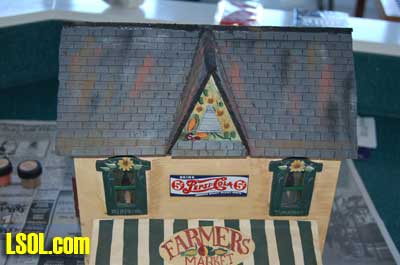
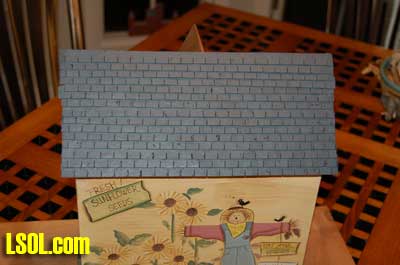 The front side of the roof required cutting the shingle strips to fit around the dormer in the center of the roof. Again, I started at the bottom edge of the roof and measured each strip before I cut it to be sure it would fit snugly against the dormer. 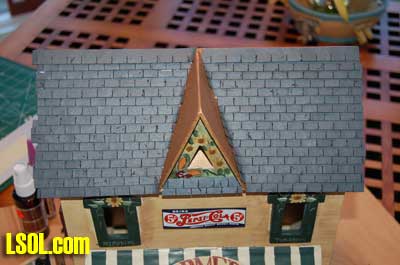
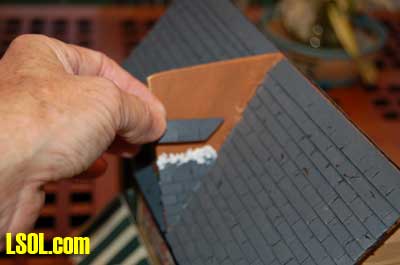
Fitting the shingle strips along the dormer was a little harder to do than the rest of the roof because of the smaller size and the sharper angles. Again, each strip was measured and cut to fit in place. I trimmed the shingles to fit along the edge where the dormer fit against the rest of the roof. I then trimmed the edge of each row of shingles so that they overhung the end of the roof by the 1/32" overhang.
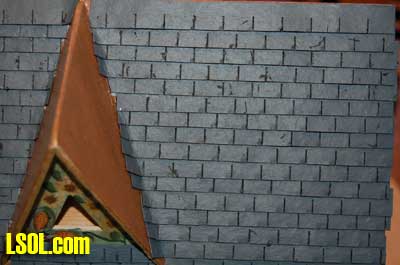

I used the Black Textured shingles to cap the ridge of the roof. I first cut a strip to the length of the long ridge and glued it along one side of the roof. I let it dry for a couple of hours and then glued down the other side. Then I cut a strip to fit on the dormer and glued it down in two steps as I had on the long ridge. 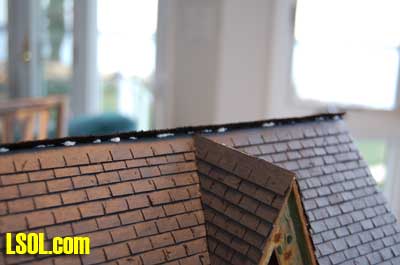
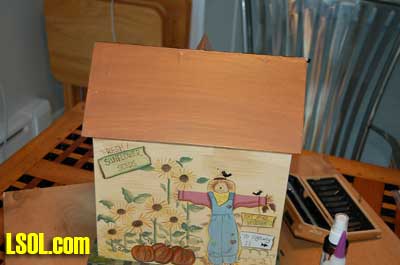
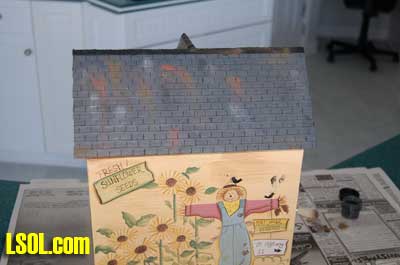
 Finished with the roofing, I moved on to the windows. There were open holes that didn't look very realistic, so I removed the base that was attached to the bottom of the Farmers' Market. That allowed me to work inside the building. I cut clear styrene to fit and glued it in place inside each window. I removed the excess glue from the window using my hobby knife. 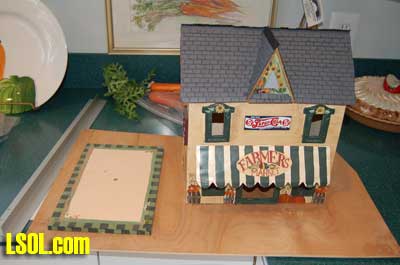

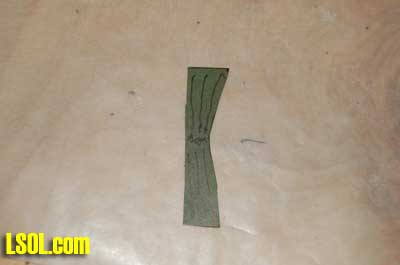
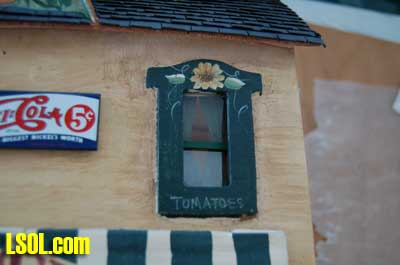
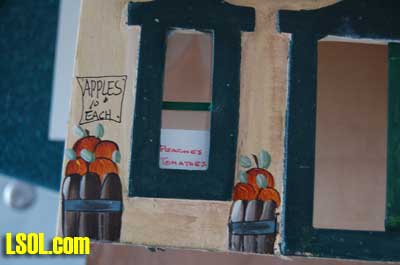
Since the G.M Feed owner used the upper story of the building as a residence, I felt the windows upstairs needed curtains. I cut curtains from hanging file folders and put detail on them with a black marker.I then glued them in place at the upstairs windows. A lettered a sign for one of the downstairs windows advertising peaches and tomatoes that would have been in season in September finished the window features. September 1954 is the time period for my railroad. 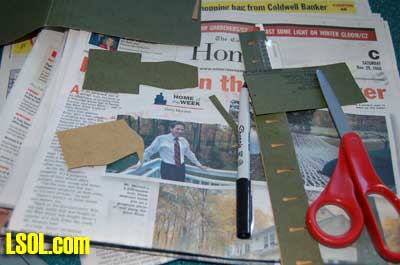
 Because there were no doors on the building, my next project was to construct them. I cut basswood strips to the size needed to fit in the doorway. I glued them together to construct the frame of the door and then glued clear styrene cut to size to the back of the doors. I mixed some acrylic paint to match the trim on the building and painted the doors. 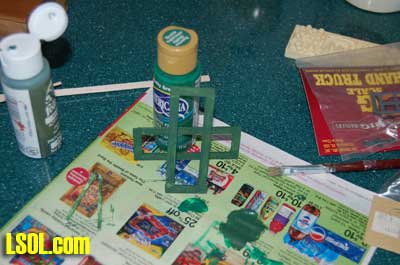

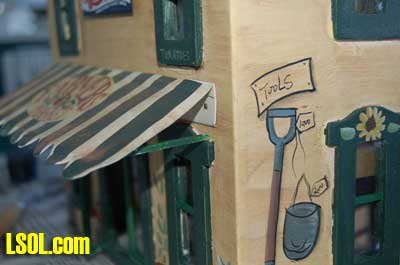
I glued the doors in place in the doorway and then turned my attention to the canopy on the building. The canopy was fastened to the building using a brass hinge, but there were no supports to hold the canopy in the raised position. I fashioned two support arms from styrene strips, painted them and glued them in place between the front wall of the building and the canopy. I also glued a small triangular piece of siding in place over the opening in the dormer and painted it grey so that it appeared to be a vent for the attic. 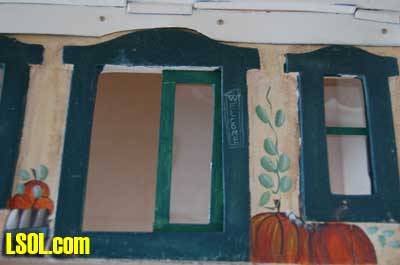

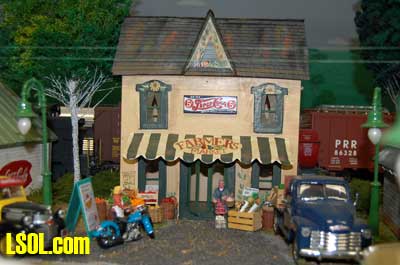
To make the building look as if it had been in use for a decade, I felt that it should be weathered. I applied weathering powders using a soft brush that I have on hand for weathering. The results looked were what I had in mind when the job was complete. 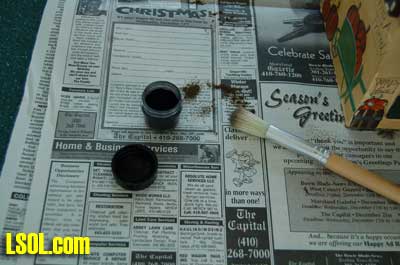
This project is an example of kitbashing buildings that are was sold for a purpose other than for a Large Scale railroad. By using my Scale Ruler that I always carry in my billfold, I was able to determine that the building was about the right scale for my railroad. Once I put it in place and looking at it for a while, I realized that it didn't look realistic enough. Thinking about how to improve it, I came up with some minor modifications that would make it look much more inhabited and realistic. I wanted to keep the basic look of the uniquely painted outside walls, door, trim and the overall colors. The project took me about three hours of modeling fun over a couple of days to complete the satisfying result. As you can see, it fits in very well and looks much better after the improvements I made. This kind of project is perfect for the winter months ahead while the weather prevents us from being outside. Perhaps if you look around your railroad you will find a similar project to keep you encouraged about staying inside for a few hours, give yourself a lift and improve your modeling skills. 
| Comment & Question |
| Noel, Neat article that I thoroughly enjoyed reading. One question: what material did you use for the canopy, and will this only be used on your "indoor layout"? Elaine |
| Elaine Haggenbottom - 12/31/2008 - 09:04 |
| Simple way to Make it real |
| Good article, Noel, and full of good ideas. I bought a building front at last year's convention. After getting it home, I decided it needed to be a building with a big door to accept grain cars. Liked your doors and windows. I build my door backwards from you. I take a piece of plastic a little larger than the door, and glue the frame to it. Then glue the whole thing into the hole! The oversize plastic holds the door more securely than just a press fit into the hole. |
| Dick Friedman - 12/31/2008 - 10:01 |
| Simple way to Make it real |
| Elaine, The canopy is sheet metal. The building is for inside. Dick, Sounds like you did a great job modifying the building too. Noel |
| Noel Widdifield - 12/31/2008 - 14:06 |
Top of Page
|


