Scratch & Bash
:
Buildings
Learn How to Build Noel's Garage
Nov 19, 2008


By Noel Widdifield
LSOL.com Managing Editor |
Author
Bio
We all decided that I needed a garage in the town of Anderson. Mike and Leon gave me that as a homework assignment to be finished before they returned for the second session of working on my railroad. So I began to look for pictures of a garage in the timeframe of 1954 to use as a model for my garage.
|
My big project this year has been to put scenery on my indoor New York Central Large Scale railroad. This railroad is the fifth railroad that I have built over the years and none of the previous ones every progressed to the stage where I put scenery on them. This is my first Large Scale railroad and probably the last that I will build, so early this year my wife and I agreed that I needed to finish this one with scenery. That led me to hiring a couple of professionals to come in and help me. (That is a whole other story that I will tell in the future.) 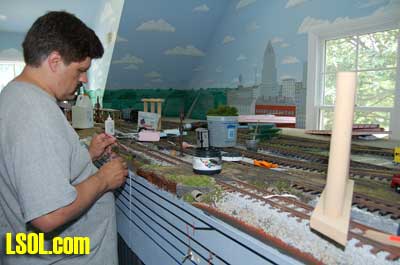 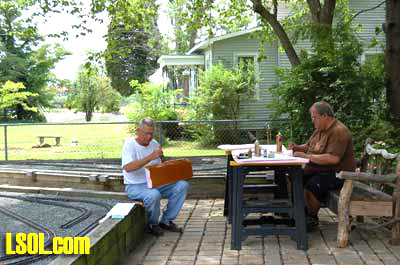 
After we had finished the first section of scenery, we all decided that I needed a garage in the town of Anderson. Mike and Leon gave me that as a homework assignment to be finished before they returned for the second session. So I began to look for pictures of a garage in the timeframe of 1954 to use as a model for my garage. 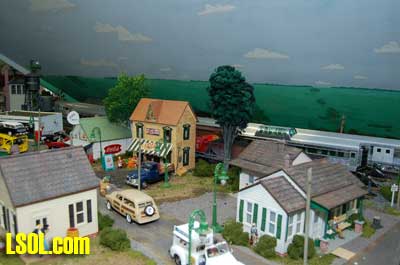 Searching the Internet for pictures of 1954 garages led me to a couple of model garages in HO and O. I downloaded those pictures and drew up plans for my garage using the pictures for a guide. 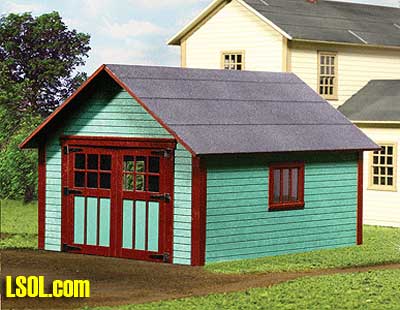 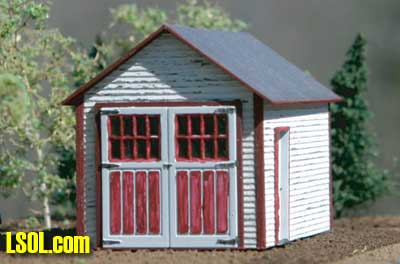
I calculated the dimensions by estimating the height of the garage doors and then working out the rest of the dimensions from that figure. I drew the plans full size on graph paper, estimated the materials needed and picked them up from my local hobby store. 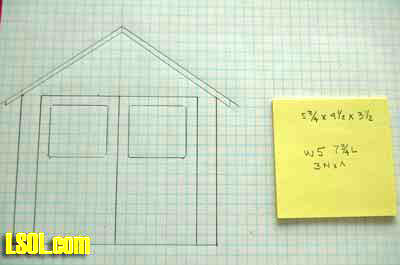 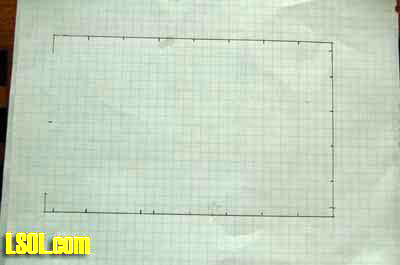 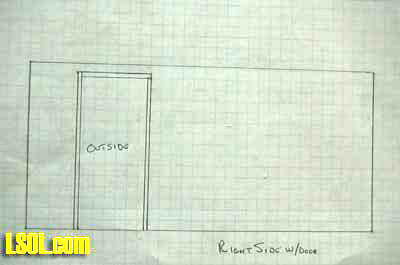
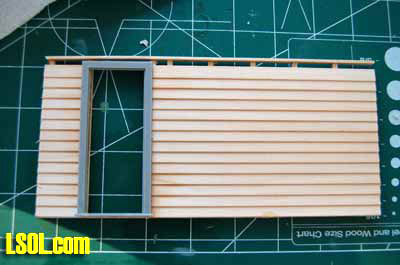
Since my railroad is indoors, I used basswood for construction. If the garage were to be for my outdoor railroad, I would have constructed it from redwood or cedar. I first cut all of the framing material to the correct size using my new Micro Mark chop saw and framed out the sides and back. I cut the basswood sheathing material to the correct size and attached it to the framing using Cyanoacrylate (CA) glue and spray accelerator. (If this were to be used outside, I would have used a poly adhesive.) I used a Grandt Line door and frame (#3984). When I was fastening the siding to the frame, I tested the door for fit in the openings before gluing the siding onto the frame. 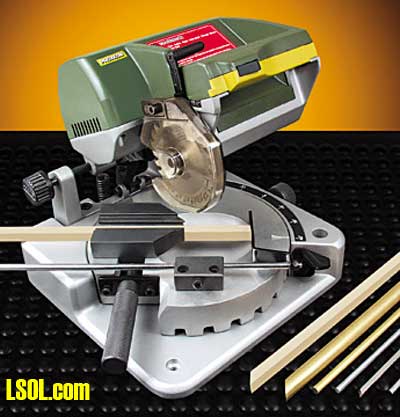 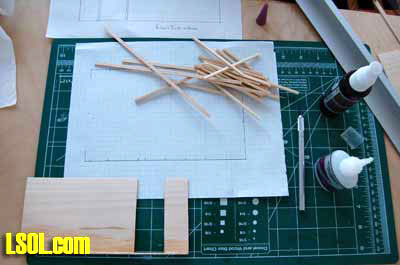 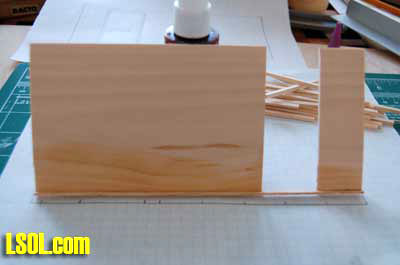
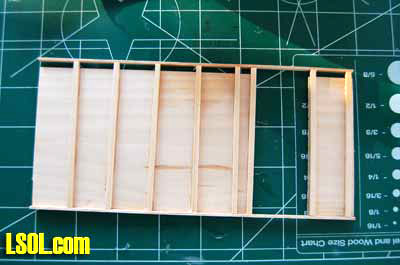  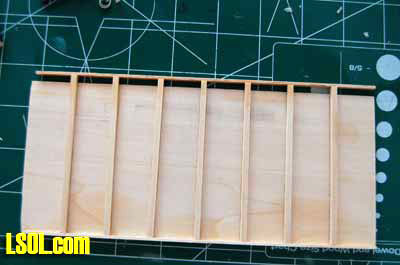
To be sure that the garage was square, I assembled it on the plans and used my mini-squares to check it. I also glued a strip of basswood along the top of each of the walls so that I could fasten the end peaks and roof to the sidewalls. 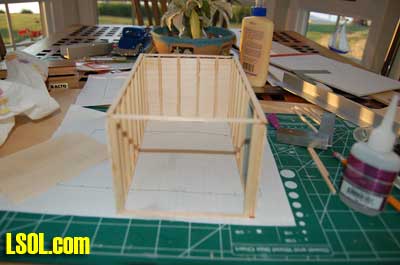 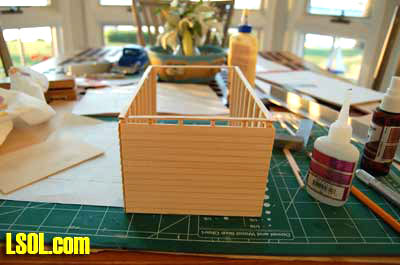 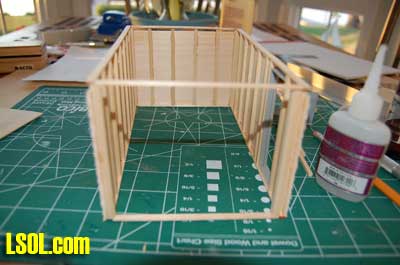
I next cut the triangular end peak from the siding material and fastened it to the front and back walls using a strip of basswood for bracing in the vertical. 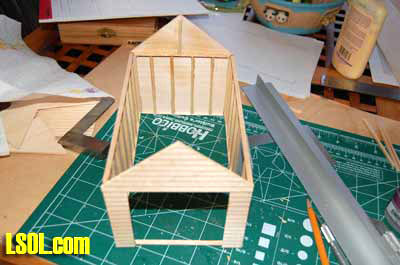 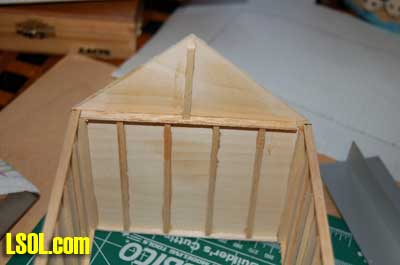
Using the rafters that I had cut to size, I built up the roof framing by attaching the rafters to the strip of basswood I had attached to the side wall and to a piece of basswood I attached across the top of the end peaks. The ends of the rafters were cut at a 45o angle so that they fit against the ridge piece. I turned the building around and fastened the rafters the other side of the building. 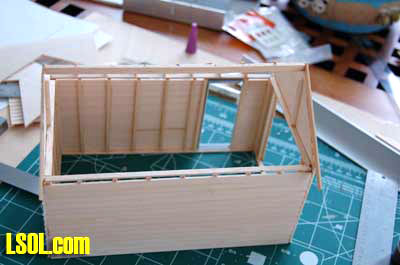 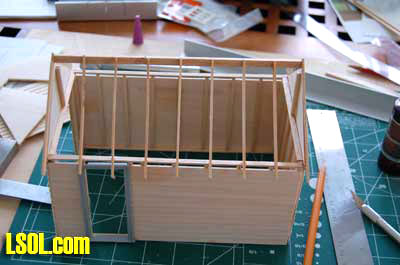  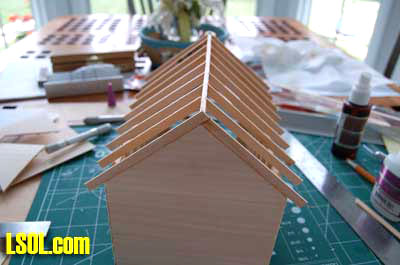
The roof was made from plain basswood sheet that I glued to the rafters. I used a strip of basswood to form the roof ridge and glued it in place.  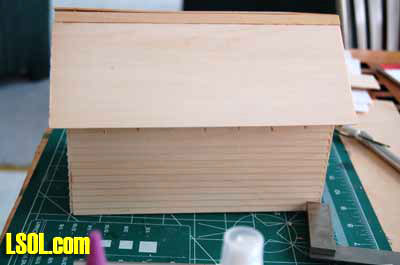 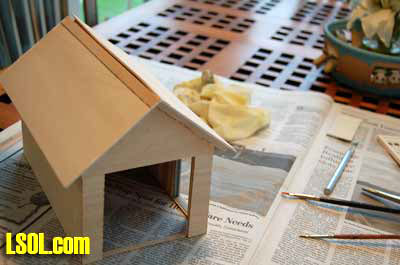 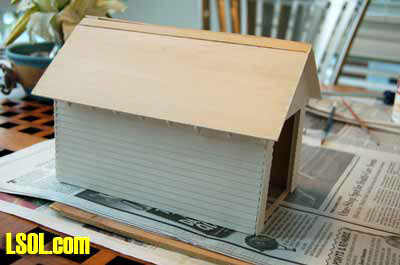
Since I couldn't find premade garage doors, I built them from basswood and used some white styrene windows that I had in my scrap box and glued them in place after crafting the doors. 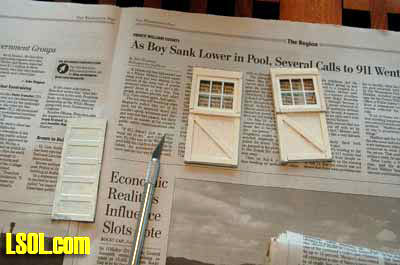 I used a penetrating primer to prime the building on the outside and left the inside raw wood like most garages of that time. I painted the outside with a flat white acrylic and then painted over it with a flat grey using the dry brushing technique to make the paint look like it was old and peeling. 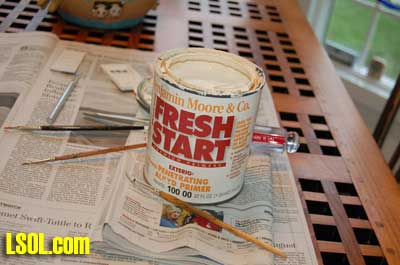 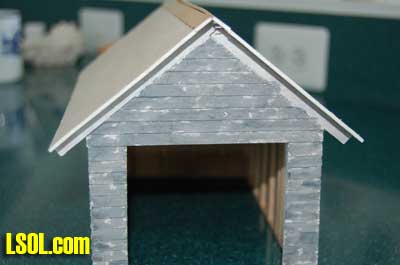  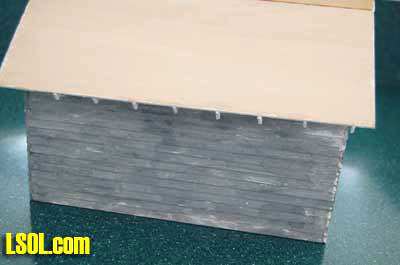
I painted the roof overhang with primer and then cut 320 grit sandpaper into strips to simulate tarpaper-roofing material. I use rubber cement to fasten the sandpaper to the roof. 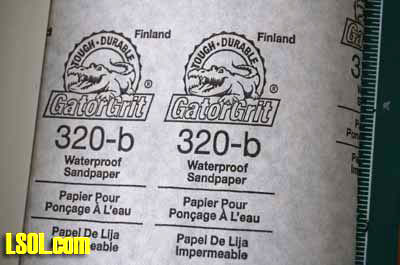  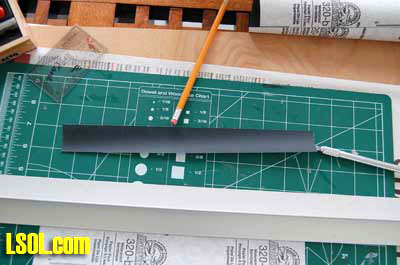 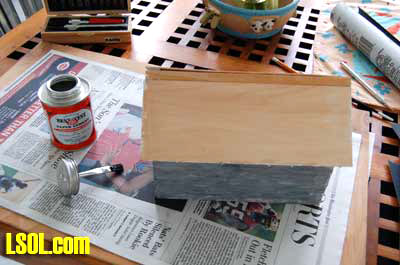
Starting at the bottom of the roof and working up to the ridge, I overlapped the sandpaper. I folded the final strip and placed it along the ridge to finish off the tarpaper. 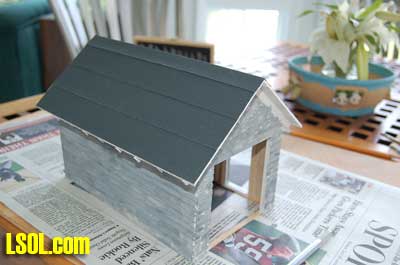 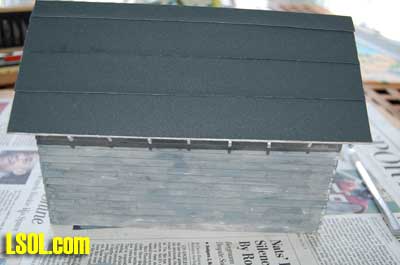 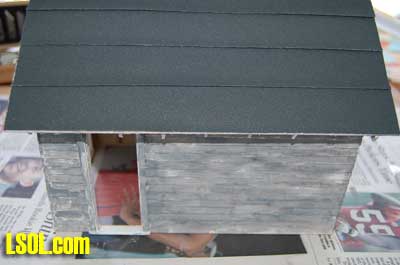 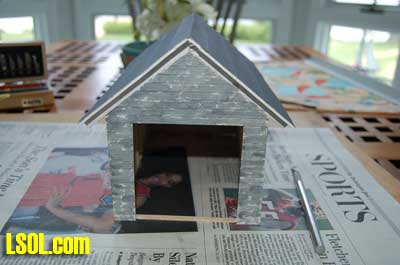
I glued the side doorframe in place and then fastened the door into the frame. In order to fasten the garage doors in place, I fashioned hinges from strip brass and glued the hinges to the finished doors and then glued the hinges to the sides of the garage door opening. It was my wife, Ann's, idea to have the garage doors open a bit to give one of my many model automobiles a home.  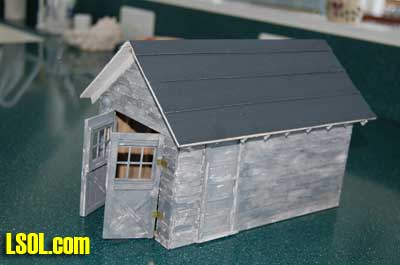 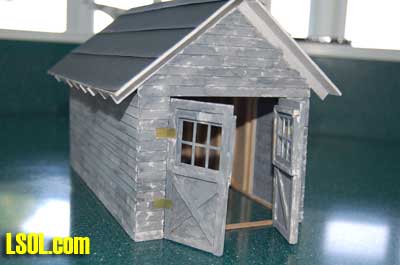 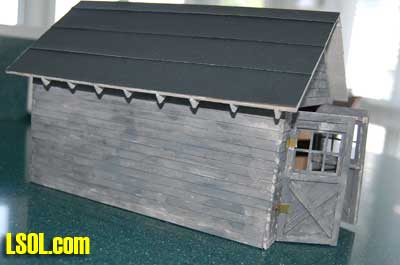
To simulate tar used to fasten the tarpaper in place, I painted glossy black along the edges of the sandpaper strips. 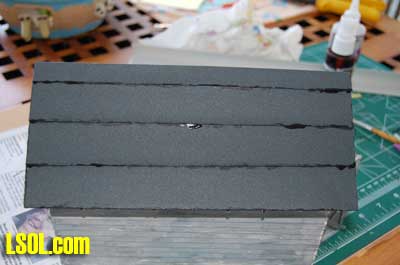 I weathered the roof and sides of the garage using Bragdon dry powders and then sprayed the whole structure with Testors Dull Cote to seal the powders. 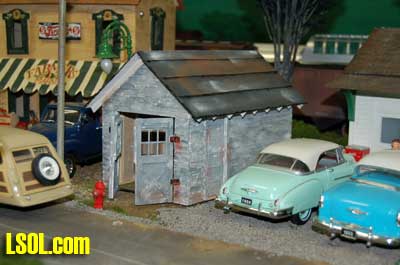
When I was finished I placed the garage next to the motel parking lot in my hometown of Anderson on the railroad. 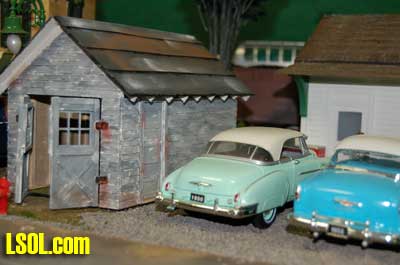 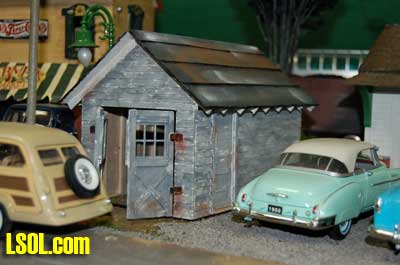 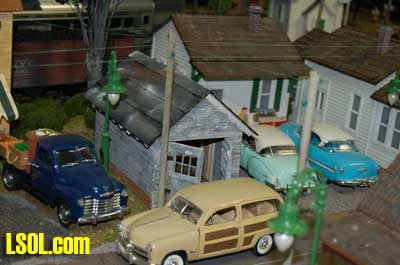 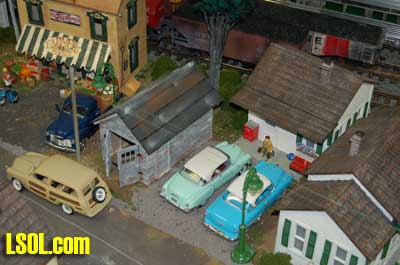 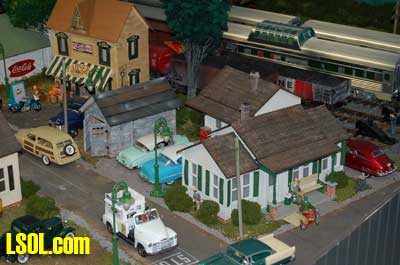
I later moved the garage a short distance back and added a driveway. I put an old truck in the garage. I plan to hang some garden tools and add some junk inside that is frequently found in garages. 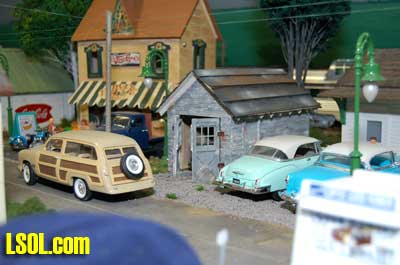 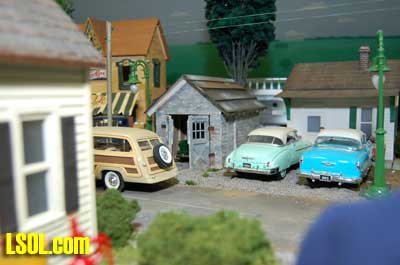 This project is an example of what can be done in a very short time to add a building to a railroad scene. If you have been thinking that your railroad needs some buildings and you can't find anything ready built, you should consider finding an example of the building you desire, drawing up some simple plans and spending a few pleasant hours making yourself a building that won't be found on any other railroad. The whole thing only took about four hours over two days to complete. The cost of the building materials is considerably less than what you would pay for a finished building. The satisfaction of showing off your own creation is something that cannot be duplicated any other way - especially if your wife believes she had a part in making a good idea better. (Remember that the open garage doors were her idea.)
| garage |
| Looks really nice, great job Noel |
| dean sleeper - 11/19/2008 - 04:20 |
| Realistic Addition |
| One of the most attractive things about this town with its details like this garage is that, as in real life, the railroad is a background part of the scene, which creates a more realistic setting in such a small area. |
| Rick Henderson - 11/19/2008 - 05:13 |
| Garage |
| Great Job....Love the old time look. |
| John Dodge - 11/19/2008 - 06:23 |
| THANKS |
| Great job. The open doors is a excellent idea. Thanks for the great artical. MG |
| Michael Gruber - 11/19/2008 - 06:40 |
| Garage article |
| Great job. Garages have been my pet project. They are so needed on railroads and are so overlooked. What scale conversion did you ues? The autos look to be mostly 1:24. What dimension strip wood did you use? I couldn't read the plans well, looks like a tight fit, but that is all that is needed in a model. Compresion helps the scene. Nice paint and door effects. |
| Warner Swarner - 11/19/2008 - 10:34 |
| Garage Article |
| The garage is 8" X 5". The side walls are 3 3/4 " high. The end peak is 6 1/4 high. The garage doors are 2" X 3 3/4 each. The basswood is all 1/16" thick. The autos are all 1/24 or 1/25 since they don't make them 1/29. I feel that the 1/32 autos look too small on the railroad. The side walls are siding stripwood and the roof is plain. It was a lot of fun to build and I am glad that some of you are enjoying seeing the project. Thanks, Noel |
| Noel Widdifield - 11/19/2008 - 14:19 |
| Garage Article |
| Nice looking garage. Thanks for the article. |
| Russ Palmer - 11/19/2008 - 18:51 |
| Garage Article |
| The article has provided me with information that I will be using to develope the B.I.D. Railway. Thank you for the good article. |
| arthur baus - 11/19/2008 - 22:43 |
| Garage |
| Noel. Good article. Folks should be able to follow your clear, concise, step-by-step building process in order to produce a worthwhile addition to their layouts. Well done. |
| JD Miller - 11/22/2008 - 04:43 |
| Garage |
| Nice garage Noel. I really like how you framed the building instead of just using flat panels. With articles like this I'm finding it hard to log off this website. |
| Jerry Madsen - 11/22/2008 - 11:05 |
Top of Page
|


