Scenery
:
Buildings
Turntable and Roundhouse Project
Feb 2, 2011


By Noel Widdifield
LSOL.com Managing Editor |
Author
Bio
Over the years, I have tried to find something available commercially that would satisfy the need for a turntable, but all of the ones available in G were much too short.
|
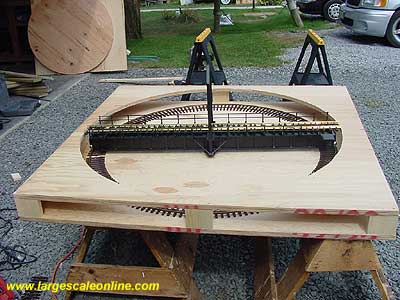
I have been modeling in 1/29 for over ten years and before that in HO for nearly 35 years. After converting to 1/29, one of my big desires has always been to have a turntable and roundhouse for my Big Four NYC) Railroad. I model the Big Four from Bellefontaine, Ohio to Indianapolis, Indiana in a space that is 24'X 42' in the house we built on Chesapeake Bay. I designed the room so I would have plenty of space for the railroad. And, of course, six years later, I need more room. Over the years, I have tried to find something available commercially that would satisfy the need for a turntable, but all of the ones available in G were much too short. I felt that I would need one with a bridge that was over 40 inches long. There were a couple that were 24 inches, but I could not get my Pacifics and the Hudsons that I knew would be available someday on a 24 inch turntable. One day I was browsing the net and happened to check out the Eaglewings Iron Craft web site. I had purchased a custom drawbridge from them to allow access into the room where my railroad resides. When I went to the site, I saw a photo of a turntable that they had build for Mike Ledley. I contacted Eaglewings and they said they would build me one if I could send the plans for one. I contacted Mike and he provided me with the plans for his turntable. I spent several hours on the phone with Mike and then with the owner of Eaglewings, who had just returned from a major train show. After about a month of discussion, Eaglewings agreed to build a 42-inch turntable that met my needs. After another month, the bridge arrived and I set it up in my living room on a chair to see how one of my Pacifics would fit. It looked great, but that was just the beginning. 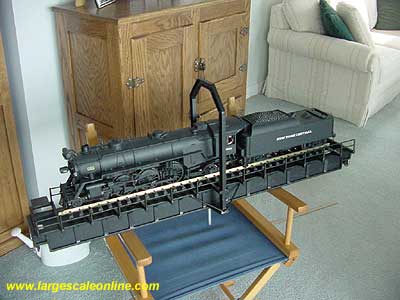 The next step was to cut some 1/2" plywood to mount the bridge. I used two 48" X 48" sections and then measured and, with my skill saw, cut the circular opening for the bridge in one of the pieces of plywood.
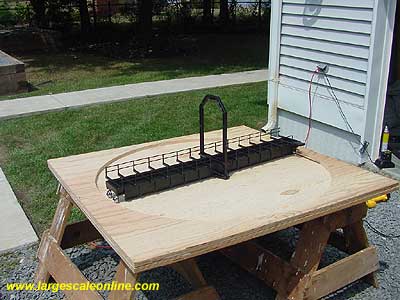 I used a Micro Mart Rotape Compass to draw the circle and then cut along the line. I measured some sectional track and cut it to fit, leaving enough track to extend beyond the end of the bridge about 1/2". I also placed parts of a couple of sections of Sunset Valley tie strip around the bottom of the lower sheet of plywood and fastened it down so that the wheels on the bridge would ride on the rail I fastened to the tie strip. 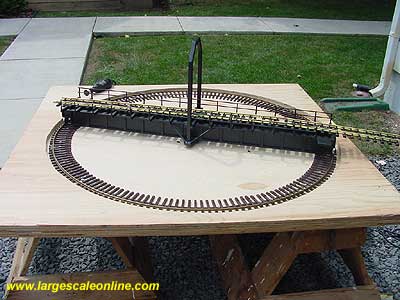 This took some work with the old rail bender and a lot of bend and try and bend and try to get it correct. I fastened a couple of ties and tried the turntable, then fastened a few more and finally nailed it in place with much trial and error. I drilled a hole at the center of the pit after several measurements to be sure it was centered. In order to separate the two pieces of plywood by the correct amount, I did some measuring and then by trial and error cut pieces of 1"X 4" pine to make separators between the plywood so that the bridge would rest on a steel washer on the lower piece and the track would be level with the upper piece of plywood. I placed the separators at each corner and at the center of each side.
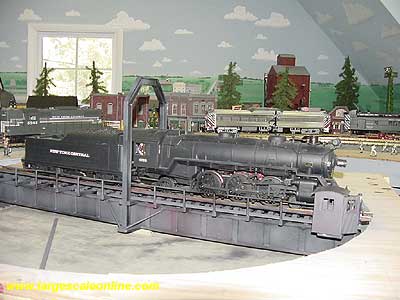
  I then removed the bridge and cut medium styrene to fit between the two pieces of plywood to form the walls of the turntable. I carefully, glued the three strips of styrene in place and cut short pieces of styrene to cover the ends where they met. This gave a finished look to the walls. I then cut a piece of 1/4" plywood to form the foundation to hold the steel washer in place so that the bridge would rotate. 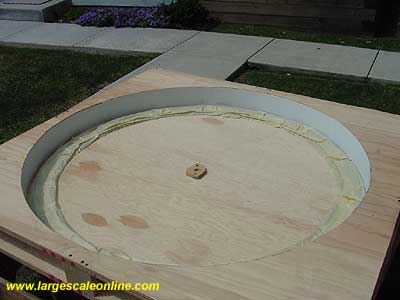 I then covered the ties and rail with masking tape so that I could spray paint the pit. After painting the floor of the pit with primer, I spray painted the floor and walls of the pit with primer gray.
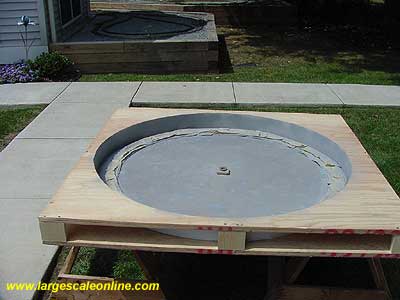 I also sprayed grimy black and earth around the walls and floor to weather them. I removed the masking tape and painted the rails with rust and weathered the ties. 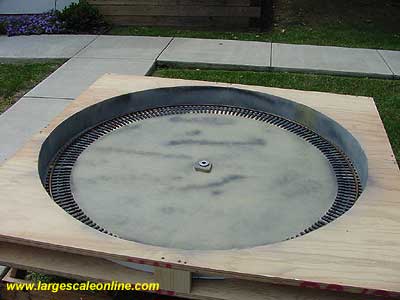 I also weathered the rails and ties on the bridge and fastened them in place temporarily. It was now time to move the assembled pit inside to my railroad area. I placed the assembly on 1"X 4" legs and frame that I used for the rest of the railroad. I wanted to be sure that the rails lined up with the track leading to the turntable, so after getting it all in place, the crew fired up one of the speeders and drove it onto the turntable. 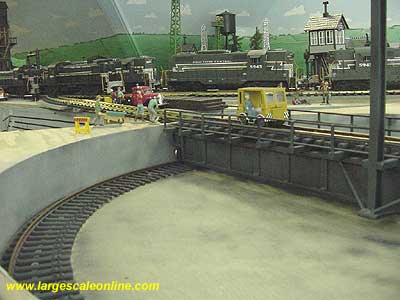 It worked fine, so we backed down the 0-4-0 as some of the track crew watched. 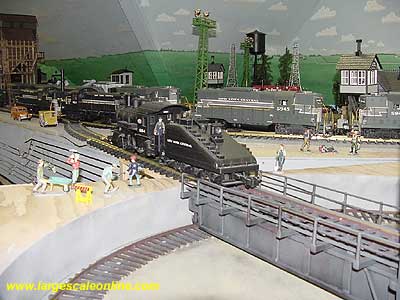 It went onto the table without a hitch
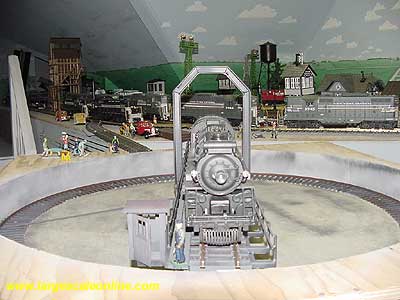
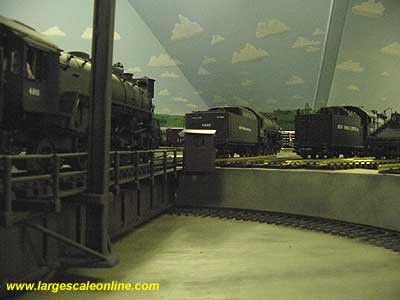
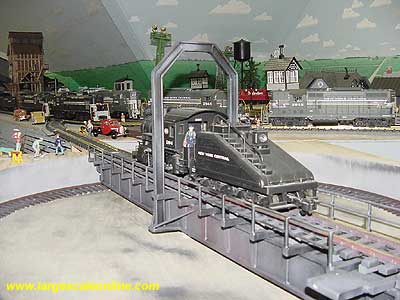 so we then backed down the Pacific onto the table for the true test. On this test, we had a hogger walk the rails alongside the engine and he watched the wheels as the Pacific backed into position. 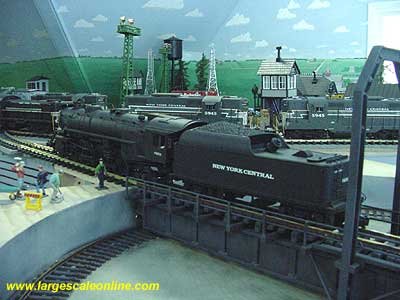 As you can see the engine rode fine as we tested the rotation. The hogger is admiring how well the whole thing came together. 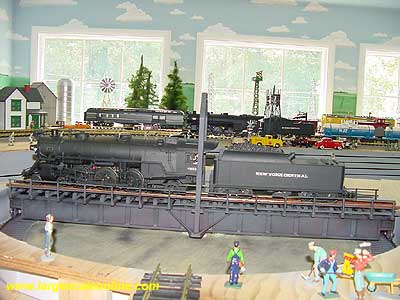 The next job was to build the shanty on the bridge. I constructed that from styrene and fastened it to the bridge and glued a workman/operator into position.
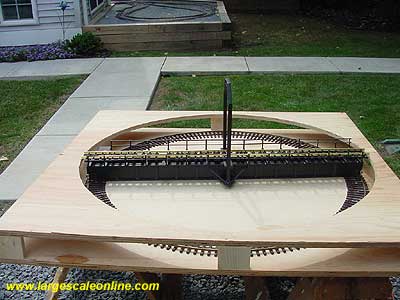
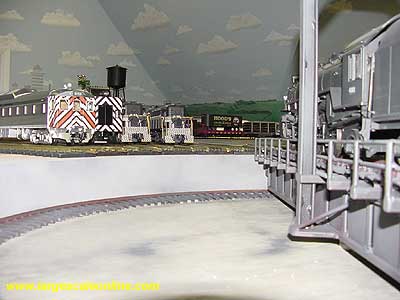
  The next several shots show the turntable in various positions and show that I then lined up the tracks for a roundhouse, figured the dimensions for the roundhouse and for the track spacing and fastened the tracks in place. The next several shots show the turntable in various positions and show that I then lined up the tracks for a roundhouse, figured the dimensions for the roundhouse and for the track spacing and fastened the tracks in place. 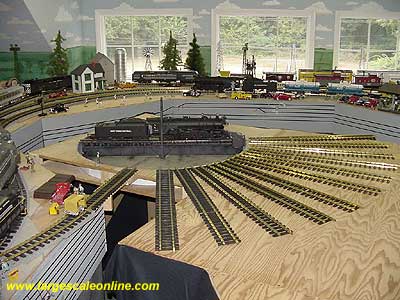 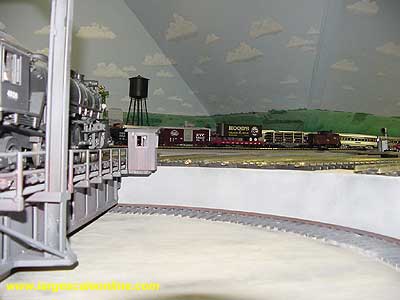
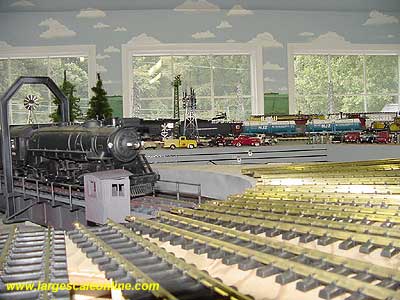   I have to permanently wire the turntable track to a power source and am awaiting some plastic and metal devices to do that. 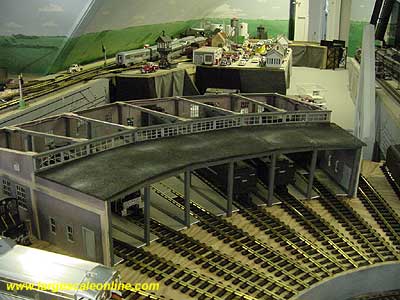 After completing the turntable, I began to scratch build a roundhouse, which hopefully will be the subject of another article. It is nearing completion and when it is finished, I will ballast the tracks and do the scenery for the whole area.
| Turntable |
| Noel, That's really neat. How did you get such a smooth curve on the track inside the turntable? Another great project completed. Thanks for sharing. Gary |
| Gary Condry - 02/02/2011 - 07:49 |
| Turntable |
| Gary, Thanks for the kind words. The turntable has been a great addition, but I completed it several years ago. Jon is just posting it again. I used a rail bender to bend the track to fit. I used the rail bender for all of my track on my outdoor railroad too. Noel |
| Noel Widdifield - 02/03/2011 - 07:39 |
| Turntable |
| Noel, I've just migrated from On3 to Fn3 (1:20.3)and I'm in awe of the size your roundhouse/turntable must be. Mine was huge in On3! As with any turntable the tracks all come together as they approach the TT from either the RH or from the yard. One must always remember that for loco clearances either way. Great job and thanks for sharing. Ron Proffitt Rio Grande Southern in Fn3 (in Kansas) |
| Ron Proffitt - 08/28/2011 - 14:43 |
| Turntable |
| Ron, Glad you liked the article and my turntable. It has a 36" span. I get lots of compliments on it when people come over to my railroad. Thanks, Noel |
| Noel Widdifield - 08/30/2011 - 16:26 |
Top of Page
|


