Scenery
:
Buildings
Striving for Realism: Walls
Jul 18, 2007


By Dennis Packer |
Author
Bio
Building walls is always the first step in building a structure. The next step is to determine what you are going to do with the interior and exterior walls once you have made them.
|
 | Building walls is always the first step in building a structure. The next step is to determine what you are going to do with the interior and exterior walls once you have made them. You will have to make a decision about the route that you are going to take before final assembly of the walls, adding windows, doors, and interior and exterior details. |
I know this firsthand, because I have assembled the walls in the past and then had to take them apart to do the interior and exteriors. I have used the following methods for finishing interior and exterior walls: - Did nothing to the interior walls because curtains or shades were placed over windows and doors;
- Painted over the rough or existing surface of the interior and exterior walls with latex paint;
- Wallpapered interior walls; and,
- Applied stir sticks, stones, clapboard and brick to the exterior.
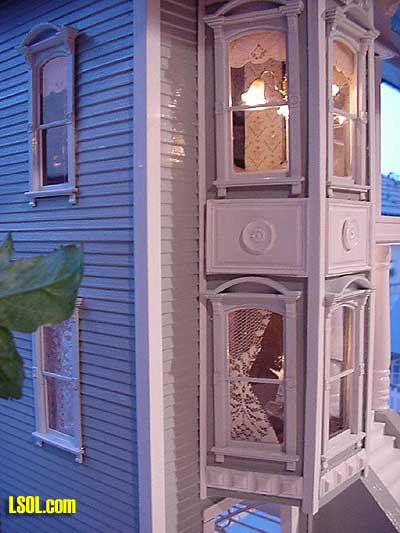
Wallpapering an interior wall is a breeze. Wallpapers can range from a decorative piece of stationary paper to patterned sheets of paper to a wide of assortment obtained from doll house shops. I have also used some types of wallpaper as flooring.
The "Doll House Lady Miniatures" shop in San Gabriel, owned by Pat, Wally and Randy Hage, is my favorite place for a wide range of building accessories. 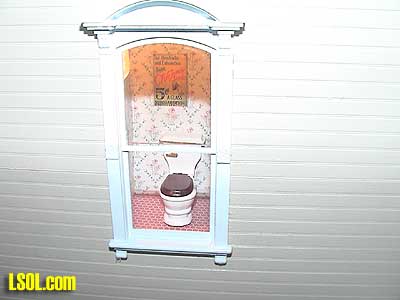
They carry every color and pattern of wallpaper imaginable and often have many of them on sale for a buck. They also sell wallpaper glue. The Hage's demonstrated how to apply wallpaper using four simple techniques: First, place the wallpaper on the wall and cut off the excess with scissors; Second, apply the glue to the wall surface, evenly, with the tip of your index finger, and then wash your hands in warm soapy water; Third, lay the wallpaper on the wall and press out air pockets and into corners with your fingertips; Lastly, use a knife to trim out the window and door slots. 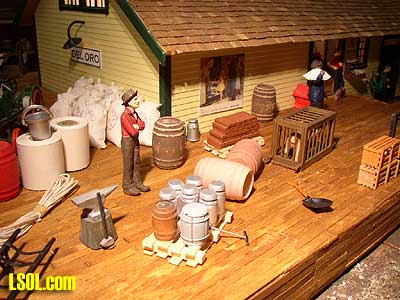
Several of my structures have exteriors made from coffee stir sticks. I square the ends with tin snips and glue them unto the exterior walls with Liquid Nails or exterior caulking. Just smooth the caulking onto the exterior surface with your index finger or a small plastic putty knife. Then press the stir sticks into place. I then paint the siding with a wood stain or water based latex (various shades of brown). The appearance is rustic and these buildings have withstood weathering very well.
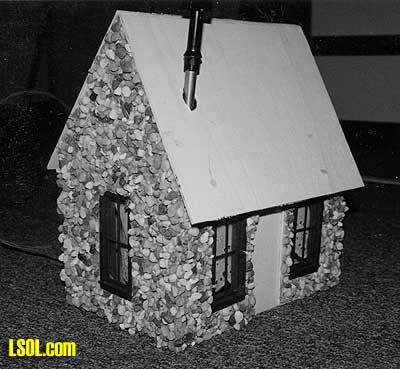
Another great exterior treatment is stones. After smoothing caulking or Liquid Nails onto a wall, like icing a cake (don't lick bowl), pour pool deck stones (they come in a wide range of colors and the rock is the perfect scale from building supply companies), onto the walls. Press the stones into the caulking. Perform this technique over a tub to catch the excess rocks. Then repeat this method on the remaining walls. After a couple hours of drying, you will have the strongest building on your layout. I have a stone cabin that has been outside five years and is in great shape.
There is nothing like clapboard siding on your structures. However, clapboard cannot be left outside overnight. I purchased 1/4" lap clapboard from the Doll House Lady Miniature Shop. Clapboard laps come in various sizes and measure 31/2 X 24 inches. I taped each piece to the exterior and then used pencil to mark the backside for windows and doors. An Exacto knife or jigsaw was used for cutting out the window and door slots. The clapboard was then glued into place with Quick Grab. Randy Hage showed me a little secret to gluing clapboard or plastic using Quick Grab. First, squeeze the Quick Grab glue onto the wall and then press the clapboard on. Then remove the clapboard and breathe on both gluey surfaces for 20 seconds. Then reaffix the clapboard to the wall. This technique will avoid air pockets and seams will be very tight. Once you have completed gluing all the clapboard, then use two coats of paint on the wood.
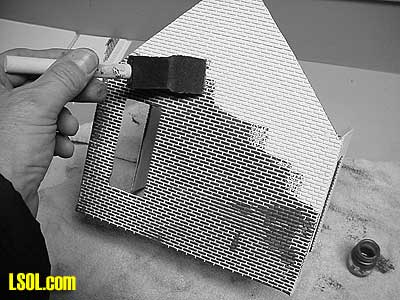 Brick will be your toughest challenge and most time consuming. You will not use real brick. I use Plastruct brick sheets. You can visit their Web Site for more information. Like clapboard, I taped the pieces to the exterior, penciled window and door slots, and glued the sheets to the exterior with Quick Grab glue. 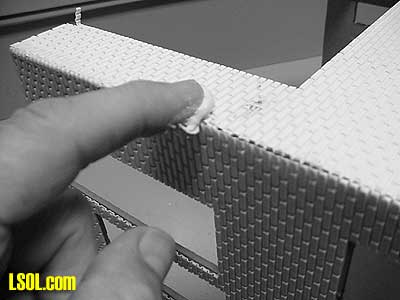 The next step is to use white putty and fill in gaps and corners. Once the putty sets up, use a table knife and match and alternate the grout lines with the brick (it takes time and patience but is worth it). 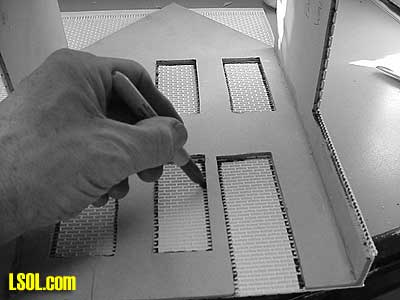 Next, I painted the brick with acrylic paint (reddish-brown), with a small one-inch square sponge brush. After dabbing on a couple of coats of paint (don't worry about the joints), spray Dull-Cote on the brick. Once it dries thoroughly, grout the brick (water-based joint compound with tinting powder). The Hage's furnished me with a gray grout that I applied with my index finger. After covering the entire wall and edges with grout, the excess was washed off with a wet sponge. After drying, I cleaned off the wall with a moist cloth. After drying, spray with Dull-Cote. The finish looks like the real thing. And, when your buddies find out you really grouted it, they will be blown away. In striving for realism, each time you try one of these techniques on interior or exterior walls, you will get better and better at it, and may develop new methods that others may want to try. Garden railroading is fun. And, I guarantee your results will not only impress yourself, but others as well. Top of Page
|


