Scenery
:
Buildings
How to make stairs. - Six simple steps.
Jul 23, 2008


By Dennis Packer |
Author
Bio
Here is an almost no-cost 6-step technique for making realistic stairs of any height
|
Here is an almost no-cost 6-step technique for making realistic stairs of any height: 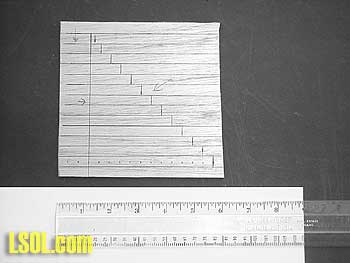
Step 1. Measure the height of the stairs to determine how many steps will be required. The height and distance between each step should be 3/8". Using a ruler, draw a dot on a piece of wood every 3/8" along the bottom and up one side of a thin piece of wood. Then draw lines and darken where the steps will be. Duplicate this process on another piece of wood so you will have a pair. 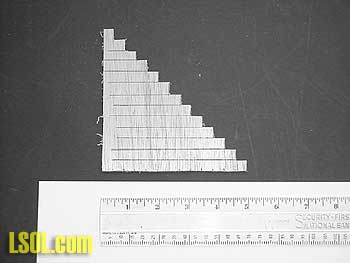
Step 2. Using a scroll or band saw, carefully cut out the steps using the lines drawn on the wood as a guide. After cutting out the second piece of wood, put one on top of the other to make sure both pieces mirror each other. Then square the height and length of each piece.
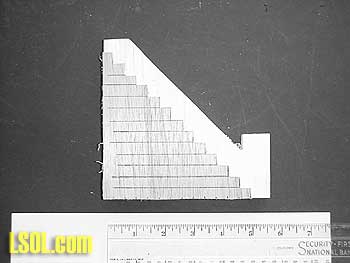
Step 3. Obtain a 1/2 - 1" thick piece of pine and cut out two pieces on a band saw to match the height and length of the steps, with overage at the top and bottom, and to simulate a railing as shown. The cut-out steps are then glued and nailed to the two pine pieces as depicted in the picture. Make sure that the cut-outs are on the inside of the pine railings…this will serve as a guide to build the steps. 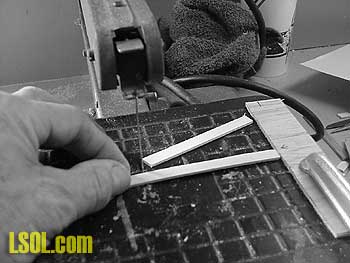
Step 4. Steps are made from Popsicle sticks (Smart & Final sells a box of 1,000 for under $5). The width is just the perfect size. You can make your steps as narrow or as wide as you want them. Using a scroll or band saw, square off one end, and then using a guide for the size you want, square off the other end. There are 13 steps depicted in these photos, so 26 sticks were required to complete the job.
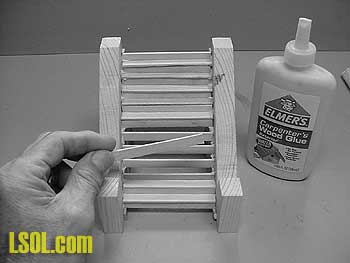
Step 5. Put a drop of wood glue on the bottom side of each stick. Place sticks onto the upright sides of the guides first. After all 13 were glued into place, then glue the sticks onto the bottom of each step. You will find that each step overlaps the upright stick by a fraction of an inch giving the appearance of rear steps. Let the stairs dry thoroughly before going to the last step. 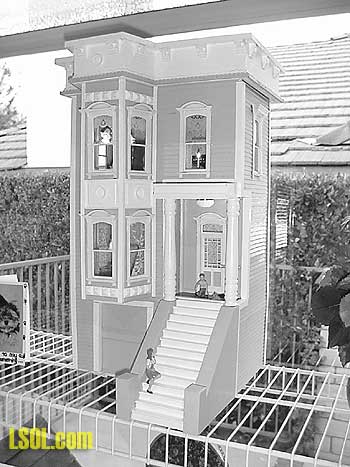
Step 6. Using water-based Latex, brush a base coat of white or the main color of your structure, on the entire staircase and railings and underside of the staircase. The paint will fill in gaps. In my finished model, I painted the stairs gloss white to match the trim, and the railings semi-gloss gray to match the overall structure. Columns were added to tie-in the stairs to the porch area of this Victorian house. The effect is very realistic and costs almost nothing to build.
| STAIRS |
| Dennis.... GREAT step by step... They look GREAT and as you said, are a simple project to make......! THANKS...! |
| Bruce from Little Rock - 07/22/2008 - 15:27 |
Top of Page
|


