Scenery
:
Buildings
Building on a Budget - Birdhouses
Jun 9, 2004


By Elaine Haggenbottom |
Author
Bio
The building of a "log cabin" on a budget begins with the purchase of a simple birdhouse from Michael's Craft Store for $5.00.
|
The building of a "log cabin" on a budget begins with the purchase of a simple birdhouse from Michael's Craft Store for $5.00 (or under, if on sale). 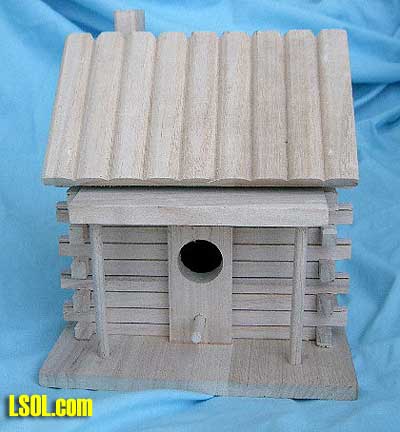
To start, remove the wood perch, cutting it flush, with a razor saw as shown. Sand smooth. 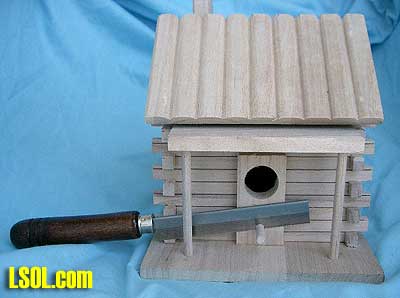
I did not use the "chimney" that came with the birdhouse, instead I cut a full chimney from a scrap of pine wood at approximately 7-1/4" high by 1-1/2" wide by 1/2" deep. ( I would measure your purchased birdhouse to see if these measurements would fit.) Cut the top at least 1-1/2" down from one end, on both sides, making a fat point, as shown in the picture. 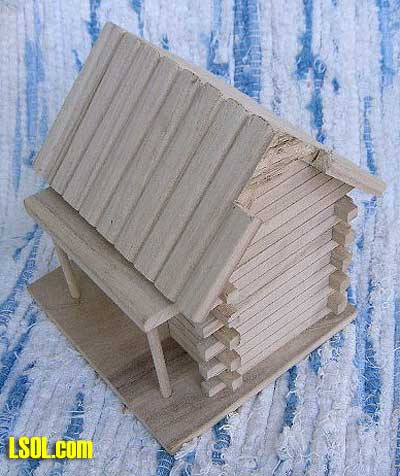
(This is accomplished by the use of a bandsaw or the razor saw) Again using a saw, notch both sides of the roof line to accommodate your "new" chimney piece, allowing for at least 1/2"clearance on both sides. (I used the razor saw again). 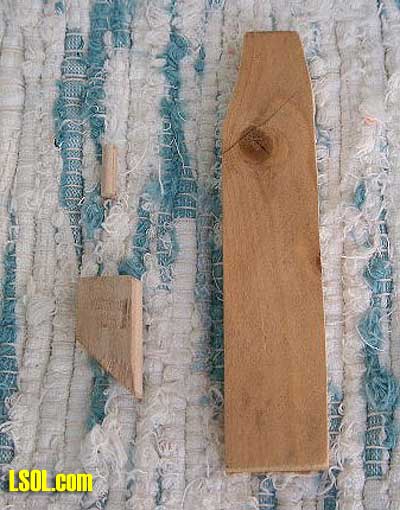
You are now ready to stain (which I have done in the past, but it is difficult to seal) or paint the entire building. I used a water-based exterior house paint in a nice shade of "brown" that is glossy. You can find many of these at Home Depot, etc. in the "oops" area. (I always use glossy paint for all of my items, as the sun dulls them very quickly anyway). Notice from the picture, 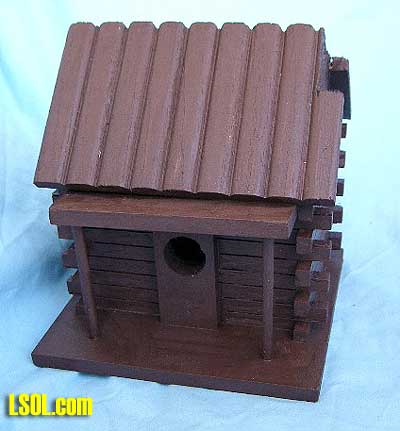
I did not bother to paint the chimney, as it will be covered with masonry. Next, glue the blank chimney in place. I used Titebond II. 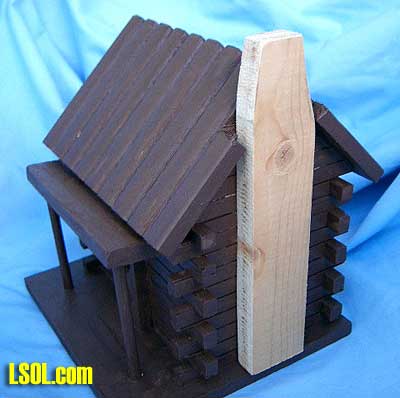
Let dry over night before proceeding.
This suggestion came from LSOL Team Member Bob Gentile: mix 1oz. of dry "ceramic tile thin set" with 1/2 oz. of the "liquid additive" in a small container, again both purchased at my local Home Depot. You may have to alter the quantities of this recipe, as you want it to be the consistancy of softened butter or peanut butter. Add a small amount of dry, one teaspoon at a time, until this is achieved, stirring constantly with a popsicle stick. Pour a layer of stones on a large tray to distinguish the sizes needed. I bought small, somewhat polished, round "river rocks"from a local "stone yard" where a 5-gallon bucket(at $5.00) gave me enough to last a life-time, with various sizes to use in all scales of train buildings. Spread a thick batter onto the chimney with a plastic knife (or a tool of your choice). I keep a pair of curved tweezers, locking tweezers and a metal shaper at my fingertips. 
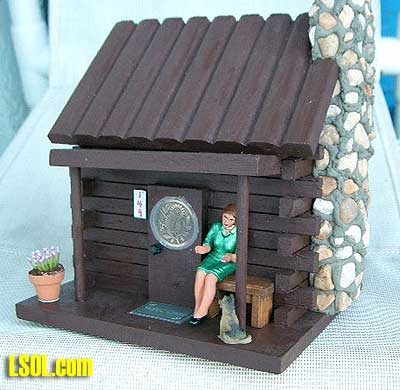
Use larger stones on the bottom and working up to smaller at the top, filling in from side to side at the same time, push each individual stone into the goop until only half of the stone is visible and most of the sides are flush with the top, forming a substantial grout line as well...Let dry overnight undisturbed. Pictures of the finished product, up to this point are shown. 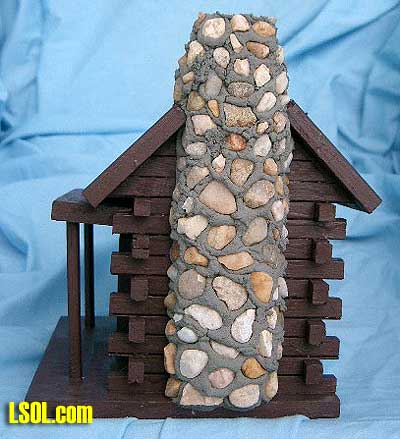
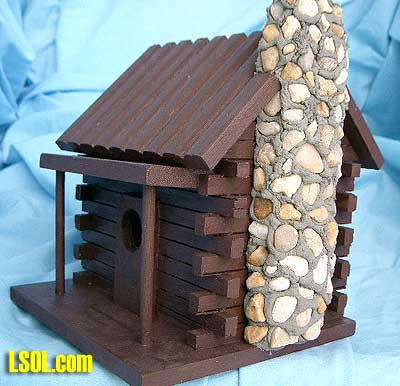 The next day I painted the last bit of raw wood at the very top with exterior-gloss-water-based-paint in "black" to simulate "soot"(This paint comes from my local Walmart store in 2 oz. bottles in lots of primary colors for less than $1.00). Next comes the FUN part for me: Decorating I made a custom bench for my porch, using scraps of "pine" wood only 3/16ths" thick. The top is one piece measuring l-3/4" long by 11/16ths" wide; 2 legs are cut 11/16ths" square and two small braces are cut 11/16ths" long by 1/4" wide. All were cut on a small jigsaw. (Check to see if these sizes will fit between your front door and the side of your porch) I stained them first and then glued the legs approximately 3/16ths" in from both side edges and added the braces at the same time, using Weldbond cement. Any wood glue would work, but this one is "waterproof" for using outside. (Again purchased at the local Home Depot.) Getting rid of the "bird hole" is next: I added a 1-1/4" sign over the hole, probably cut from some decorating magazine and then laminated with a small machine. (I had found a small "stained glass minature" in the listing below and laminated it, but couldn't find it when completing this procedure) A miniature 1" square window, left over from any of the major building kits will also work. In that case, I would add a plastic window and paint(with the above glossy ones) the interior white, or black, or yellow (to show a light inside). Attach with German glue or Weldbond. Next, drill a hold to accommodate a door knob. Mine was 5/32nds" and I used a left-over "fastener" from the Piko kits, designed for the interior to keep the building stable. Sometimes I paint these in gold or silver metallic, before installing. Glue with either of the aforementioned products. A new addition for this log cabin is a "welcome mat".
John Damkier suggested looking at a website for printed miniatures. It is: www.printmini.com and has proved very helpful in obtaining small signs, etc. Several scales are listed. I used the 1/2" one to obtain an entire page of the mats. After printing on my computer, I embellished each one with "flowers or designs" by hand, using metallic or primary-colored gel pens before going through the laminator. (Pens like this are found at any of the craft stores) These buildings are smaller in scale than most of the kits, therefore, the "dog" is between 1:29 and 1:32 scale. An address(number) was added by hand, using a Piko/Pola white stick-on paper used for signs, attached to a small plastic backing (again a scrap from some other kit)and a permanent "Sharpie" marker.(You can see I don't throw ANYTHING away!) I make my own "potted plants" using real 5/8"-high terracota pots (obtained from JoAnn Fabrics) and adding some plastic minature flowers with a "coffee grounds dirt" over tile mastic (will be using the above mentioned recipe from now on). Add a seated figure, generally Aristocraft in 1:29 or 1:32 or Preisser ones are best, and you are all set. I've made a great many of these buildings, mostly for resale, so I do sign and date them on the bottom. Enjoy! Elaine Top of Page
|


