Scenery
:
Buildings
Building a Three Story Sawmill
Dec 8, 2004


By David Maynard |
Author
Bio
I have had my railroad running for over one year and now I need some buildings.
|
I have had my railroad running for over one year and now I need some buildings. Since there was a sawmill near where my inspiration prototype ran, and since I have a collection of logging engines, a sawmill seemed to be good choice. I have been admiring the sawmill built by Bob Gentile, but I needed something a little smaller. However, I also wanted something big enough to prevent foot traffic across my railroad at the beginning of the lower reverse loop. 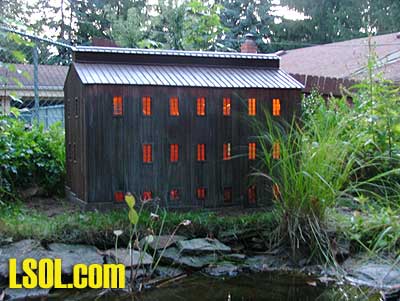
So that required that the mill be as big as possible. I looked through several books for pictures of sawmills and came up with a basic design. Then I measured the plot of land where the mill was to go. 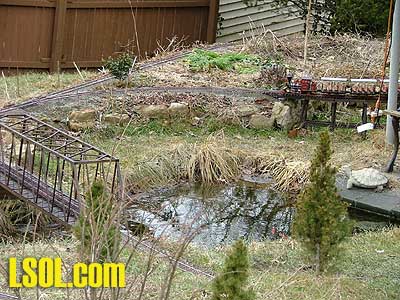
This gave me an idea as to how big I can make the mill. I decided on 3 feet by 2 feet and 3 stories high. I made each story 7 inches; this would give me the high 13-foot ceilings that were common in some older structures. With the basic design sketched out I went and got the supplies I needed.
I got a sheet of 3/8-inch plywood (exterior grade of course), a roll of aluminum roof flashing, 2 sheets of Hardiboard (3/8 inch and 1/4 inch thick), a strip of aluminum soffit vent and an "egg crate" fluorescent light diffuser. When I go shopping my list sounds like I am on a scavenger hunt, but that's what I needed. I started by drawing out my plan on the plywood, I tried several different angles for the pitch of the roof, and when I hit on one I liked I went with it. I then cut out the plywood. I also cut out the window openings, some by hand because my little scroll saw couldn't reach all of the openings. 
I assembled the walls using some scrap 2x4s to make a frame inside the building. I also ripped down a 2x4 to make a support for the roof vent. Then I cut the Hardiboad and made the base and foundation. The thicker hardiboard is the bottom; the thinner is for the sides. I layered the Hardiboad onto the sides of the plywood. I countersunk all the nails used to assemble the basic structure, and filled in the divots with Bondo auto body filler. Next I went over the plywood with a wire wheel in a drill to give the Bondo some texture, and distress the wood.
Then I carved stones into the Hardiboard, but only on one side. The other sides can't really be seen so why invest (waste) the time on them? I also drilled a hole in the bottom to run wires into the structure.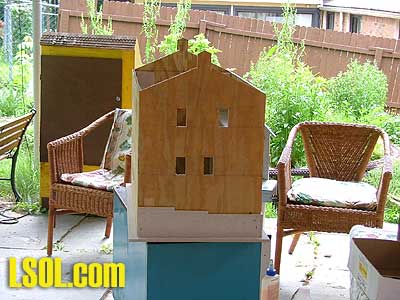
So now that I had a basic box, sort of, I started to apply the window framing and battens. The battens are 1/16 x 1/8 and the window frames are 1/4 by 1/6. All from scrap wood ripped down on the table saw. They are glued on with Titebond 2. To hold them on while the glue dried I used little pieces of Duck tape. I made the windows from the light diffuser, I just cut out the sizes I needed and sanded the edges smooth. The windows were installed flush with the back of the plywood, and glued with marine Goop. Any major gaps between the windows and the plywood were filled with more Bondo. To space out the window frames properly, I placed another window against the one that was installed in the walls, and made the frame tight to it. 
The doors were built in place with the 1/4 and 3/8-inch strips of wood, and then everything was stained. I used two different colors of stain, a lighter color near the top of the walls under the eaves and a darker color on the walls. As I went along I ran out of the darker color and opened another can. Both cans of stain were leftovers from the last century, and even though they were labeled as the same color they weren't. 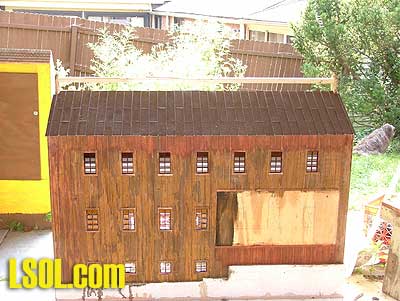
I tried to fade out the darker stain with various thinners but it just wouldn't fade for me, the solution? Heavy weathering. I got out the old paints I had leftover from other projects, and ragged on some tans, beiges, white and yellow paint. I also painted the stone shapes I carved into the Hardiboad different colors. When I was done I oversprayed the mill with some Krylon gray primer, and sealed the wood with polyurethane. I sealed the Hardiboard with Thompson's water seal, 3 coats. After I had the exterior walls done, I glazed the windows. I cut pieces of Plexiglass bigger than the windows, sanded around the edges, and glued them onto the plywood with more marine goop.
Now for the roof. I made the roof panels from the roof trim coil I bought. 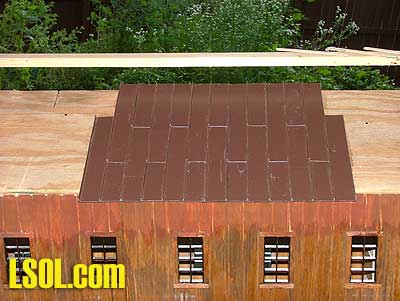 I bent them up using a hand held brake tool. I made the panels 4 inches and 7 inches long, so that when I installed them I could get the staggered look, with 3 and 6 inches exposure. For the 1 inch flat part of the panel I used a thick steel ruler clamped in the brake with the roof panel to make them all about the same size. The other dimensions I just measured. 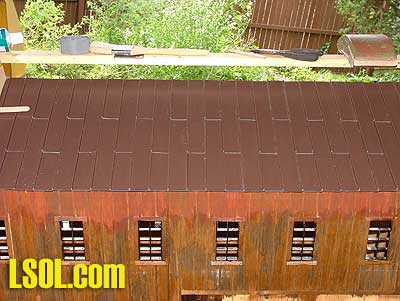
I sanded the backside of the panels so the Goop would have something to stick to. The panels are mounted to more of the 3/8th inch plywood. The plywood sub roof on one side is nailed to supports that are nailed to the inside of the mill. But the other side is just resting on the supports; this way I can remove the one side of the roof to get inside for working with the lights, or to install an interior at a later date. 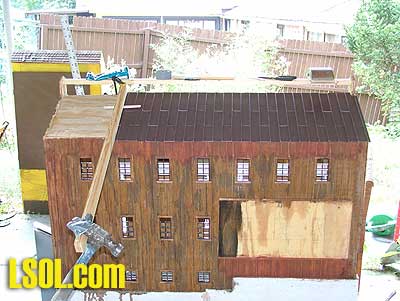
The roof panels are glued to the sub roof with more marine goop, and crimped together. I used a Popsicle stick as guide to measure the overhang, and keep it uniform. 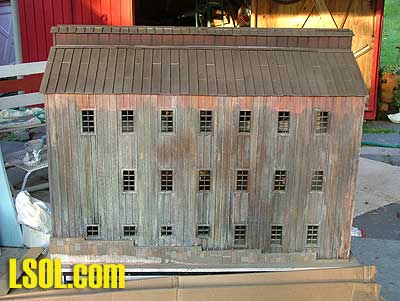
In order to make sure the plywood is protected from any water that seeps in thru the seams I made sure that the plywood was completely coated in goop, and there was goop in the panels where they were crimped together. To hold the panels down while the goop dried, I clamped a scrap piece of wood to the roof, and taped a hammer to it to put pressure on the panels. Yea I know, I should have let the Goop dry till tacky, then put the panels on. But by doing the assembly while the Goop is still wet, I can adjust the position on the panels, and crimp them, then let the Goop dry in the hot sun.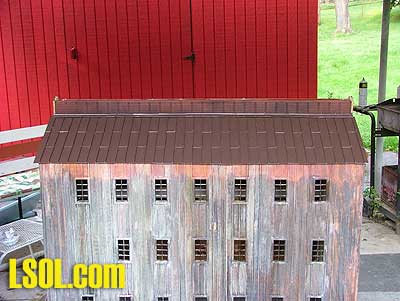
For the roof vent I cut a length of the soffit vent, trimmed the edged so it wasn't too wide, painted it with Krylon ruddy brown (my favorite color for rust) and ultra flat black. I screwed it to the top support with little wood screws from my junk box. I covered the ends with strips of my 1/4 wide wood left over from the window frames. I made flashing to go under the roof vent, and over the main roof from scrap pieces of the trim coil, and sealed the gap with pieces of foam insulation. I sealed the openings so the wasps don't have a new home inside my mill, them pesky little things will nest anywhere given half a chance.
The roof vent roof was made the same as the main roof, but with 3-inch long panels. To support the peak I ripped a piece of wood, angled at the top. I would tell you what all the angles are, but I didn't actually measure them with a protractor. I just made it to the angle I cut before, and that was something I just fudged till I got something I liked. Then I capped the roof peak with strips of that trim coil bent to an inverted v shape. On the last panel, the strip is right on the panel, on the rest of the peak its raised above the ribs, and attached with the strip foam insulation I used to seal the gaps on the main roof's flashing.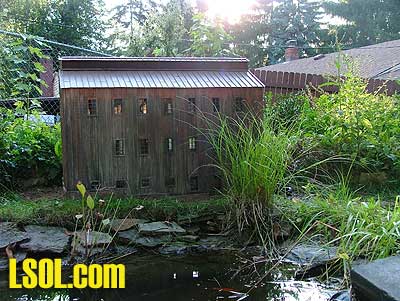
I didn't put any stacks on my mill; I will be building a separate boiler house out of Hardiboard later. I also will be adding a loading dock to one side, that is why in some pictures you see a blank area on one side. I also will be adding the slide that they pull the logs out of the pond with. I also didn't put any signage on my mill because I run different logging trains, plus my Pittsburgh and Castle Shannon Rail Road trains so I need a generic mill, not one specific to one road or another.
Now I cleared the lot for the mill and leveled the area. Then I dug a small trench to where the hole in the foundation would end up. I put down a layer of sand, and placed the mill where it belongs, darn its heavy! Then I had an idea, so I put my low voltage lighting power supply INSIDE the mill, and ran the end of the wires I buried for lighting into the mill. I had to dig up the wires, and then bury the wires and the power cord, so when I filled in the new trench I used the broken reddish rock I had. 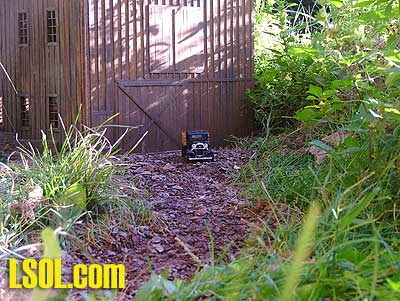
Instant dirt road to the mill, and I know exactly where the wires are buried.
To light the mill I took a garage sale string of Christmas lights, cut out a string of 8 of them, and hung them in the mill. The bulbs are 3-volt bulbs, but with 8 of them across a 12-volt supply they get about 1-1/2 volts. This gives them a warm glow, I like that, and means that they should last nearly forever. I have the timer on my lighting power supply so the lights come on a little before dusk, and go off at midnight. So even when I am not running the trains, it still lights up, and the light reflecting off the pond at night really looks nice.
The mill is a big structure, and it looks at home by the pond. But unfortunately it hasn't stopped all the foot traffic across the tracks; my dog still crosses there. And the neighbor kid now walks on the tracks to cross there, instead of stepping over the tracks. Top of Page
|


