Scenery
:
Buildings
Adding Details to your Buildings
Dec 26, 2007


By Noel Widdifield
LSOL.com Managing Editor |
Author
Bio
A while ago I wrote three articles about my 1/29 NYC Roundhouse for LSOL detailing how I had built a six stall roundhouse for my New York Central Big Four indoor railroad. Come see how I add machine shop equipment, gas station furnishings, tools and people in 1/25 scale to give your buildings a finished look.
|
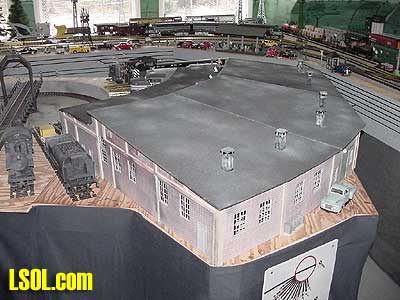 A while ago I wrote three articles about my 1/29 NYC Roundhouse for LSOL detailing how I had built a six stall roundhouse for my New York Central Big Four indoor railroad. NYC Roundhouse Part 1 NYC Roundhouse Part 2 NYC Roundhouse Part 3 While looking for some miniature shop machinery to detail the roundhouse someone suggested that I take a look at Scale Equipment, Ltd. He noted that the company made miniature equipment for 1/25-scale model cars, but they had some interesting stuff. I checked out the company's website and found they carried machine shop equipment, gas station furnishings, tools and people in 1/25. The online catalog listed the following categories: Auto Shop, Food Details, Tools, Structural Details, Dudez "N" Babez, Material Handling, Plumbing, Traffic Control, Special Projects, Office Furniture, Electrical Fixtures, General Equipment, Storage Systems, Structural Kits, Display Items, Extra Details, Scenery Details and Graffix. There are over 300 items found in all of these categories. Most of the items are as applicable for railroads as they are for automobiles.
All of the items are for scale dioramas and come unpainted and unassembled. 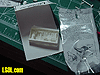
Click for larger picture They also come attached to the molding residue. 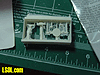
Click for larger picture Most of the items are easily assembled once they are carefully cut out of the molding. 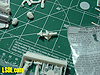
Click for larger picture Using a hobby knife with a new blade on a self-sealing cutting pad, I began the work. Care must be taken because the material used is fairly soft and easily scored. The lathe shown has eight individual parts that are glued together with super thin, instant cure cyanoacrylate. This picture shows some of the light and heavy tools available. 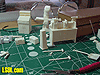
Click for larger picture The first aid kit and welding tools were a little easier to assemble. 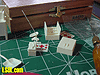
Click for larger picture | 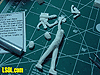
Click for larger picture |
The company offers a variety of people figures that come with an assortment of heads and arms, which allows you to use the same figure in several different scenes without them appearing to be the same figure. After assembling all of the equipment and people, I sprayed each of them a base color and then hand painted the details. 
Click for larger picture | 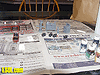
Click for larger picture | 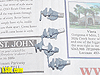
Click for larger picture | 
Click for larger picture | 
Click for larger picture | 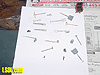
Click for larger picture | 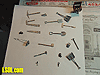
Click for larger picture | 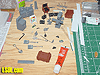
Click for larger picture | 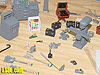
Click for larger picture | 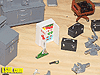
Click for larger picture |
Once all of the items were painted, it was time to put them in place in the roundhouse. When I arrived at the roundhouse, I found a new NYC pickup waiting outside the shed door 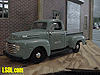
Click for larger picture and one of the engineers 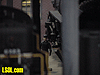
Click for larger picture waiting for me inside. I removed the three roof panels 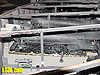
Click for larger picture and began by gluing (with White Lightning acrylic silicon caulk) the machine shop machinery and tools in place. 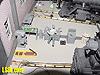
Click for larger picture | 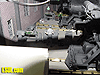
Click for larger picture |
Then I put the workbenches and tools in place in each of the stalls. 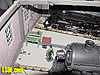
Click for larger picture | 
Click for larger picture | 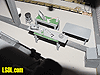
Click for larger picture | 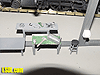
Click for larger picture | 
Click for larger picture |
Next I constructed walls for the bathroom from styrene and painted them an institutional green. I fastened the walls in place and installed the stools, sinks, mirrors and toilet paper and paper towel dispensers. I put a row of lockers along the back of the bathroom. 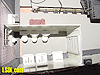
Click for larger picture | 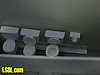
Click for larger picture | 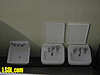
Click for larger picture | 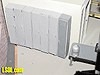
Click for larger picture |
I then installed the office furniture and supervisors 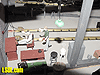
Click for larger picture | 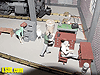
Click for larger picture | 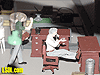
Click for larger picture |
I also made sure that the red headed secretary was doing her filing when I shot the picture. 
Click for larger picture The installation of the machinery and figures gives the interior of the roundhouse a finished look. 
Click for larger picture | 
Click for larger picture | 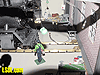
Click for larger picture | 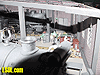
Click for larger picture |
Of course, I still need to put some old parts and broken tools around to complete the project. I emailed some of these photos to my brother so he could see the results of this project. He quickly shot back the message that I needed a guy at the urinal and the red head should be repositioned so she was more visible. I reminded him that mine is a family railroad, but I'll probably have a worker washing his hands at the sink. I have already started my next project, a Texaco filling station. Look for another article on its completion. Top of Page
|


