Scratch & Bash
:
Accessories
Building on a Budget - Potted Plants
Aug 25, 2004


By Elaine Haggenbottom |
Author
Bio
The latest addition to my budget minded accessories are my "potted plants".
|
The latest addition to my budget minded accessories are my "potted plants". I recently found this birdhouse building at the local Michael's craft store. 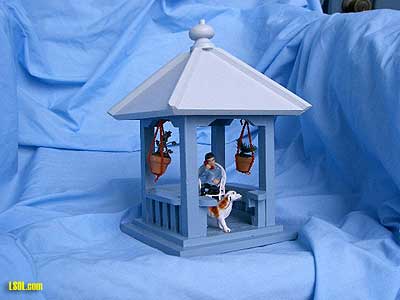
It started out as an unfinished wooden square gazebo with a string holder for under $5.00. (Sometimes on sale for under $4.00) First step was to remove the holder, and plug up the hole with a small 1/4" dowel (whatever length you desire), glued in place with Titebond II. With a hand razor saw, I cut the middle out of one side approximately 1-1/4" in from each main post, stopping at the main terrace. Next step was to sand any rough edges and pick my colors. If you get one of these paint the roof one color and the rest another.(It took two coats) I used an exterior gloss gray and a complimentary blue for the main color. (Both "oops" paints from your local Home Depot.) Since this design speaks to me as a "patio gazebo" I decorated it to be an addition to a regular "home" building. I added a plastic dog (detailed by me), a metal chair, found at a Big Lots store, especially at Christmas time(which I re-painted) and an "unknown" manufacturer of a plastic figure, appropriately talking on a telephone, but any sitting person that will "fit" in the chair will work.
So what was missing? Some potted plants! This picture shows the necessary ingredients you will need to make your own. 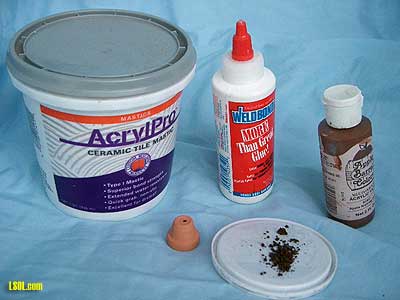
I use pre-mixed "tile mastic", brown flat paint and Weldbond adhesive. All of these items can be purchased at the local Home Depot or most hardware stores. Look for the smaller containers, as they go a long way.Also required is a couple of real terracota minature pots, 3/4"high by 3/4"wide . Mine came from Jo-Ann's on sale for under $l.00, but they should be there all of the time @ $1.59 for 12(IF you can't find them, some craft stores carry minature wooden pots and they can be substituted, provided you paint them in advance.)Last thing needed is some "used"(perked) coffee grounds. These can be spread on a tray until dry. Again, a little goes a long way. 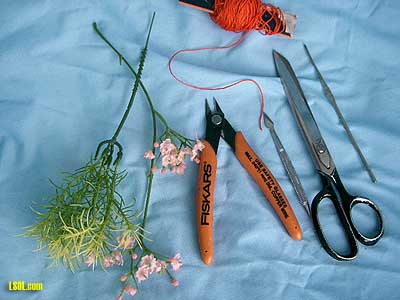
Above are the tools I use: a popsicle stick, a 2-sided metal tool (one pointed end and one flat end) old scissors, a sprue cutter (found at most hobby shops) Mine is a "button shank cutter" by Fiskars from Jo-Ann's. Lastly some plastic flowers found at Michael's or Jo-Ann's. Look for the smallest you can find, and some minature string and a size "6"metal crochet hook. Not shown is a wire cutter, which may be required IF the flowers you pick are wire-based under the plastic.
Most are not. 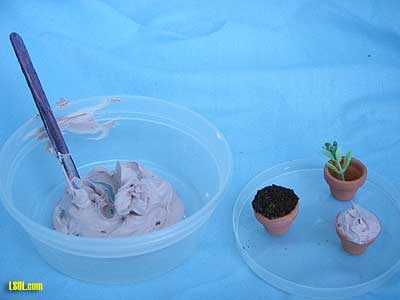
To make your concoction: mix a couple of tablespoons of the mastic in a lidded plastic container (it will keep for a short time, should you make too much), add several drops of the brown paint, until the desired color and also add a couple of good drops (maybe a tsp) of the adhesive: mix well with the popsicle stick until very blended. Cover and set aside until the following has been done. Predetermine the size of the flowers and cut to fit in your pot with the old scissors and/or sprue cutters. Remove any greens left on the bottoms of the stems that would be covered with the mastic. Individual leaves may be added after the flowers, so cut them ahead of time as well. Now back to your recipe, using the stick or the metal tool, glob the mixture into the pot rounding the top like an old-fashioned ice cream cone, and instantly dip into the coffee grounds, covering the entire top surface. Next put your florals in, as well as any leaves and set aside to dry at least overnight. Last thing is to crochet(get your wives to help on this step) 3 strands of 20 stitches for each pot, tying them together at the top and the bottom.
I used a regular stapler to attach one knot at the top of each side and glued with the Weldbond as well. (don't put the plant in until this has set) Hang your plant and you are finished. Top of Page
|


