Scratch & Bash
:
Accessories
Building A Low Deck Trestle Bridge
Sep 22, 2010


By Tim Blagg |
Author
Bio
As usual I would be daydreaming about building some of these projects and having my own railroad eventually. I say daydreaming because my carpentry skills tend to be on the "rough-in" side and anything like finish carpentry is NOT my forte.
|
When I received an issue of Garden Railways magazine I sat down with it to enjoy the articles about large scale trains and how some of the people go about building the various structures they use. As usual I would be daydreaming about building some of these projects and having my own railroad eventually. I say daydreaming because my carpentry skills tend to be on the "rough-in" side and anything like finish carpentry is NOT my forte. 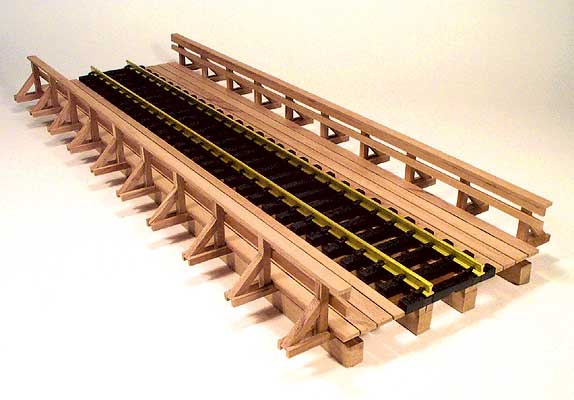 This picture reprinted from GARDEN RAILWAYS magazine, with permission. This picture reprinted from GARDEN RAILWAYS magazine, with permission. Not to mention the fact that I do not have anything like a workshop or some of the tools needed to work on miniature projects. That's when I saw the article about building the low deck trestle bridge. Marc Horovitz wrote the article and provided some very good instructions and good detail pictures. Well sir, that bridge just intrigued me to no end. Somehow, some way I had to build this bridge, shop or no shop, proper tools or not! I've built dollhouses for some of my granddaughters but those were kits with all the parts pre-cut. It's a simple matter to glue "tab 'a' into slot 'b'". This project was something different completely. I've never done any kind of scratch building and I certainly don't have the proper tools but somehow I was going to make this thing work. The first thing I had to consider was what type of wood to use. In his article Marc recommends redwood or cedar. Neither species is available around here, in stock form, in the major chain lumber stores. So I found some poplar (1" x 6" x 50") that wasn't really expensive and figured that if I can build this thing right I could use it as a display stand and build another one later that I can use outside. After all, this is just to see if I can do it. 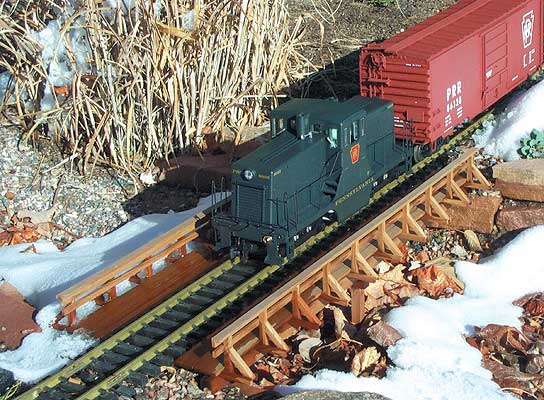 This picture reprinted from GARDEN RAILWAYS magazine, with permission. Okay, now I have my material and that brought up the next issue. My circular saw is a really nice tool but it certainly wasn't going to do the precise cutting that needed to be done. Fortunately my son-in-law has a shop of sorts (most of it is being used as storage right now) that includes a big Delta 10 inch table saw. Following the excellent cutting guide that Marc included in his article, my son-in-law and I cut all the parts needed for the bridge. When we had finished I determined that cutting small precise parts like these on a big table saw like that was something of a scary experience. Don't even think about doing this without a push stick. Featherboards would be nice too but these weren't available. (A smaller table saw would have been preferred for this job.) The 45 degree angle cuts that were needed I did at home with an Exacto miter box and razor saw. I did make one purchase though. I found a Dremel Multi-Pro kit on sale that can come in handy for a lot of things so I brought it home. All the parts are now in hand. Even some extra pieces that may come in handy. (Some of the extra pieces are due to the fact that I didn't pay close enough attention to the cutting list. Shame on me.) My next problem was where to set up a workspace to do the assembly. (No, I don't have a garage or a basement.) I ended up setting up a rather flimsy folding table in my computer room. Have to be very careful of dust now. The added complication here is that my computer room is also where we have to keep the toys that our youngest grandchildren play with when they visit. That also means that tools and small parts have to be put away when they are here. But this bridge is going to get built one way or another! Finally, assembly can begin. To my regret I did not bundle my parts together as Marc recommended. (When am I going to learn to listen to the pros? Some people say you can't teach an old dog new tricks. Maybe there is something to that.) This is a learning experience and I am learning. So now the parts are bundled together and it is much easier to identify what you need. Now once in a while a blind dog finds a bone. I remembered a clamping set that I bought many years ago to help my son with a model airplane he wanted to build. I trekked out to the shed and sitting right out in the open was the clamping set like it was waiting for me. A metal pan with magnets, small C clamps and miniature bar clamps. 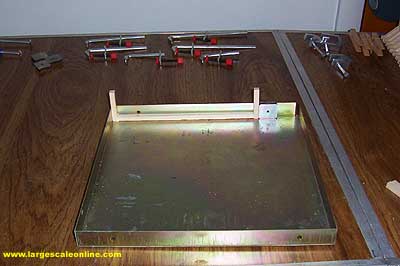
(Glue clamp set) I'm almost sure it smiled when I took it in the house cleaned it up and put it to work. This tool is great. If I remember right I bought it from MicroMark but I don't have the part number anymore. As you can see in the picture magnets work really well. 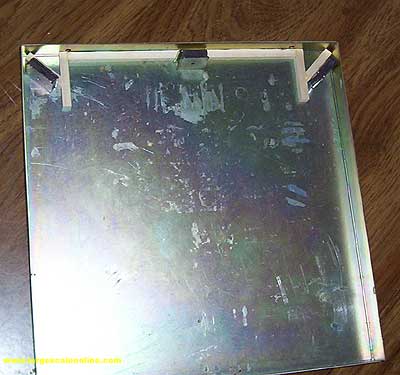
(Magnets work) Without them I don't believe I would have been able to get as strong a joint as I did. The small C clamps and bar clamps were indispensable also. I tried the clothespins that were recommended in the article but I couldn't get them to work. They just wouldn't quite open up wide enough. Now that the cross braces are done I can start assembling the frame. 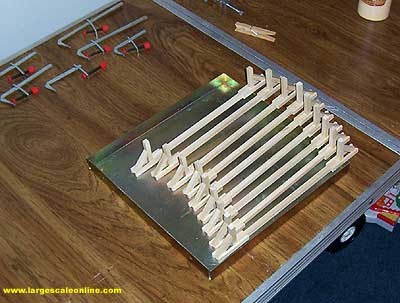
(Cross beams complete) This required a larger more level space so the kitchen table was drafted. Fortunately my wife (good woman that she is) is very sympathetic to the fact that I do not have a workshop. The frame goes together very easily. I used the plywood spacers as recommended in the article and they are a big help. 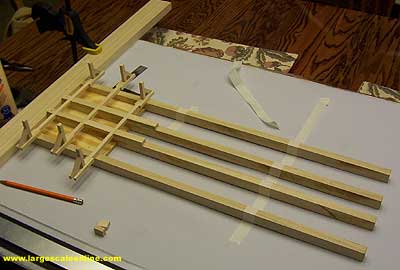
(Beginning of frame) There are two small spacers that are installed on the end of the two center stringers. I used brads and glue. It is a good idea to blunt the ends of the brads so they do not split the wood when they are driven in. Next goes the first cross brace where again I used brads and glue. Make sure it overhangs the outside stringers equally on either end of the cross brace. Now the long spacers are glued in place against the first cross brace. Next just lay a cross brace in place (no glue or brads) and glue the next spacers in place. Continue this process until all the spacers are in place. Install the last cross brace being careful of the overhang as with the first cross brace and use glue and brads to secure it. There are two short spacers remaining and they are installed now on the two center stringers with glue and brads. Now with a straight edge placed the length of the bridge against the first and last cross brace (to keep everything lined up) I was able to install the remaining cross braces and glue them in place. I didn't use brads on these. That completes the frame. It is starting to look like a bridge now and that is very encouraging! So now I want to put down the deck boards. 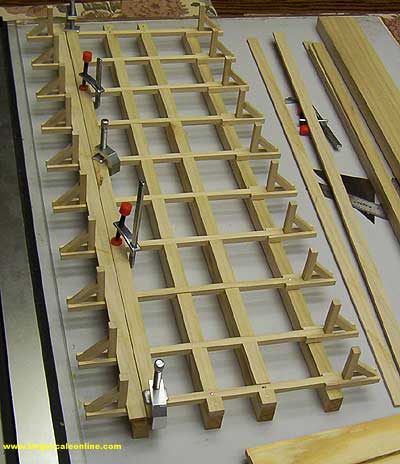
(Beginning deck boards) The MOW crews need someplace to walk don't they? There are eight deck boards. I installed three on each side of the bridge and left the last two out for the time being. These last two may need to be ripped down a little narrower to fit between the track and the other deck boards. The deck boards can be laid tight together or a little space can be left in between just for looks, which is what Marc did with his bridge. I like the look of the space but somehow my deck boards ended up tight together. Guess I'll chalk that up to the "learning experience" also. Finally the handrails can be installed on the cross brace uprights. The inner rails were a small challenge as I can be pretty fumble-fingered sometimes. But with a little persistence, patience and the help of some clamps I managed to get them on. (Installing side rails) These were all glued in place. The top rail goes on last and gets glued the length of the rail to the top of the posts and the upper side rail. 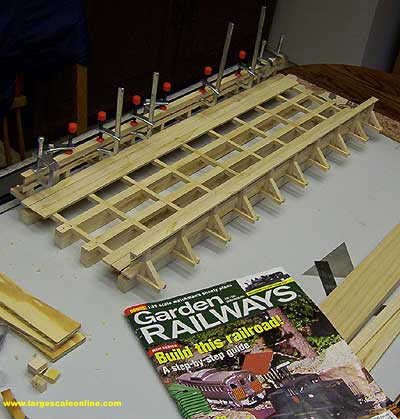
(Installing top rails) When I laid a piece of track on the bridge I had very little space left between the ends of the ties and the deck boards. I'm not sure that I want to rip that small of a piece on that table saw again. All that's left now is some sanding and some paint. 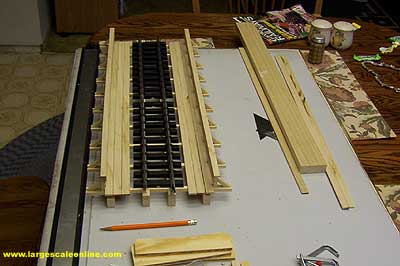
(Finished) I may even try to distress the whole thing to make it look older. That might even be another article but we'll see about that later. Emmett Kelly Jr. even stopped by to take a look at the new bridge. He seemed to like it. 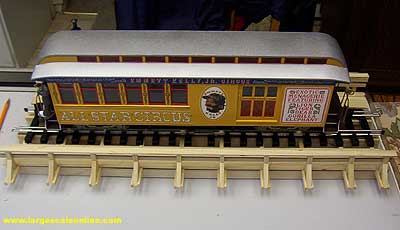
(Emmett Kelly Jr. approves) Lessons learned: A 10" table saw is way too much saw for this type of work. Pay closer attention to the cutting list and make sure you bundle your parts when you cut them. You save yourself a lot of time later trying to sort out what you cut and the kids don't have to say "What was that word you used?". While Marc was able to make clothespins work for clamps I couldn't. The clamping kit is just an excellent tool for this. I guess maybe I do have some of the tools to work in miniature after all. In conclusion I have to say that I really enjoyed my first experience with scratch building. My wife was watching me work with these small pieces and chuckling to her self. I asked her what she was so amused about. She told me that it was very unusual to see me working with small parts and not uttering some strange language that she really didn't want to understand. If there is anyone reading this article that is not sure whether they want to try scratch building or not don't be afraid of it. You have to try it at least once and who knows? You may want to try it again. I do. Now lets see do I want to try a two story warehouse or a switching tower or...
| low deck trestle |
| Tim, Outstanding article on this project. You DO have very good carpenter skills. A great looking trestle. Poplar was a good choice. Very stable and very easily worked. Takes stain real well except the green heartwood, but it looks like you didn't use any. Like most woods it will weather gray if not treated with some kind of stain that has ultraviolet inhibitors. Sunlight does more damage than rain. That PRR engine looks super pulling that car. Gary |
| Gary Condry - 09/21/2010 - 12:47 |
| Low deck Trestle |
| Hi Tim....Great job on building the trestle. I reckon I have the same issue of Garden railway because I built the same bridge as you. Keep up the great work and I look forward to seeing more of your projects. Dave |
| Dave Clarke - 09/22/2010 - 00:52 |
| Low Deck Trestle |
| Tim, Great looking bridge. My good friend, Dave Fuller, built one for me just like yours. He used the article in Garden Railways to build it. Yours looks very nice and the article is well done. It is hard to believe that this is your first attempt at scratch building. It looks like it was done by a pro. Thanks, Noel |
| Noel Widdifield - 09/22/2010 - 03:01 |
| Low deck trestle bridge article |
| Loved this brdige when I first saw it in June 2003. I built several of them and enjoyed it very much. |
| Gary R. Tebo - 09/22/2010 - 09:18 |
| Low deck bridge |
| My GR mags don't go back that far. So how can I get the plans for my project????? |
| Rich Ryba - 09/22/2010 - 13:38 |
| Low Deck Trestle Bridge |
| Looks great Tim!!! I am inspired to do the same for my rail road. I think I will go out and work on the trestle bridge I started last week. |
| Clifton MunzPhelps - 09/24/2010 - 04:52 |
Top of Page
|


